README
玖富Vue-cli种子项目介绍
概览
Base
- vue-cli3.0
注入插件
- PostCss => 支持px单位自动换算
- Stylus + Stylus-loader => 支持Stylus语法糖
- VConsole => 支持移动端调试控制台
- Lodash => 支持Js工具库
- NProgress => 支持页面跳转顶部loading
- axios => 支持ajax数据请求和数据劫持
- mock.js => 支持前端mock静态数据
- .editorConfig => 支持编辑器统一代码格式化
- vue-meta => 支持SPA下单独设置页面title以及元信息
- husky + lint-staged => 支持Git钩子验证
- vue-lazyload => 支持图片懒加载
- vue-lazy-component => 支持模版懒加载,可做骨架屏优化
- vuex => 支持状态管理器
- vuex-persistedstate => 支持数据状态持久化
- vue-router => 支持路由跳转管理
- vuex-router-sync => 支持router的状态<path,query和params>存入vuex的state中
- ...
UI库
- cube-ui
Webpack 优化
- Happypack => 多进程打包
- webpack-parallel-unglify-plugin => 利用缓存快速压缩
- ...
Feature
- vue-i18n => 多语言配置解决方案
- vue-class-component => 以class的模式写Vue
- vuex-class- => 装饰器语法写Vuex
- vue-property-decorator => 装饰器语法写钩子函数
- SSR => 支持服务端渲染
- Koa2/egg => 支持中间层
- ...
目录结构
├── package.json					# npm包管理文件
├── .postcssrc.js					# postcss配置文件
├── .eslintrc.js					# eslint配置文件
├── .editorconfig					# editorconfig配置文件
├── lint-staged.config.js			# postcss配置文件
├── babel.config.js				# babel配置文件
│── main.js                        # vue项目入口文件
├── build		 					# webpack配置
│   ├── config.js					# 参数配置文件
│   ├── webpack.base.conf.js		# 公共打包执行任务
│   ├── webpack.dev.conf.js		# 开发环境打包执行任务
│   └── webpack.prod.conf.js		# 生产环境打包执行任务
├── mock
│   ├── data						# mock接口
│   │   └── userinfo.js
│   └── index.js					# mock配置文件
├── public
│   ├── favicon.ico
│   └── index.html					# 入口页面
├── src
│   ├── App.vue					# 入口组件
│   ├── api						# 接口请求处理
│   │   ├── axios.js				# axios请求拦截封装
│   │   ├── config.js				# axios请求参数配置
│   │   └── index.js				# 接口请求封装
│   ├── common
│   │   ├── image
│   │   │   └── default.png
│   │   └── stylus
│   │       ├── base.styl			# 公共全局样式
│   │       ├── border.styl			# 移动端1像素封装
│   │       ├── index.styl			# 入口文件
│   │       ├── mixin.styl			# 常用mixin<长期维护>
│   │       ├── reset.styl			# 接口请求封装
│   │       └── variable.styl		# 全局定义变量
│   ├── components
│   │   └── Skeleton.vue			# 骨架屏组件
│   ├── mock
│   │   ├── data					# mock接口
│   │   │   └── users.js
│   │   ├── index.js				# mock出口方法
│   │   └── mock.js				# mock拦截处理
│   ├── routers
│   │   └── index.js				# vue-router配置
│   ├── store
│   │   ├── modules				# 功能模块
│   │   ├── actions.js				# 根级别的action
│   │   ├── getters.js				# 根级别的getters
│   │   ├── index.js				# store入口
│   │   ├── mutation-types.js		# 根级别的mutation-types
│   │   ├── mutations.js			# 根级别的mutations
│   │   └── state.js				# 根级别的state
│   ├── utils						# 工具方法库<长期维护>
│   │   ├── array.js
│   │   ├── cache.js
│   │   ├── common.js
│   │   ├── date.js
│   │   ├── dom.js
│   │   ├── is.js
│   │   ├── object.js
│   │   ├── storage.js
│   │   ├── string.js
│   │   └── url.js
│   └── views						# 业务页面组件
│       ├── Home
│       │   └── index.vue
│       │   └── main.styl
│       ├── Login
│       │   └── index.vue
│       │   └── main.styl
│       ├── My
│       │   └── index.vue
│       │   └── main.styl
└── vue.config.js				    #vue全局配置文件
Base 脚手架
主要基于vue-cli 3.0 版本做了一些提高团队生产力和开发效率的事情。推荐阅读vue-cli官方文档。
插件说明
PostCss
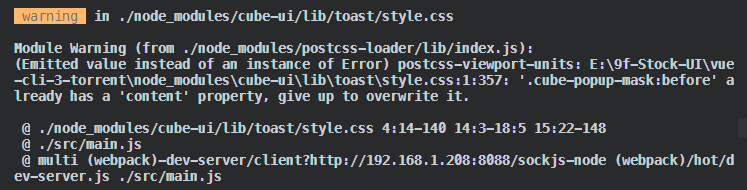
这里有一个坑需要注意一下,踩了一坑,由于
postcss-px-to-viewport并没有exclude配置项,所以会把node_modules里的ui库文件的css也包含进去进行转换,控制台会出现warning,所以需要做一些必要的处理。
// 此段代码在依赖包postcss-px-to-viewport/index.js里 大约第30行
...
css.walkDecls(function (decl, i) {

if (options.exclude) { // 添加对exclude选项的处理
    if (Object.prototype.toString.call(options.exclude) !== '[object RegExp]') {
      throw new Error('options.exclude should be RegExp!')
    }
    if (decl.source.input.file.match(options.exclude) !== null) return;
}
...
然后就在.postcssrc配置文件里添加
...
 "postcss-px-to-viewport":{
     ...
    exclude: /(\/|\\)(node_modules)(\/|\\)/  // 忽略node_modules
 }
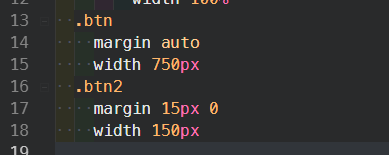
编译前
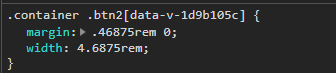
编译后

Stylus + Stylus-loader
推荐使用Stylus,语法简练。 具体语法可参考Stylus cheatsheet
VConsole
真机调试,在
main.js里已配置。
// 开发环境开启vConsole
if (process.env.NODE_ENV !== 'production') {
  const vConsole = new VConsole()
  console.log(vConsole.version)
}
Lodash
在
main.js里注入到Vue的原型上,通过this._来调用。
Vue.prototype._ = lodash

// @Example
this._.chunk(['a', 'b', 'c', 'd'], 2);
// => [['a', 'b'], ['c', 'd']]
其它用法请浏览 lodash文档。
NProgress
在
main.js里引入样式文件
import 'nprogress/nprogress.css'
在
router.js的钩子函数里根据不同场景做配置
//  判断是否需要登录权限 以及是否登录
router.beforeEach((to, from, next) => {
  let userinfo = storage.get('userinfo')
  // 判断是否需要登录权限
  if (to.matched.some(res => res.meta.requireAuth)) {
    // 判断是否登录
    if (userinfo) {
      next()
    }
    // 没登录则跳转到登录界面
    else {
      NProgress.start()
      next({
        path: '/Login',
        query: { redirect: to.fullPath }
      })
    }
  } else {
    next()
  }
})

router.afterEach(transition => {
  NProgress.done()
})
axios
axios除了接口请求,主要还做了拦截处理,利于接口数据异常统一管理,相关代码都在
src/api文件夹内。
请求拦截的逻辑放在src/api/axios.js里。
// http请求拦截器<pendding>
Axios.interceptors.request.use(
  config => {
    //...
    // 以下的判断处理可根据具体需求场景做一些统一操作
    const token = cookie.get('token')
    // 判断是否存在token,即判断用户是否登录
    if (token) {
      cookie.set('token', token, 1 / 12) // 用户每次操作,都将cookie设置成2小时
      config.headers.Authorization = token // 每个http header都加上token
    }
    return config
  },
 error => {
    // do something
  }
)
所有的接口请求统一放在src/api/index.js里。
// 首页信息
export const getHome = (params) => axios.get(HOST + 'home', params)
然后在.vue文件内使用如下
<script type="text/ecmascript-6">
import { getHome } from '@/api'

export default {
    // do something....
    methods:{
        // 获取数据,私有方法尽量使用 _ 前缀
        async _fetchData() {
          const res = await getHome()
          try {
            const data = res.data
            this.slideImgs = data.slideImgs
          } catch (err) {
            console.log('获取数据错误', err)
          }
        }
    },
    created(){
        this._fetchData()
    }
}
mock.js
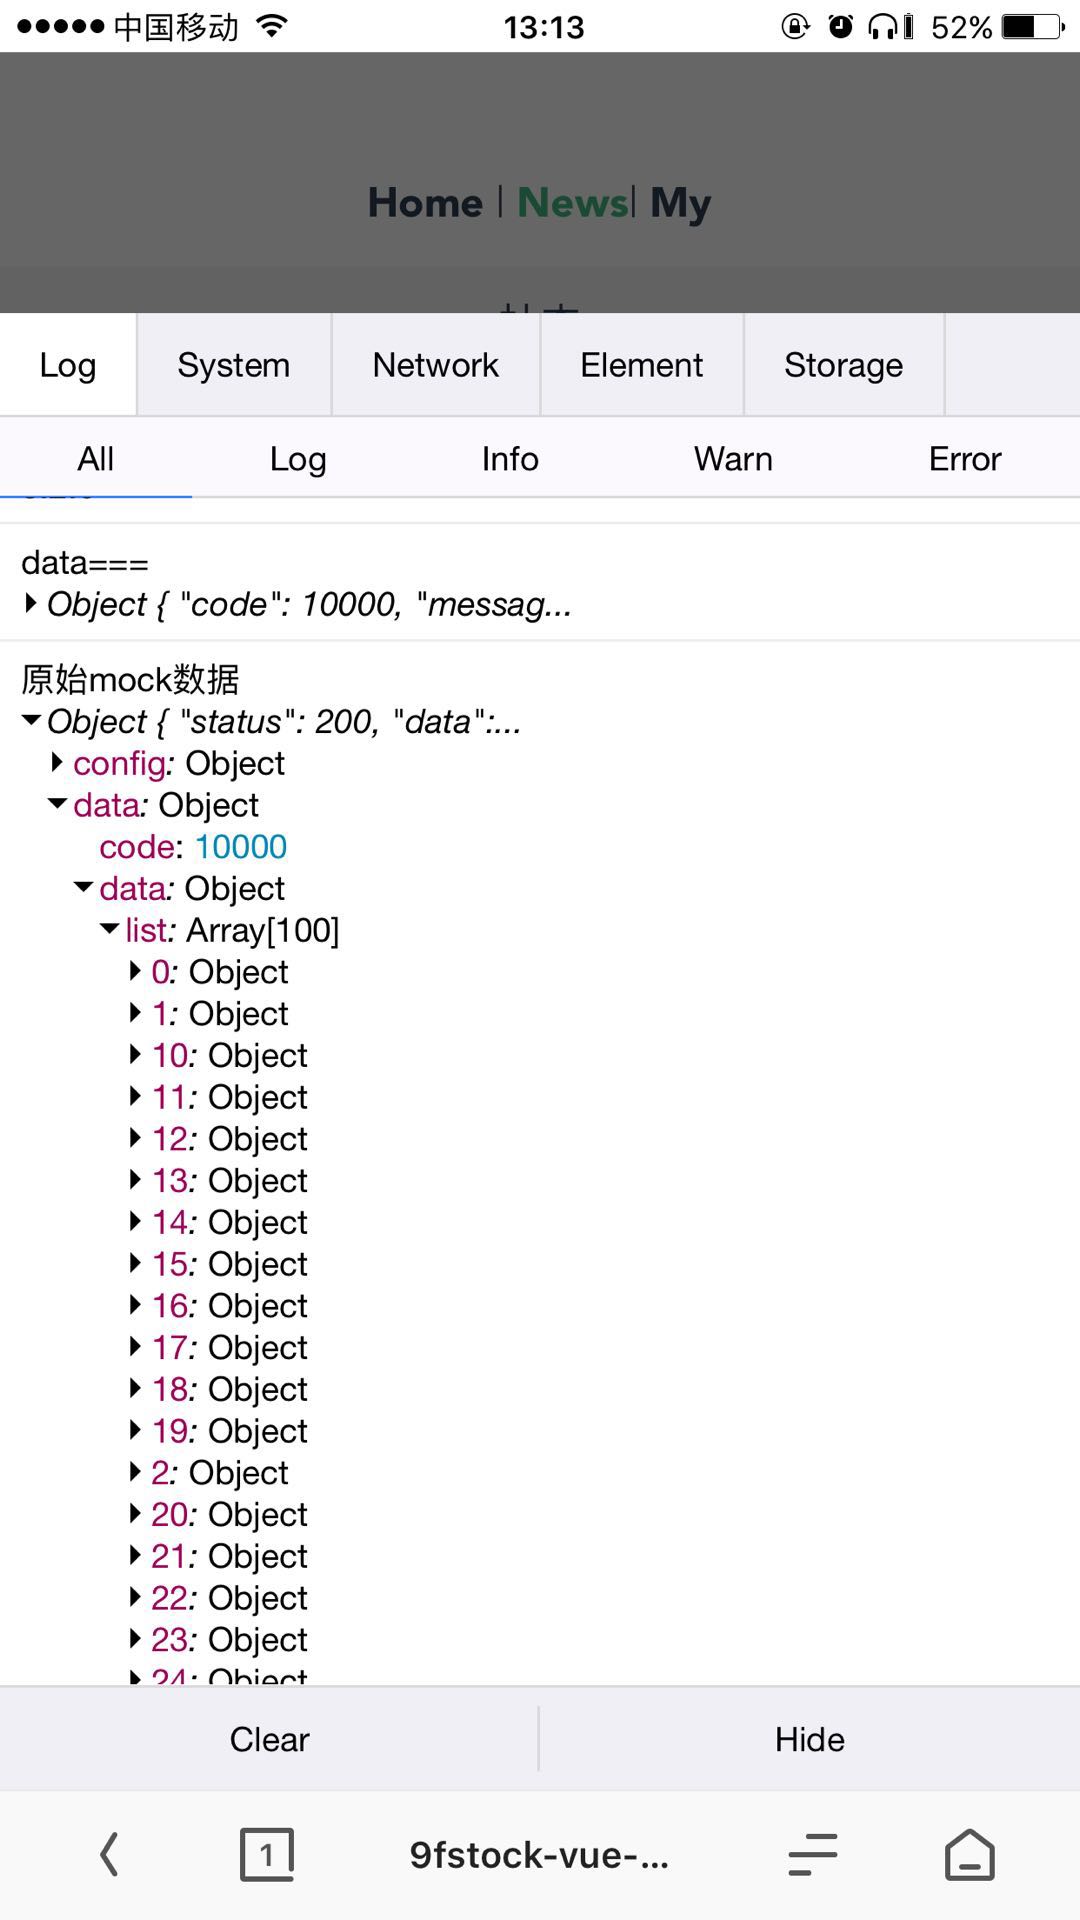
很多时候我们前端来定接口数据结构,
easy-mock等在线工具也好用,但是经常出现不稳定,网址频繁挂掉。这里的moack主要引入axios-mock-adapter,一样配合axios来做了拦截处理。mock的语法请参考官方文档Mock。
所有的mock数据接口每条单独一份放在src/mock/data文件夹下,数据对象使用common.js语法暴露出来。
// users.js
module.exports = {
  code: 10000,
  message: 'success',
  data: {
    'list|100': [{
      'id|+1': 1,
      userName: '@cname()'
    }]
  }
}
在src/mock/index.js里封装了一个CreateInterface类:
    class CreateInterface {
      constructor() {
        this.SUCCESS_STATUS = 200 // 成功状态
        this.FAIL_STATUS = 500 // 失败状态
        this.mocker = new MockAdapter(Axios)
        // mock接口列表,需要手动添加
        this.interfaces = [
          'users',
          // more interface...
        ]
      }
      init() {
        const { interfaces, mocker, SUCCESS_STATUS } = this
        interfaces.forEach(filename => {
          mocker.onGet(filename).reply((config) => [SUCCESS_STATUS, Mock.mock(require(`./data/${filename}`))])
        })
      }
    }
.editorConfig
可操作的配置虽然不多,但是能覆盖大部分情况。
root = true #表明是最顶层的配置文件,发现设为true时,才会停止查找.editorconfig文件

[*] # 对所有文件生效
charset = utf-8
indent_style = space #tab为hard-tabs,space为soft-tabs
indent_size = 2 #设置整数表示规定每级缩进的列数和soft-tabs的宽度
end_of_line = lf #定义换行符,支持lf、cr和crlf
insert_final_newline = true #设为true表明使文件以一个空白行结尾,false反之
trim_trailing_whitespace = true #设为true表示会除去换行行首的任意空白字符,false反之
编辑器一样还是推荐使用VsCode,里面有个插件支持可以安装下。

vue-meta
视情况使用,一般在PC端应用的相对比较多。在
main.js里引入后全局注册。
import VueMeta from 'vue-meta'


// 单独设置页面的title和meta信息
Vue.use(VueMeta)
具体在vue文件内使用方法如下
export default {
  data() {
    return {
      pageTitle: '个人中心'
    }
  },
  metaInfo() {
    return {
      title: this.pageTitle,
      titleTemplate: '%s - Test',
      script: [{ innerHTML: 'console.log("Hey!~~!")', type: 'text/javascript' }]
    }
  }
}

husky + lint-staged
主要是在把 Lint 挪到本地,并且每次提交只检查本次提交所修改的文件,使用
git commit -a,或者先git add然后git commit的时候,你的修改代码都会经过待提交区。
主要配置在package.js配置文件里.
{
    "script":{
        // ...
        "precommit": "lint-staged"
    }
    "lint-staged": {
    "src/**/*.{js,ts}": [
      "standard --write",
      "eslint --fix",
      "git add"
    ]
  },
}
vue-lazyload
它其实就是注册一个全局指令,然后使用一个默认图片。
//main.js

// do something
Vue.use(VueLazyLoad, {
  loading: require('./common/image/default.png')
})
// do something
<img class="img" v-lazy="item.url">
vue-lazy-component
引用这个插件具体解决做Seketon骨架屏效果。可配置的参数实用,效果不错。
- 支持 组件可见或即将可见时懒加载
- 支持 组件延时加载
- 支持 加载真实组件前展示骨架组件,提高用户体验
- 支持 真实组件代码分包异步加载
vuex
推荐直接阅读vuex官方文档。项目结构一样是使用的官方推荐的。
vuex-persistedstate
数据持久化解决方案,主要使用场景是,页面刷新时当前页面的状态仍然可以保持。
- 当vuex状态发生改变时,自动同步保存到
localStorage。 - 当重新加载页面vuex初始化时,自动将
localStorage存储的数据作为初始状态加载。
在src/store/index.js内引入插件并使用,无需其它操作。
// index.js

import createPersistedState from 'vuex-persistedstate'
import * as storage from '@/utils/storage'

export default new Vuex.Store({
  actions,
  getters,
  state,
  mutations,
  strict: debug,
  // 状态持久化
  plugins: [
    createPersistedState({
      storage: {
        getItem: key => storage.get(key),
        setItem: (key, value) => storage.set(key, value),
        removeItem: key => storage.remove(key)
      }
    })
  ]
})
vuex-router-sync
主要是router的状态<path,query和params>存入vuex的state中; 使用方式如下:
store.state.route.path   // current path (string)
store.state.route.params // current params (object)
store.state.route.query  // current query (object)
UI库
Cube-UI
cube-ui 是基于 Vue.js 实现的精致移动端组件库。推荐阅读官方文档。
- PC门户网站:使用Muse-UI
- PC后台CMS:使用vue-element-admin。
常用的组件我们可以直接在main.js里全局注册
import {
  // eslint-disable-next-line
  Style,  // 引入 Style 加载基础样式
  Loading,
  Button,
  Dialog,
  Toast,
  Scroll
} from 'cube-ui'

Vue.use(Scroll)
Vue.use(Loading)
Vue.use(Button)
Vue.use(Dialog)
Vue.use(Toast)
Webpack优化
与2.x相同,在根目录下新建了
build文件夹。所有可以优化webpack相关的代码逻辑放入这里,仍然通过node环境变量来使用webpack-merge做逻辑合并。
- webpack.base.conf.js 共用的配置文件
- webpack.dev.conf.js 走开发环境的配置文件
- webpack.prod.conf.js 走生产环境的配置文件
- config.js 配置参数
Happypack
通过多进程模型,来加速代码构建,代码在
webpack.prod.conf.js文件中,主要使用了Happypack的ThreadPool方法,HappyThreadPool(“进程池”) 对象来管理生成的子进程对象。利用缓存来使得rebuild 更快。
推荐阅读happypack 原理解析。
具体操作方法如下:
// webpack.prod.conf.js

const OS = require('os')
const HappyPack = require('happypack')
const happyThreadPool = HappyPack.ThreadPool({ size: OS.cpus().length })

  {
  // do something...
      plugins: [
        new HappyPack({
          id: 'happybabel',
          loaders: ['babel-loader'],
          threadPool: happyThreadPool,
          cache: true,
          verbose: true
        })
    ]
  }
webpack-parallel-unglify-plugin
webpack提供的UglifyJS插件由于采用单线程压缩,速度很慢; 使用
webpack-parallel-unglify-plugin可以并行运行UglifyJS插件,这可以有效减少构建时间多线程压缩js。
// webpack.prod.conf.js
const ParallelUglifyPlugin = require('webpack-parallel-uglify-plugin')

  {
  // do something...
      plugins: [
        new ParallelUglifyPlugin({
          cacheDir: '.cache/',
          sourceMap: false,
          uglifyJS: {
            output: { comments: false },
            compress: { warnings: false }
          }
        })
    ]
  }