README

@sketchmine/app-builder
Note: This is a Dynatrace internal tool that may not fit your needs.
The app-builder builds the example Angular application out of our »pure example components« to generate the dynatrace components library. We've added support for Angular Material as well but keep in mind that it is optimized for the dynatrace components library.
We are using the Angular devkit Schematics for generating the app-shell.
Dependency graph
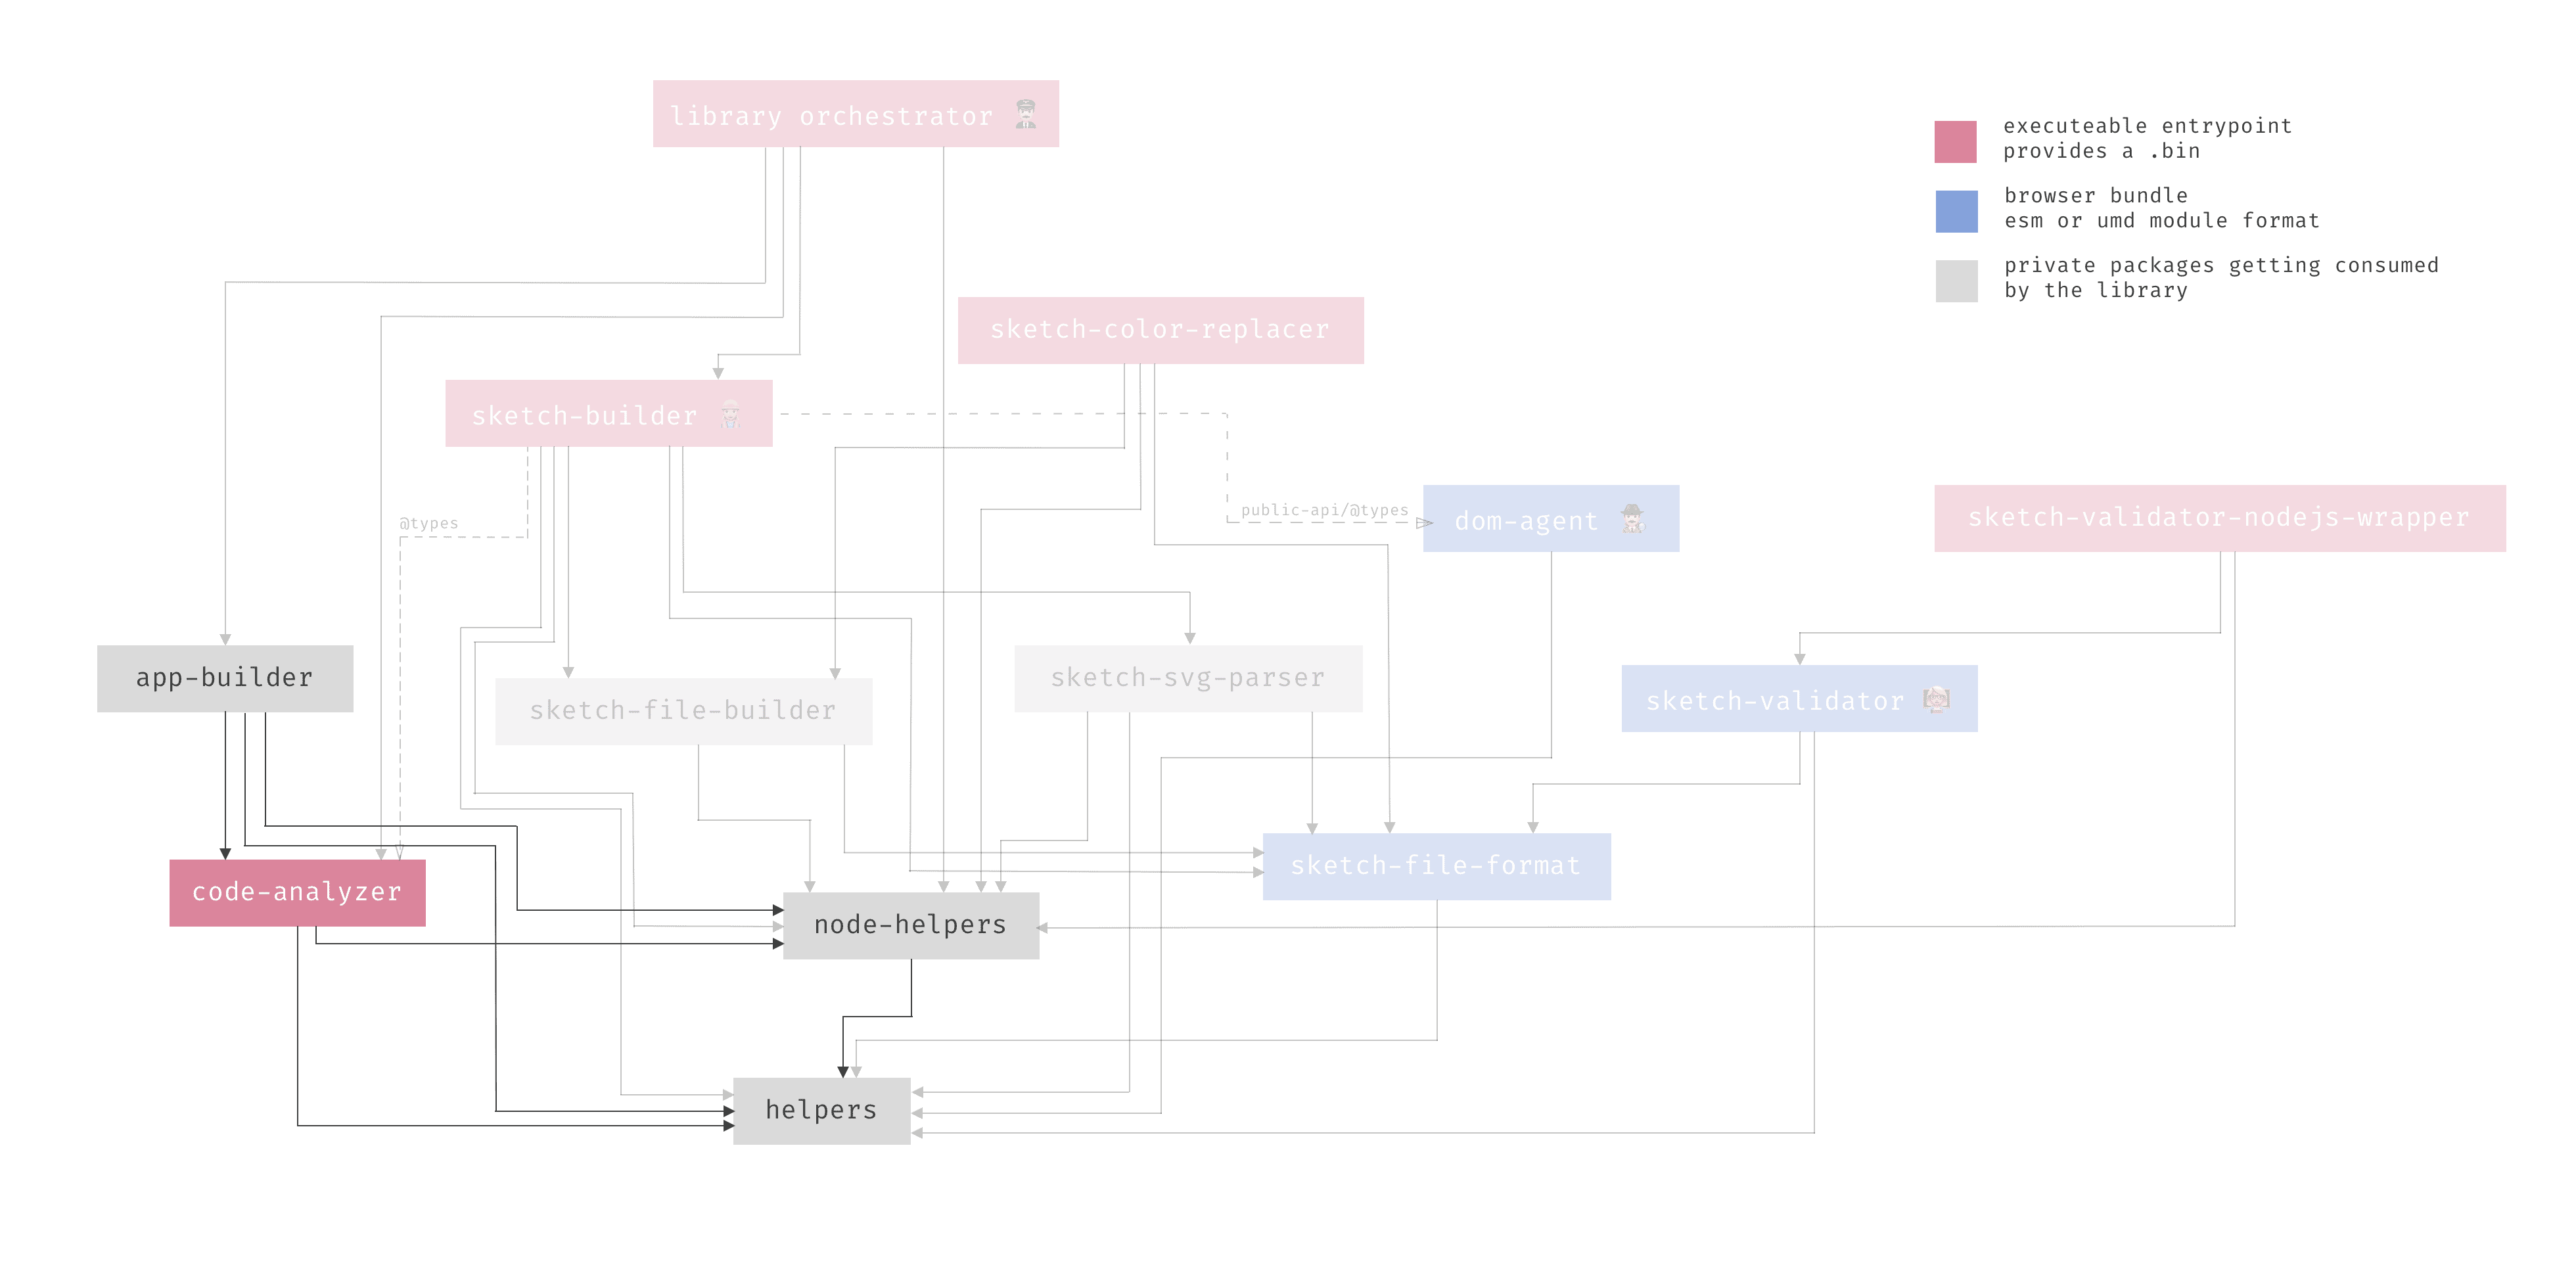
The purpose
As a brief overview of this package, please note that this package doesn't make any sense as a standalone package, even if it's possible to execute it from the command line and the integrated CLI. This package is orchestrated from the @sketchmine/library. It's responsible for generating an Angular application that instances all the library components, so that the @sketchmine/dom-agent can scrape the meta information related to styling and pass it to the @sketchmine/sketch-builder, which generates a new library Sketch file.
Building the package
Get running with material2
TL;DR
- Checkout material2, with specific tag like
7.1.1. npm install && npx gulp build-examples-moduleinside material2- Move to Sketchmine's code-analyzer. Change the config.material.json to suit your folder structure.
- Run
skm-code-analyzer -c config.material.json - Move to the app-builder adjust config.material.json to your needs and run
yarn schematics --dryRun=false --config config.material.json - Now copy the generated meta-information.json with
npx gulp copyMeta - Navigate to the generated
dist/sketch-libraryand serve it withng serve
Prerequisites
To get started it is necessary to checkout the material2 github repository in a separate folder. Then checkout a specific version with git checkout 7.1.1 for example.
After that perform a npm install and generate the examples module file with npx gulp build-examples-module. Now everything should be ready to go ahead.
Now it is time to generate the meta information from the library for that use the @sketchmine/code-analyzer – see further information about how to generate this information in the README.md from the code-analyzer. Come back if the meta information was generated.
Now it is time to prepare the configuration. Therefore you will find the config.material.json in the package root. Please update the paths to the src/material-examples/ folders and the path to the meta-information.json file.
After that you can map which library component like (button, card, grid-list) should match which examples Component in the examples folder. Notice that it is important to lock the version of @angular/material to the same that was checked out with git!
Build the application
Now it is time to execute the schematics that will build the examples-library.
Please run yarn build to build the Angular schematics that are written in TypeScript. After you have built them perform the yarn schematics --dryRun=false --config=config.material.json command where you provide the configuration to the schematics.
After this a folder according to the directory property in the config.material.json is generated with your app shell.
Run the application
The last step before running the application is to copy the generated meta-information to the needed destination. For this a gulp task is prepared for you. Execute npx gulp copyMeta and after this you can go ahead!
This is mostly done by the @sketchmine/library but you can navigate in the generated directory and execute ng serve. If you want to build the library with the sketch-builder by hand.
How to build
For building the package Gulp is used in combination with the tsc. The configuration can be found in the gulpfile.js and is orchestrated by the yarn package manager.
The build can be started with the following two commands:
yarn buildfor building the package.yarn devfor building and watching the sources of the package.
Linting
The source code of this package will be linted by our CI environment. To ensure a coding standard and quality, use the configured linter tslint. This package extends from the tslint-config-airbnb and the linting configuration extends from the root tslint.json.
Run yarn lint to execute the linter.
Testing the package
To ensure that the app-builder is working, write tests and put them in a properly named file.
Note: All tests based on this package should be wrapped in a describe method with the prefix: [app-builder] › ... as shown in the following:
// import statements

describe('[app-builder] › ${folder} › ${description of the suite}', () => {
  // your tests should be placed here
});
For tests the Jest framework has been seleted. See jestjs.io for details.
Run yarn test to run all tests specified for the app builder. Run yarn test -f filename.test to run only tests that match the provided RegExp for the filename.