README
Build Status"> 
 data-canvas

data-canvas allows you to add event tracking and tests to existing canvas code without sacrificing performance and without forcing you to refactor.
It does this by introducing a new abstraction to canvas: the data stack.
Background
The HTML5 canvas has several advantages over SVG, its main rival for graphics on the web:
- Depending on the benchmark, it's anywhere from 10x to 300x faster than SVG.
- It allows for a simpler coding style. Rather than setting up elaborate data binding to track updates, you just redraw the scene from scratch every time.
That being said, canvas also has some major drawbacks:
- It can only be used through JavaScript. Rather than styling elements declaratively using CSS, you have to style them in code.
- It's harder to work with events. For example, when the user clicks on the canvas, it's difficult to determine exactly which element they clicked on.
- It's harder to test. Assertions about individual pixels are hard to understand and can break easily. With SVG, you can find complete shapes using selectors and make assertions about them.
data-canvas aims to overcome some of these drawbacks without compromising canvas's speed and simplicity.
A canvas example
Here's a bit of data representing a car:
var car = {
  name: 'Box car',
  x: 100,
  y: 100,
  width: 200,
  wheels: [
    {name: 'back wheel', x: 20, radius: 15},
    {name: 'front wheel', x: 180, radius: 10}
  ]
};
You might render it using canvas like so:
function renderScene(ctx, car) {
  ctx.fillStyle = 'red';
  ctx.fillRect(car.x, car.y, car.width, -25);
  ctx.fillRect(car.x + 50, car.y - 25, car.width - 100, -25);
  ctx.fillStyle = 'black';
  ctx.strokeStyle = 'gray';
  car.wheels.forEach(function(wheel) {
    ctx.beginPath();
    ctx.arc(car.x + wheel.x, car.y, wheel.radius, 0, Math.PI*2, true);
    ctx.fill();
    ctx.stroke();
  });
}

function renderBoxyCar() {
  var ctx = canvas.getContext('2d');
  renderScene(ctx, car);
}

(see full demo)
This is a beautiful car and a faithful rendering of the data. But what if you wanted to add a click handler to it? What if you wanted to write a test which asserted that there were two wheels?
data-canvas can help you do both of these.
The data stack
"All problems in computer science can be solved by another level of indirection."
data-canvas wraps the browser's canvas rendering context with a DataContext,
which adds two new primitives:
declare class DataCanvasRenderingContext2D extends CanvasRenderingContext2D {
  pushObject(o: any): void;
  popObject(): void;
}
These primitives associate a data stack with the canvas rendering context. Whenever you render a bit of data, you should push it onto the data stack. When you're done with it, you pop it off.
Here's what the car example looks like using a DataContext:
function renderScene(ctx) {
  ctx.pushObject(car);  // <---
  ctx.fillStyle = 'red';
  ctx.fillRect(car.x, car.y, car.width, -25);
  ctx.fillRect(car.x + 50, car.y - 25, car.width - 100, -25);
  ctx.fillStyle = 'black';
  ctx.strokeStyle = 'gray';
  car.wheels.forEach(function(wheel) {
    ctx.pushObject(wheel);  // <---
    ctx.beginPath();
    ctx.arc(car.x + wheel.x, car.y, wheel.radius, 0, Math.PI*2, true);
    ctx.fill();
    ctx.stroke();
    ctx.popObject();  // <---
  });
  ctx.popObject();  // <---
}

function renderBoxyCar() {
  var ctx = dataCanvas.getDataContext(canvas.getContext('2d'));   // <---
  renderScene(ctx);
}
The new code is marked by comments. The pushObject/popObject calls fit
nicely into the existing code without changing its style.
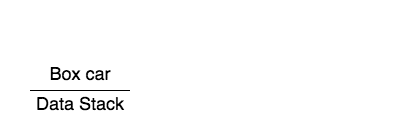
Here's what the data stack looks like while the rendering happens:
Testing
Using this modified code, we can write a test:
describe('boxy car', function() {
  it('should have two wheels', function() {
    var RecordingContext = dataCanvas.RecordingContext;
    RecordingContext.recordAll();  // stub in a recording data context
    renderBoxyCar();

    var wheels = RecordingContext.drawnObjectsWith(x => x.radius);
    expect(wheels).to.have.length(2);
    expect(wheels[0].name).to.equal('back wheel');
    expect(wheels[1].name).to.equal('front wheel');

    RecordingContext.reset();  // restore the usual data context
  });
});
The RecordingContext.recordAll() call swaps in an alternate implementation of
DataContext which records every method called on it. This includes the
pushObject calls. After the drawing is done, we can access the drawn objects
using its helper methods, such as drawnObjectsWith.
It's typically easiest to make assertions about the objects pushed onto the data stack, but you can make assertions about the underlying drawing commands, too:
describe('boxy car', function() {
  it('should draw two wheels', function() {
    var RecordingContext = dataCanvas.RecordingContext;
    RecordingContext.recordAll();  // stub in a recording data context
    renderBoxyCar();
    RecordingContext.reset();  // restore the usual data context

    var wheels = RecordingContext.callsOf('arc');
    expect(wheels).to.have.length(2);
    expect(wheels[0].slice(0, 3)).to.deep.equal(['arc', 120, 100, 15]);
    expect(wheels[1].slice(0, 3)).to.deep.equal(['arc', 280, 100, 10]);
  });
});
Writing the test required no modifications to the rendering code beyond the
pushObject/popObject calls.
Click tracking
data-canvas also facilitates mapping (x, y) coordinates to objects in the scene.
Suppose you wanted to add click handlers to the wheels and the car itself. Here's how you might do that:
canvas.onclick = function(e) {
  var ctx = canvas.getContext('2d');
  var trackingContext = new dataCanvas.ClickTrackingContext(ctx, e.offsetX, e.offsetY);
  renderScene(trackingContext);

  if (trackingContext.hit) {
    alert(trackingContext.hit[0].name);
  }
};
(Try it with this fiddle)
Again, no modifications to the scene rendering code were required. To determine
which object (if any) was clicked on, we swapped in an alternate data context
(ClickTrackingContext) and redrew the scene.
While redrawing the scene may feel inefficient, it rarely is.
ClickTrackingContext doesn't need to draw any shapes, only check whether they
contain the relevant point.
After rendering the scene, ClickTrackingContext will have both a hit and a
hits property. hit records the contents of the data stack for the last
(top-most) shape which contains the point. hits records the contents for all
shapes which contained the point, ordered from top to bottom.
For example, if you click the top part of the back wheel, then we'll have:
hit = [back wheel, car]
Because both the car and the back wheel were on the data stack when the car was drawn.
We'll also have:
hits = [[back wheel, car], [car]]
This is because only car was on the stack when the car rectangle was drawn,
and another shape (the wheel) was drawn on top of it.
Usage
To install data-canvas, use NPM:
npm install data-canvas
Then include it either in your page:
<script src="node_modules/data-canvas/data-canvas.js"></script>
or require it:
var dataCanvas = require('data-canvas');
data-canvas comes with type bindings for Flow. To use these, add the
following to your .flowconfig:
[ignore]
.*node_modules/data-canvas.*

[lib]
node_modules/data-canvas/flowtype