README
knockout-spa
![]()


Take a SPA with Knockout.
knockout-spa.mybluemix.net (demo/doc site built using this framework itself)
What's this?
A mini but full-fledged SPA framework and boilerplate to build SPAs fast and scalable.
![]()
![]()
![]()
![]()
![]()
Demo
- DEV mode: knockout-spa.mybluemix.net
- PROD mode: knockout-spa-prod.mybluemix.net
- Implementaion of the famous TodoMVC: https://onlyurei.github.io/todomvc-knockout-spa/
- Real World App: http://rentever.com Social Rental Marketplace - Rent anything from anyone nearby
Features
- Fast and lightweight (Under 100 KB of JS minified and gzipped for initial core setup).
- Using Knockout 3.4.0+ so ready for Knockout's flavor of web component and custom tags.
- Component files (html, js, css) are loaded dynamically on-demand: only when the component is in the view.
- Provide Knockout ES5 POJO style viewModel/binding option to help you write cleaner code and make it easier to replace Knockout with other MVVM libraries in the future.
- Use 2-tier bundle build strategy for production: common module that will be used by most pages, and page-specific modules that will be lazy-loaded. This allows the app to scale to very large - not doing a lump-sum load of giant bundled files for the entire app on first page load - only the needed parts of the page, and common dependencies of all modules will be loaded. As user navigates to other parts of the app, the needed files (js, css, html) are lazy loaded. This is important for the app to be performant especially on mobile devices, since the lump-sum bundle files are not only slower to download due to size, but also slower to parse.
- Use
require-cssandrequire-textAMD plugins to load CSS and HTML templates dynamically ondemand along with the JS modules requiring them; these CSS and HTML template files will be inlined and minified into the corresponding JS modules for production build.
- Use
- Use
require-i18nfor scalable internationalization/localization. - No any watcher/transpiler/build tasks required during development - you debug directly the exact same JS/CSS/HTML/Any file you edit in the IDE. Changes made to a file will be immediately reflected upon refreshing the browser (or use Chrome devtools workspace or similar tool to have the changes live-rerendered without having to refresh the page). The only build task required for production is the RequireJS r.js optimizer task that's already predefined in
build.js. Just figure out a config-based way to serve the assets from/buildfolder for production. - Routing (based on Flatiron's Director: HTML5 history (pushState) or hash.
- Highly composable and reusable: pick modules/components for a page in the page-specific JS and they will be auto-wired for the page's HTML template.
- SEO ready (prerender.io).
- Organized folder structure to help you stay sane for organizing and reusing modules/files. Not using the file type folder structure such as
/js,/css,/html,/template, etc, as files belonging to the same module/component are easier to navigate when grouped together under the same folder. If a part of the app should be removed, in theory you just need to delete the corresponding module/component folder, and touch very few other places. - All documentation are in the major dependencies' own homepages, so that you don't need to completely learn a new framework (learn and practice general and reusable frontend development skills, not specific giant framework and tooling skills):
- One important advantage of this mini framework: if you don't like some of the major dependencies, you can swap them out without having to completely rewrite your entire app. Example: use Vue to replace Knockout, use Webpack to replace Require, use Crossroads to replace Director, use Prototype to replace jQuery, use Lodash or Underscore to replace Sugar, etc. Also, if you don't like certain things of this mini framework, you can easily change them to cater to your own needs/taste.
Getting started
- Install
nodeandnpmif you haven't. - Clone/Download the repo. You can also run
npm install knockout-spato install from NPM, then manually moveknockout-spafolder out of thenode_modulesfolder to where your projects are normally located. cdinto the repo's folder in your OS terminal and runnpm install. Runnpm startto run the app in DEV mode, or runnpm run prodto run the app in PROD mode.- visit http://localhost:8080 (or the port you specify) to see the app. Notes:
- Using history api fallback so
index.htmlwill be served for all 404s. - You can also change
server.jsso that it can proxy your CORS requests to endpoints which don't have CORS header present. - This is the dev-only simple static asset server to allow easier bootstrapping/running/testing of the app. In real life use cases, you can either deploy the frontend to a CDN and enable CORS on your endpoint API server(s) to accept CORS requests from the CDN origin(s), or deploy the frontend along with endpoint API server under the same origin.
- Using history api fallback so
How do I use it?
- Take a look at the file structure and comments/
TODOs in the bootstrapped setup, and use your browser devtool of choice to poke around - you'll figure out everything in 10 minutes or less (assuming you know Knockout and Require fairly well). Use Show Page Source toggle on each page to quickly review theJS,HTML,CSSfiles of the page.- The
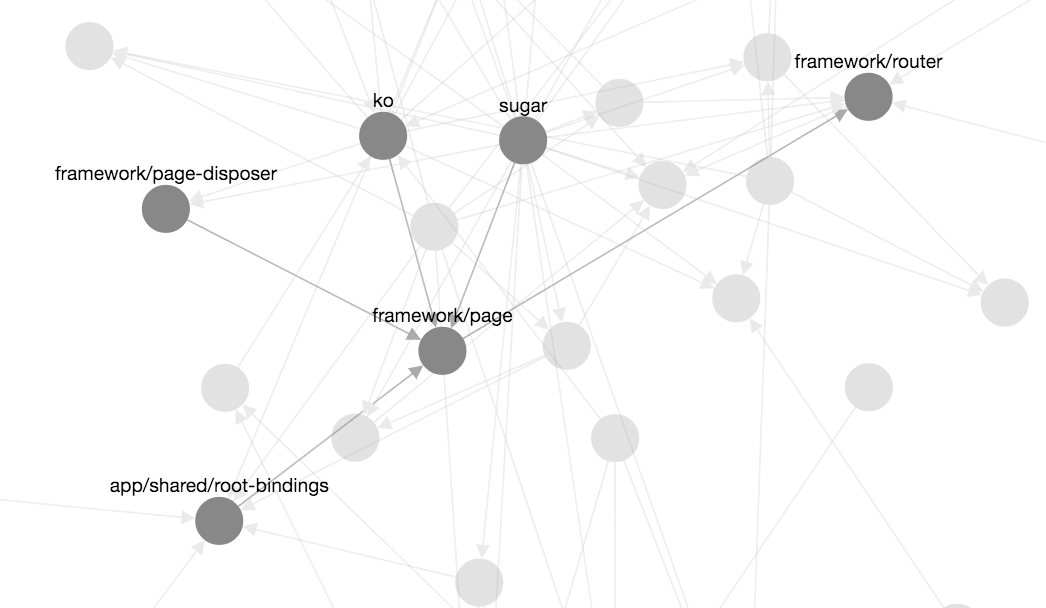
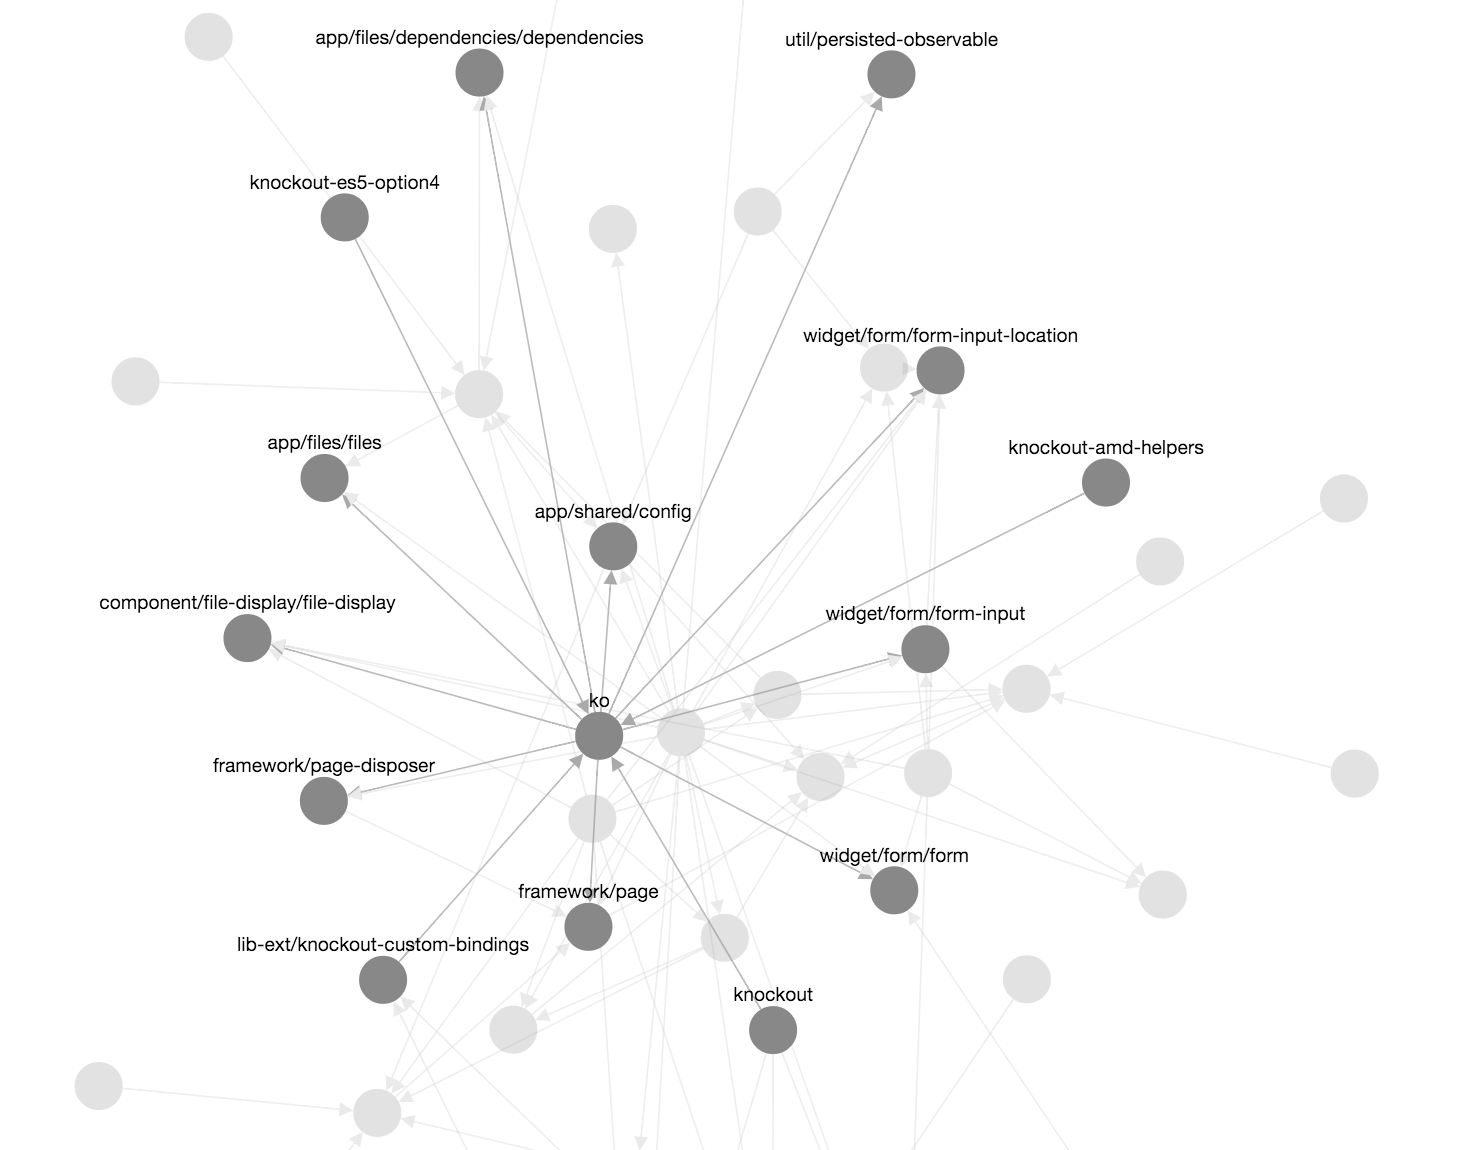
Filespage is a great example that demonstrates almost all of the SPA development aspects: routing and url query handling; usingkocomponent to encapsulate reusable logic, and using custom tagfilein the page's template and pass observable params to initialize the component; usingkocustom bindinghighlightto display the highlighted file source; using theapi-fileapi client to make api calls easier, etc. - The
Files Dependenciespage shows the modules dependencies graph of the repo. You can observe how the 2-tier build structure changes the graph from DEV mode to PROD mode - Take a look at the knockout-spa implementation of the famous TodoMVC: https://github.com/onlyurei/todomvc-knockout-spa
- The
- Start building your own SPA from the provided boilerplate - make whatever changes you want to cater to your needs! Edit the code in your IDE of choice and refresh the page to see the changes. No watcher task is required. If you have Chrome devtools workspace enabled and mapped to the repo's folder, you get live edit/reload for free out of the box. https://developer.chrome.com/devtools/docs/workspaces
- If you are new to Knockout, visit http://learn.knockoutjs.com to get the interactive quick start guide.
- Run
npm run buildin the repo's folder from command line to build assets for production, or run the combo commandnpm run prodto build and start the app in PROD mode. See http://requirejs.org/docs/optimization.html for complete optimization guide.- Built assets will be under
/buildfolder of the repo. The build is setup as 2 tiers: 1 common module that contains modules that will be required by most page modules, and page modules (1 per page) excluding common dependencies. Each built module will have all the declared dependencies recursively minified and inlined. - The 2-tier bundle build strategy allows lazy-loading of page modules as needed, so that the app can be scaled to very large number of pages without upfront load/parse hit for slower browsers if everything is bundle together as 1 single module. When you do a hard refresh, only the common module and the page's module are loaded. When you go to another page using the UI, that new page's module is loaded on-demand, excluding any dependencies already loaded in the common module. Another advantage of this strategy is that no code that references any modules needs to be changed when deployed to production.
- CSS and HTML template files will be inlined and minified with the corresponding JS modules (assuming you use
css!and/ortext!prefixes to add them as the JS module's dependencies) for pure modularization/portability, and reduce HTTP requests to improve app performance. - As you create new pages, remember to add the page modules to the build file
build.js, and add their common dependencies to thecommonmodule. - You should serve the optimized assets for production to avoid numerous AMD require calls and serving unminified files.
- Built assets will be under
Workflow of adding a new page
- Add the page's route(s) to
app/shared/routes.js. - Add the page's module folder. Folder's relative path to root should match the newly added route definiton, example:
app/files.- JS and HTML files are required, CSS file is optional. If CSS file is added, reference it with the
css!prefix in the AMD dependencies array in the JS file. - JS file exposes the View Model of the page and the lifecyle hooks (callback functions):
init,afterRender,dispose,controllers, seeapp/home/home.jsfor detailed explanation. - Page's CSS class will be set on the
<html>element. It's the dasherized version of the page folder's relative path to app root, without the 'app' part. - Prefix all CSS rules with the page's class in the CSS file.
- JS and HTML files are required, CSS file is optional. If CSS file is added, reference it with the
- Add the page's module to
build.js. - If you need to install new lib dependencies, run
npm install dependency-package-name --saveto install the package and save dependency entry topackage.json, then alias the lib file incommon.js(so that you don't have to type the long relative path everywhere when using the lib). - If you are adding third party plugins that manipulates the DOM (e.g. jQuery plugins), avoid using selectors to reference the desired DOM nodes at any cost (spaghetti code). Instead you should add custom bindings and load the plugin ondemand. See
lib-ext/knockout-custom-bindings-lib.jsfor examples and detailed instructions. - If you are creating reusable UI widgets, consider making them components and publish to NPM to be reused across projects. See examples
component/file-display/file-display.jsandcomponent/page-source-display/page-source-display.js.- No component pre-registration is required since a convention is defined in
lib-ext/knockout-extended.js. This allows the component modules to be loaded dynamically ondemand only when the custom tags are found in your app's templates, improving performance and app scalability. Modify the convention to your needs if desired.
- No component pre-registration is required since a convention is defined in