README
Lysertron
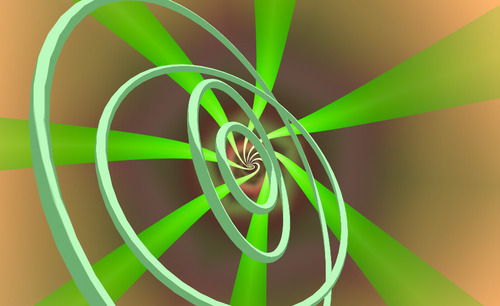
Lysertron is a WebGL semantic and extensible music visualizer.
Running it locally
Prerequisites:
- node.js
- npm
- CoffeeScript (for the moment)
- WebGL capable browser
If you have the above squared away, then you are ready to get your own local Lysertron server.
- Clone the repository, cd into project directory.
- Install npm dependencies:
npm install - Start the local server:
bin/lysertron - Point your browser to:
http://localhost:3001/
Anatomoy of the Lysertron
Lysertron has 3 pools of layers. When creating each scene, a random layer of each type is chosen and composited together.
- Background: Renders first, paints entire frame.
- Midground: Renders second, typically textures or adorns background.
- Foreground: Renders last, typically some sort of object animating front and center
In the layers/ directory is a directory for each of these types. Each layer gets it's own folder within those. Simply adding a directory for a new layer type in the correct directory will cause the server to find it, package it, and expose it to the browser.
Most layers will have at least 3 files:
- main.coffee: The JavaScript that powers the layer.
- vert.glsl: A vertex shader.
- frag.glsl: A fragment shader.
When working on a layer, you can force the randomizer to choose the layer you are working on every time with some query string shenanigans.
http://localhost:3001/?fore=foregroundexamplehttp://localhost:3001/?mid=mymidgroundlayerhttp://localhost:3001/?mid=somebackgroundhttp://localhost:3001/?fore=abc&mid=def&back=xyzhttp://localhost:3001/?fore=abc&mid=_&back=_(hides mid and back entirely)
Learning by example
The project comes with an example which, while not very pretty, should lay out the foundation for you to understand how a layer works.
Simply change the name of the folder at:
layers/foreground/_example
To:
layers/foreground/example
Now, with the server running, navigate to:
http://localhost:3001/?fore=example
You should see the example layer as a spinning, color changing, cube as the foreground over random mid ground and background layers.
Now you can tweak the content of the files in the example directory, and figure out how things work in the Lysertron.
Adding your own music
Lysertron music must be pre-processed by Echonest.
- Signup for an Echonest API key
- Copy
echonest.example.jsontoechonest.json. - In
echonest.jsonreplaceYOUR_API_KEY_HEREwith your actual api key. - Run the upload script:
coffee upload.coffee "path/to/someSong.m4a" ShortSongName(only unprotectedm4acurrently supported) - Wait a minute or two for uploading plus analyzation on their servers.
- When it completes you should have an
ShortSongName.m4aandShortSongName.jsonfiles in yoursongsdirectory. - To play the song with visuals, simply navigate to:
http://localhost:3001/?song=ShortSongName
Contributing
Eventually, there is plans to treat layers more like content with support for keeping them in a database on a server somewhere.
But for now, I encourage anyone simply fork this repo, make some really cool layers, and send me back a pull request.