README
Mopidy.js


Mopidy.js is a JavaScript library for controlling a Mopidy music server.
The library makes Mopidy's core API available from browsers and Node.js programs, using JSON-RPC over a WebSocket to communicate with Mopidy.
This library is the foundation of most Mopidy web clients.
Table of contents
Compatibility
Mopidy.js should work with Mopidy >= 0.19.0.
Installation
Mopidy.js is a tiny library, building upon the standardized WebSocket and Promise APIs, weighing in at around 12 kB minified.
From npm
You can install Mopidy.js from npm:
npm install mopidy
Prebuilt bundle
A minified version of Mopidy.js, complete with sourcemaps, is available from the project's GitHub release page.
Building from source
Install Node.js.
Enter the source directory, and install all dependencies:
npm install
That's it.
You can now run the tests and linters:
npm test
To build updated JavaScript files for browser use in dist/, run:
npm run build
Usage
Importing
After installing, you can import Mopidy.js into your code using require():
const Mopidy = require("mopidy");
Or using ES6 imports:
import Mopidy from "mopidy";
Creating an instance
Once you have Mopidy.js loaded, you need to create an instance of the wrapper:
const mopidy = new Mopidy();
When you instantiate Mopidy() without arguments, it will connect to
the WebSocket at /mopidy/ws/ on the current host. Thus, if you don't host
your web client using Mopidy's built-in web server, or if you use Mopidy.js
from a Node.js app, you'll need to pass the URL to the WebSocket end point:
const mopidy = new Mopidy({
  webSocketUrl: "ws://localhost:6680/mopidy/ws/",
});
It is also possible to create an instance first and connect to the WebSocket later:
const mopidy = new Mopidy({ autoConnect: false });
// ... do other stuff, like hooking up events ...
mopidy.connect();
Settings
When creating an instance, you can specify the following settings:
autoConnect
Whether or not to connect to the WebSocket on instance creation.
Defaults to true.
backoffDelayMin
The minimum number of milliseconds to wait after a connection error before
we try to reconnect. For every failed attempt, the backoff delay is doubled
until it reaches backoffDelayMax. Defaults to 1000.
backoffDelayMax
The maximum number of milliseconds to wait after a connection error before
we try to reconnect. Defaults to 64000.
console
If set, this object will be used to log errors from Mopidy.js. This is
mostly useful for testing Mopidy.js. Defaults to console.
webSocket
An existing WebSocket object to be used instead of creating a new
WebSocket. Defaults to undefined.
webSocketUrl
URL used when creating new WebSocket objects.
In a browser environment, it defaults to
ws://${document.location.host}/mopidy/ws. If the current page is served over
HTTPS, it defaults to using wss:// instead of ws://.
In a non-browser environment, where document.location isn't
available, it defaults to ws://localhost/mopidy/ws.
Hooking up to events
Once you have a Mopidy.js object, you can hook up to the events it emits. To explore your possibilities, it can be useful to subscribe to all events and log them:
mopidy.on("state", console.log);
mopidy.on("event", console.log);
Mopidy.js uses Node.js' events API, so you should refer to its documentation to see how you can hook up your listeners to the different events.
Several types of events are emitted:
Client state
You can get notified about when the Mopidy.js client is connected to the
server and ready for method calls, when it's offline, and when it's trying to
reconnect to the server by looking at the events state:online,
state:offline, reconnectionPending, and reconnecting.
The client state events are also emitted under the aggregate event named
state.
Mopidy events
You can get events sent from the Mopidy server by looking at the events with
the name prefix event:, like event:trackPlaybackStarted.
The events from Mopidy are also emitted under the aggregate event named
event.
WebSocket events
You can introspect what happens internally on the WebSocket by looking at the
events named websocket:open, websocket:error, websocket:close, websocket:incomingMessage, and websocket:outgoingMessage.
Of course, you can also do this using the web developer tools in any modern browser.
Calling core API methods
Once your Mopidy.js object has connected to the Mopidy server and emits the
state:online event, it is ready to accept core API method calls:
mopidy.on("state:online", () => {
  mopidy.playback.next();
});
Any calls you make before the state:online event is emitted will fail with a
Mopidy.ConnectionError error.
All methods in Mopidy's core API
are available via Mopidy.js. For example, the
mopidy.core.PlaybackController.get_state() Python method is available
in JSON-RPC as core.playback.get_state and in Mopidy.js as
mopidy.playback.getState().
Both the WebSocket API and the JavaScript API are based on introspection of the core Python API. Thus, they will always be up to date and immediately reflect any changes we do to the core API.
API discovery
The best way to explore the JavaScript API, is probably by opening your browser's console, and using its tab completion to navigate the API. You'll find the Mopidy core API exposed under:
mopidy.playbackmopidy.tracklistmopidy.librarymopidy.playlistsmopidy.historymopidy.mixer
All methods in the JavaScript API have an associated data structure describing
the Python params it expects, and most methods also have the Python API
documentation available. This is available right there in the browser console,
by looking at the method's description and params attributes:
console.log(mopidy.playback.next.params);
console.log(mopidy.playback.next.description);
Arguments
JSON-RPC 2.0 limits method parameters to be sent either by-position or by-name. Combinations of both, like we're used to from Python, isn't supported by JSON-RPC 2.0.
To call a method with by-position arguments, wrap the arguments in a list:
mopidy.library.search(["abba", null, true]);
As you can see, this quickly becomes confusing as we don't know what null
and true is without referring to documentation or Python source code.
Thus, it is usually better to call methods with by-name arguments, by passing an object to the method:
mopidy.library.search({ query: "abba", exact: true });
Promises
Obviously, you'll want to get a return value from many of your method calls.
Since everything is happening across the WebSocket and maybe even across the
network, you'll get the results asynchronously. Instead of having to pass
callbacks and errbacks to every method you call, the methods return
ES6 Promise objects, which you can use to pipe the future result as input
to another method, or to hook up callback and errback functions.
const track = mopidy.playback.getCurrentTrack();
// => `track` isn't an object with track data, but a Promise
Typical usage of a Promise can look like this:
function showPlaying() {
  const printCurrentTrack = (track) => {
    if (track) {
      console.log(
        "Currently playing:",
        track.name,
        "by",
        track.artists[0].name,
        "from",
        track.album.name
      );
    } else {
      console.log("No current track");
    }
  };

  const failureHandler = () => {
    console.warn("Something went wrong");
  };

  mopidy.playback.getCurrentTrack().then(printCurrentTrack, failureHandler);
}
The first function passed to .then(), printCurrentTrack, is the callback
that will be called if the method call succeeds. If anything goes wrong,
the second function passed to .then(), failureHandler will be called.
async/await
With the foundation of Promise, you can simplify the code flow using the
async and await keywords introduced to JavaScript in ES2017.
The following is the same example written using async and await:
async function showPlaying() {
  try {
    const track = await mopidy.playback.getCurrentTrack();
    if (track) {
      console.log(
        "Currently playing:",
        track.name,
        "by",
        track.artists[0].name,
        "from",
        track.album.name
      );
    } else {
      console.log("No current track");
    }
  } catch (e) {
    console.warn("Something went wrong", e);
  }
}
Cleaning up
If you for some reason want to clean up after Mopidy.js before the web page is closed or navigated away from, you can close the WebSocket, unsubscribe all event listeners, and delete the object like this:
// Close the WebSocket without reconnecting. Letting the object be garbage
// collected will have the same effect, so this isn't strictly necessary.
mopidy.close();

// Unsubscribe all event listeners. If you don't do this, you may have
// lingering references to the object causing the garbage collector to not
// clean up after it.
mopidy.off();

// Delete your reference to the object, so it can be garbage collected.
mopidy = null;
Demos
Web application
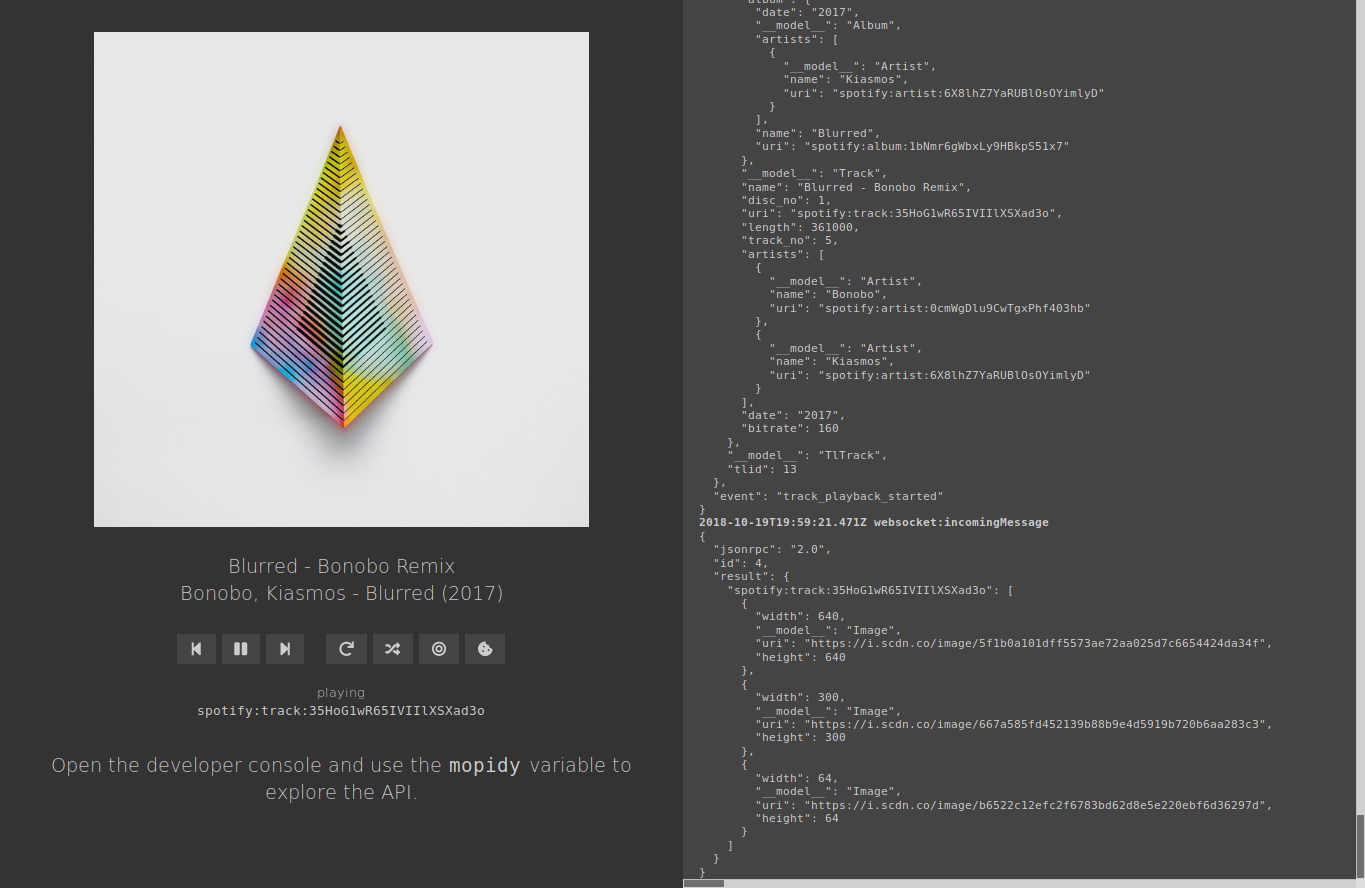
In the examples/ directory of the Git repo, you can find a small demo web
application using Mopidy.js. The left half of the screen shows what's
currently playing and provides some basic playback controls. The right half of
the screen shows the JSON-RPC messages and events that are sent back and forth
to the server, hopefully giving some insight into what is available to
Mopidy.js developers.
To run the demo application yourself:
Make sure the
http/allowed_originsconfig value in yourmopidy.confincludeslocalhost:1234.Run Mopidy on your local machine, so that Mopidy's web interface becomes available at http://localhost:6680/.
Clone Mopidy.js from GitHub.
Run
npm installto install dependencies.Run
npm startto run the demo application at http://localhost:1234/.
This setup uses hot module reloading, so any changes you do to the demo
application files, examples/web.{html,js}, will instantly be visible in
your browser. Thus, this can serve as a nice playing ground to get to know
the capabilities of Mopidy and Mopidy.js.
Console application
In the examples/ directory of the Git repo, you can find mpc.js, a partial
clone of the mpc utility built using Mopidy.js on Node.
Output from the original command:
$ mpc
Jon Hopkins - C O S M
[playing] #6/12   2:33/7:08 (35%)
volume:100%   repeat: off   random: on    single: off   consume: off
Output from the mpc.js example:
$ ./examples/mpc.js
Jon Hopkins - C O S M
[playing] #6/-   2:34/7:08 (36%)
volume:100%   repeat: off   random: on    single: off   consume: off
To run this example yourself, follow step 1-4 for the demo web application, and
then run ./examples/mpc.js.
Changelog
See Releases at GitHub.