README
█▓▒░⡷⠂μ GL⠐⢾░▒▓█
muGL - Micro WebGL Library for JavaScript and WebAssembly
![]()

![]()
Overview
mugl is a minimalistic WebGL 3D rendering library that allows you to run the same 3D app on both JavaScript and WebAssembly (WASM) environments using portable TypeScript / AssemblyScript code. It runs on any modern web browser and mobile via React Native.
The core mugl library provides a simple, modern WebGPU-style API abstraction layer that removes the verbosity and state management aspect of WebGL. There are several backend implementation of the API (see usage here):
- Default WebGL backend (
getGLDevice): Full-featured backend implementation on top of WebGL 1.0 / 2.0. - Nano backend (
getNGLDevice): A 3KB WebGL 1.0 only backend implementation. The size can be reduced to less than 2KB with Webpack tree-shaking and toggling off features that you do not need (e.g. scissor, stencil testing)! - WebAssembly binding (
muglBind): An API binding that allows you to use the samemuglinterface in AssemblyScript / WASM. It simply forwards API calls to one of the above backends. - More backends WIP, including WebGPU and native graphics backends
Dependencies:
- munum - minimalistic AssemblyScript 3D Math Library
Examples
Check out the live examples! The source code of all examples can be found here.
All examples run on both JavaScript and WebAssembly, using the exact same code base! Click the toggle in the examples menu to seamlessly switch between the two environments.
glTF 2.0 Model Viewer (WIP)
A minimal 13KB (gzipped) glTF model viewer built on mugl is available as an example usage of this library. The source code can be found here. Currently only running on JavaScript, but it is planned to be ported to AssemblyScript/WASM.
Any model from glTF-Sample-Models can be loaded using the model and variant URL parameter, e.g.: ?model=Buggy&variant=glTF-Binary to load the Buggy model. You can also use the url URL parameter to load a model from any source (example).
Install
npm install --save mugl
API Documentation
See TSDoc: http://andykswong.github.io/mugl
Usage
1. Basic Rendering Example
Below is a simple mugl program to draw a triangle using the default or Nano backend:
(See this example live here)
import { getGLDevice, ShaderType, VertexFormat } from 'mugl';
import { getNGLDevice } from 'mugl/n';  // For nano backend

// 0. Prepare triangle vertex positions and colors data
const triangle = new Float32Array([
  // position  color
  +0.0, +0.5,  1.0, 0.0, 0.0, 1.0,
  +0.5, -0.5,  0.0, 1.0, 0.0, 1.0,
  -0.5, -0.5,  0.0, 0.0, 1.0, 1.0,
]);

// 1. Create WebGL rendering device from an existing canvas
const device = getGLDevice(canvas);
// For Nano backend, use getNGLDevice instead of getGLDevice:
// const device = getNGLDevice(canvas);
if (!device) throw new Error('WebGL is unsupported');

// 2. Create GPU buffer for the triangle data
const buffer = device.buffer({ size: triangle.byteLength }).data(triangle);

// 3. Compiler the vertex and fragment shaders
const vert = device.shader({
  type: ShaderType.Vertex,
  source: `
    uniform float angle;
    attribute vec2 position;
    attribute vec4 color;
    varying lowp vec4 vColor;
    void main () {
      gl_Position = vec4(
        cos(angle) * position.x - sin(angle) * position.y,
        sin(angle) * position.x + cos(angle) * position.y,
        0, 1);
      vColor = color;
    }`
});
const frag = device.shader({
  type: ShaderType.Fragment,
  source: `
    varying lowp vec4 vColor;
    void main () {
      gl_FragColor = vColor;
    }`
});

// 4. Create pipeline object for drawing the triangle
const pipeline = device.pipeline({
  vert,
  frag,
  buffers: [{
    attrs: [
      { name: 'position', format: VertexFormat.Float2 },
      { name: 'color', format: VertexFormat.Float4 }
    ]
  }],
  uniforms: [ { name: 'angle' } ]
});

// 5. Create default render pass object
const pass = device.pass();

// 6. Submit draw call in a render pass
device
  .render(pass)
    .pipeline(pipeline)
    .vertex(0, buffer)
    .uniforms([ { name: 'angle', value: Math.PI / 2 } ])
    .draw(3)
  .end();
2. Running on Native Mobile Apps via expo-gl
mugl is compatible with expo-gl for 3D rendering on Expo / React Native mobile apps.
Below is the setup required to use mugl with expo-gl.
(See the full example live here)
import React from 'react';
import { Asset } from 'expo-asset';
import { GLView } from 'expo-gl';
import { getGLDevice } from 'mugl';

export default function App() {
  return (<GLView style={{ width: 300, height: 300 }} onContextCreate={onContextCreate} />);
}

async function onContextCreate(gl) {
  // 1. Create device by passing a canvas-like object that wraps the gl context
  const canvas = {
    getContext(type) { return gl; }
  };
  const device = getGLDevice(canvas, { webgl2: gl instanceof WebGL2RenderingContext });

  // 2. Use expo-asset to load an image for textures
  const image = (await Asset.loadAsync(require('./image.png')))[0];
  const tex = device.texture({ width: 512, height: 512 })
    .data({ image });

  // 3. Setup other resources and render as usual
  const pass = device.pass();
  const buffer = device.buffer(...).data(...);
  const pipeline = device.pipeline(...);
  device.render(pass)
    .pipeline(pipeline)
    .vertex(0, buffer)
    .uniforms([{ name: 'tex', tex }])
    .draw(3)
    .end();

  // 4. Call the expo-gl 'swap buffers' API at the end of each frame
  // See: https://docs.expo.dev/versions/latest/sdk/gl-view/#webgl-api
  gl.endFrameEXP();
}
3. Running on WebAssembly via AssemblyScript
Use muglBind to bind a device backend to an AssemblyScript WASM module:
import loader from '@assemblyscript/loader';
import { getGLDevice, muglBind } from 'mugl';

const imports = {};
const mugl = muglBind(imports, getGLDevice);

return loader.instantiate(
  fetch('module.wasm'),
  imports
).then(({ exports }) => {
  mugl.bindModule(exports);
  return exports;
});
You can then use getGLDevice to initialize a device in AssemblyScript in the same way:
import { getGLDevice, getCanvasById, RenderingDevice } from 'mugl';

const device: RenderingDevice = getGLDevice(getCanvasById('canvasId'));
See the examples source code on how to build an AssemblyScript mugl app.
4. GlTF 2.0 Rendering (WIP)
Below is the minimum setup required to render a GlTF 2.0 model:
import { getGLDevice } from 'mugl';
import { renderGlTF, resolveGlTF } from 'mugl/tf';
// 1. Create WebGL rendering device from an existing canvas
const device = getGLDevice(canvas);
if (!device) throw new Error('WebGL is unsupported');
// 2. Async load a GlTF/GLB file
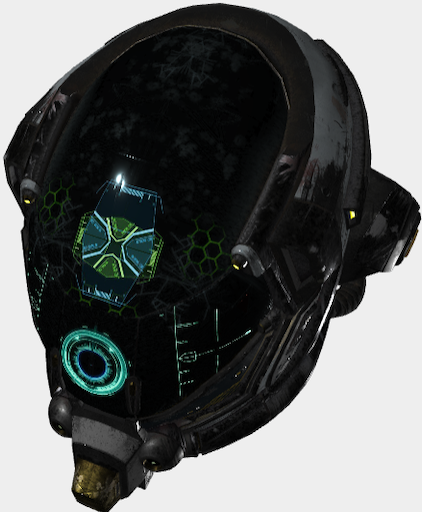
const glTFPromise = resolveGlTF({ uri: 'DamagedHelmet.gltf' });
// 3. Render the GlTF model
glTFPromise.then(glTF => {
renderGlTF(device, glTF);
});
License
This repository and the code inside it is licensed under the MIT License. Read LICENSE for more information.