README
VEGAS JS
Vegas JS | Signals - version 1.3.7 is an Opensource Library based on ECMAScript for develop crossplatform Rich Internet Applications and Games.
This library is light-weight, strongly-typed messaging tools. Wire your application with better APIs and less boilerplate than W3C DOMEvents.
This library contains a set of libraries writing in Javascript and based on the ES6 standard :
About
- Author : Marc ALCARAZ (aka eKameleon) - Creative Technologist and Digital Architect
- Mail : ekameleon[at]gmail.com
- LinkedIn : https://www.linkedin.com/in/ekameleon/
License
Under tree opensource licenses :
Resources
⌜ Download
Download on Bitbucket the latest code, report an issue, ask a question or contribute :
⌜ Documentation
Get started with the the Vegas JS API :
⌜ Slack Community
![]()
Send us your email to join the VEGAS community on Slack !
Install
⌜ YARN / NPM
You can install VEGAS JS with NPM or Yarn.
yarn add vegas-js-signals --dev
or
npm install vegas-js-signals --save-dev
Example
1 - Load the ¨./dist/vegas-index.js* library in your HTML page.
The index.html file :
<!doctype html>
<html>
    <head>
        <meta charset="UTF-8">
        <title>Test VEGAS JS | Signals</title>
    </head>
    <body>
        <script src="./js/vegas-index.js"></script>
        <script src="./js/index.js"></script>
    </body>
</html>
2 - Use the signals package in your javascript application.
The index.js file :
"use strict" ;

window.onload = function()
{
    if( !signals )
    {
        throw new Error("The VEGAS Signals library is undefined.") ;
    }

    // ------

    function Slot( name )
    {
        this.name = name ;
    }

    Slot.prototype = Object.create( signals.Receiver.prototype );
    Slot.prototype.constructor = Slot;

    Slot.prototype.receive = function ( message )
    {
        console.log( this + " : " + message ) ;
    };

    Slot.prototype.toString = function ()
    {
        return "[Slot name:" + this.name + "]" ;
    };

    // ------

    let slot1 = new Slot("slot1") ;

    let slot2 = function( message )
    {
        console.log( this + " : " + message ) ;
    };

    let signal = new signals.Signal() ;

    //signal.proxy = slot1 ;

    signal.connect( slot1 , 0 ) ;
    signal.connect( slot2 , 2 ) ;

    console.log( "signal.connected : " + signal.connected() ) ;
    console.log( "signal.length : "    + signal.length ) ;
    console.log( "signal.hasReceiver(slot1) : " + signal.hasReceiver(slot1) ) ;
    console.log( "signal.hasReceiver(slot2) : " + signal.hasReceiver(slot2) ) ;

    signal.emit( "hello world" ) ;

    signal.disconnect( slot1 ) ;

    signal.emit( "Bonjour monde" ) ;
};
Building and test the libraries
VEGAS JS | Signals use Yarn with a set of powerful packages (Babel, Mocha, etc.) to compile and build this library.
⌜ Simple Build
1 - The first time, initialize the project and run yarn :
yarn
2 - Run the Unit Tests + Compile all the libraries + Generates the documentation :
yarn build
⌜ VEGAS (only) Build
1 - Build the ./dist/vegas-index.js : not minified + no comments + sourcemap.
yarn dev
2 - Build the ./dist/vegas-index.js and watch the changing into the ./src folder.
yarn watch
3 - Build the ./dist/vegas-signals.min.js : minified + no comments.
yarn prod
⌜ Unit tests
We use the Mocha and the Chai (http://chaijs.com/) tools to run the unit tests of the VEGAS JS libraries.
1 - Run all unit tests
$ yarn test
2 - Run a specific library, use one of this command :
The --match option trigger the unit test engine (based on Mocha) to only run tests matching the given pattern which is internally compiled to a RegExp, for examples :
$ yarn test -g system.signals.Receiver
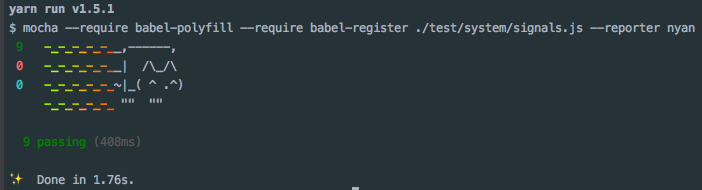
The --reporter option define the unit test result rendering in the terminal with the values : 'spec', 'dot', 'landing', 'dot', 'nyan', 'list', 'mochawesome'. By default the 'spec' value is used.
yarn test --reporter nyan
⌜ Generates the documentation
The documentation of the framework is based on JSDoc.
Run the documentation build with gulp :
yarn doc
The documentation is generated in the folder : ./docs/bin
Reference
The "signal engine" include in the package system.signals is a very simple messaging tools.
With a Signal class we can define objects who communicates by signals and can be use to create a light-weight implementation of the Observer pattern.
A signal emit simple values with its own array of receivers (slots). This values can be strongly-typed with an internal checking process.
Receivers (or Slots) can be defines with a simple Function reference or a custom object who implements the system.signals.Receiver interface.
Receivers subscribe to real objects, not to string-based channels. Event string constants are no longer needed like W3C DOM 2/3 event model. Interfaces.
Hello World
We begin with a first basic example.
In this example we use the system.signals.Signal.
function write( message )
{
    console.log( message ) ;
}

const signal =  new Signal() ;

signal.connect( write ) ;

signal.emit( "hello world" ) ; // hello world
signal.emit( "thank you" ) ; // thank you
Features
Signals have many features.
Disconnect a specific receiver or all receiver
You can disconnect the receivers registered in a Signaler object with the method disconnect(). This method can target a specific receiver (function reference or Receiver instance) but you can disconnect all registered receivers if you don't passed-in value.
Example :
let signal = new Signal() ;

signal.connect( slot1 ) ;
signal.connect( slot2 ) ;
signal.connect( slot3 ) ;

console.log( signal.length ) ; // 3

signal.disconnect( slot2 ) ;

console.log( signal.length ) ; // 2

signal.disconnect() ; // disconnect all

console.log( signal.length ) ; // 0
Auto disconnect feature
Receivers can be added for a one-time call and removed automatically on dispatch.
let receiver = function( message )
{
    console.log( message ) ;
}

let signal = new Signal() ;

signal.connect( receiver , 0 , true ) ;

signal.emit( "hello world" ) ;  // hello world
signal.emit( "bonjour monde" ) ;
Only the first message is dispatched, the reveiver is automatically disconnected and can't receive the next messages.
Receiver priority
When you connect a receiver with the connect method you can apply a priority over your reference.
The priority is designated by an int value ( an integer > 0 ). The higher the number, the higher the priority. All receivers with priority n are processed before receivers of priority n-1. If two or more receivers share the same priority, they are processed in the order in which they were added. The default priority is 0.
let slot1 = function( message )
{
    console.log( "slot1: " + message ) ;
}

let slot2 = function( message )
{
    console.log( "slot2: " + message ) ;
}

let slot3 = function( message )
{
    console.log( "slot3: " + message ) ;
}

let signal = new Signal() ;

signal.connect( slot1 ,  10 ) ;
signal.connect( slot2 , 999 ) ;
signal.connect( slot3 , 400 ) ;

signal.emit( "hello world" ) ;

// slot2: hello world
// slot3: hello world
// slot1: hello world
Other features
- You can retrieve the number of receivers with the read-only attribute : signal.length
- You can retrieve if the signal contains one or more receivers with the method : signal.connected()
- You can retrieve if a specific receiver is connected with the method : signal.hasReceiver( receiver )
History
- 1998 : Flash
- 2000 : First framework concept and first libraries (components, tools, design patterns)
- 2004 : First official SVN repository
- 2007 : Fusion with the Maashaack framework (eden, etc.)
- 2015 : Google Code must die - VEGAS move from an old Google Code SVN repository to this Bitbucket GIT repository and REBOOT this source code.
- 2016 : Begin the new JS architecture of the VEGAS JS library based on ES6
- 2018 : Cut the JS packages of VEGAS in a set of independent libraries.