README
React-Native Approov Quickstart
![]()


![]()
Basic Usage • Common Issues • Command Reference • Release Notes
The React Native Approov Quickstart provides an easy integration of Approov API threat protection into most React Native apps.
You will learn how to:
- Check that your React Native app meets the minimum requirements for Approov integration,
- Integrate Approov into your app without writing additional code,
- Register and successfully deploy your app onto Android and iOS devices.
Start with your own React Native app or try one of the available examples.
Basic Usage
0. Check that your development environment is properly set up
Ensure that you have a recent version of React Native (>= 0.60) installed (see installing react native). You also need yarn classic (1.x) (see installing yarn). If you can build the default react-native init app, your React Native environment is likely set up properly.
For Android, you will also want access to adb for identifying device IDs and running logcat (see Android Debug Bridge ). For iOS, you should also install ios-deploy to run on iOS devices (see installing ios-deploy).
For Approov, make sure you have installed and can run the approov CLI tool (see installing Approov). If you do not have access to Approov, you can sign up for a free trial at https://www.approov.io/signup.
1. Start with a working React Native app
You can start with any React Native app using the default runtime and standard react-native networking (fetch, axios, frisbee...). Start with your own React Native app, or use one of the Approov-provided examples.
Three examples: shapes_axios, shapes_fetch, and shapes_frisbee all work with a publicly available shapes service at shapes.approov.io.
We will use the Approov shapes_fetch example to illustrate the remaining steps to integrate Approov into a simple React Native app. To copy a pre-packaged example, start a command-line terminal, run the react-native-approov example command, and select an example and directory to install into:
$ npx @approov/react-native-approov example
✔ Select example app to copy › shapes_fetch
✔ Specify destination path … .
✔ Created shapes-fetch example.
ℹ Installing shapes-fetch npm dependencies...

...

✔ Example shapes_fetch is installed.
The example react-native project is downloaded, npm packages are installed, and, on iOS, pod dependencies are also installed. The above output was elided for brevity.
Depending on your platform, before building your app, you may need to explicitly start the metro packager in the top-level React Native project directory as well as starting an emulator/simulator or connecting a physical device.
$ cd shapes_fetch
$ yarn run react-native start
To run the app on an Android emulator, in a separate process or terminal window, change into the shapes_fetch directory and run android:
$ cd shapes_fetch
$ yarn run react-native run-android
To test the app on the iOS simulator, run iOS from the same shapes_fetch directory:
$ cd shapes_fetch
$ yarn run react-native run-ios
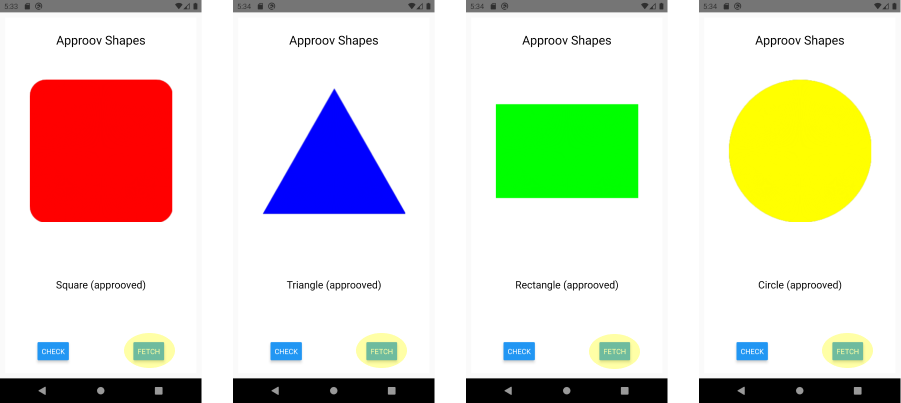
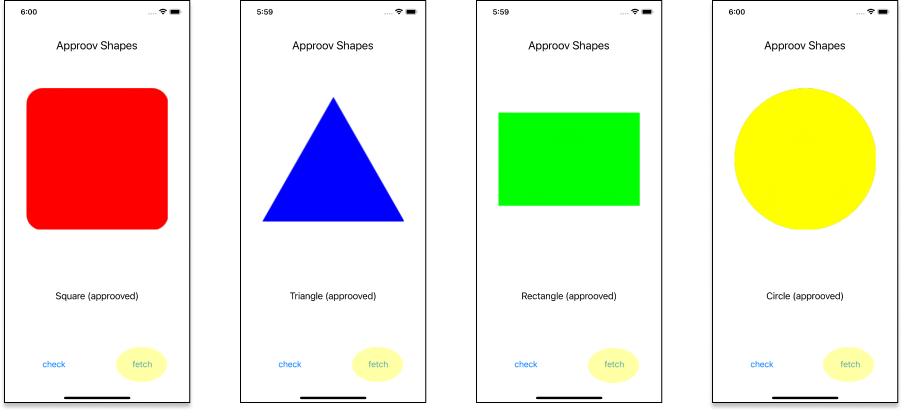
You should see a running Approov Shapes app running on either an Android emulator or iOS simulator. This is a plain React Native app; Approov is not installed.
Again, depending on your exact React Native environment, you may have to pre-launch the Android emulator or iOS simulator, and you may need to restart Metro package server if it was previously running in a different project directory - the usual React Native idiosyncrasies.

There are two buttons on the app. Pressing check will call the shapes.approov.ioserver's unprotected hello endpoint /v2/hello, and this should succeed. The shape button requests a random shape from the Approov-protected /v2/shapes endpoint. This should not succeed because the API call is being made from an App not recognized by Approov.
The Shapes start up, successful hello API call, and unsuccessful shapes API call screens are shown above.
2. Integrate Approov into your app
We'll start Approov integration by running the react-native-approov check command to see if the app is ready for integration.
Here's a sample Android check:
$ npx @approov/react-native-approov check

✔ Found project.json in /Users/skiph/projects/quickrn/play/shapes_fetch.
✔ Found yarn in PATH.
✔ Found React Native version 0.64.0.
✔ Found Approov CLI with active session.
ℹ Approov is currently protecting these API domains:
ℹ   shapes.approov.io
ℹ To add or remove API domains, see https://github.com/approov/quickstart-react-native/blob/master/README.md#checking-and-updating-approov-protected-api-domains.
ℹ The @approov/react-native-approov package is not installed
✔ Found Android project.
✔ Found Android minimum SDK 21.
✔ Found required Android network permissions.
✔ Found iOS project.
✔ Found iOS workspace - shapes_fetch
✔ Found iOS deployment target 10.0.

✔ Approov check completed successfully
Watch for a few things:
The
checkcommand requires an active Approov session. See Establishing an active Approov session if you encounter a missing Approov session error.Once you have an active Approov session, the
checkcommand will show API domains registered to your Approov service. Make sure all API domains called by your app which require API protection are registered with Approov. In our shapes example, allshapes.approov.ioendpoints will be protected. In case you are wondering, although the '/hello' endpoint is protected by Approov, the shapes server chooses to respond to any '/hello' API call whether the caller appears valid or not.Fix any errors reported by the
checkcommand. Approov often requires a few version updates or extra permissions. On Android, for example, the minimum SDK is 21, and the additionalACCESS_NETWORK_STATEpermission is required. Look up reported errors in the common scenarios section or follow help links included in the command output.
Once all issues are fixed, you should rerun your app to verify it is working as before. You are now ready to add Approov API protection.
Before integrating Approov into your React Native app, add all API domains to your account which need API protection. For our shapes service examples, there is one API domain to protect, shapes.approov.io. Add an API domain to your account:
$ approov api -add shapes.approov.io
WARNING: active role is for account <your-account>
WARNING: adding the API will have an immediate impact on your apps in production. If you wish to continue then please enter YES and return: YES
added new API domain shapes.approov.io with type:restricted, alg:HS256
Run the react-native-approov integrate command. It will prompt you to make some choices such as the name of the Approov header field and whether to bind authorization and approov tokens. Some of these values require coordination with your backend service. Refer to the react-native-approov integrate command for all options.
In our shapes example, just accept all the default options.
$ npx @approov/react-native-approov integrate

✔ Found project.json in /Users/skiph/projects/quickrn/play/shapes_fetch.
✔ Found yarn in PATH.
✔ Found React Native version 0.64.0.
✔ Found Approov CLI with active session.
ℹ Approov is currently protecting these API domains:
ℹ   shapes.approov.io
ℹ To add or remove API domains, see https://github.com/approov/quickstart-react-native/blob/master/README.md#checking-and-updating-approov-protected-api-domains.
✔ Specify Approov token header name … Approov-Token
✔ Specify prefix to add to the Approov token string, if any …
✔ Specify binding header data name, if any …
✔ Start token prefetch during app launch? … no
✔ Use bitcode for iOS builds (not typical)? … no
  Installing the @approov/react-native-approov package...
  ...
✔ Installed @approov/react-native-approov package
ℹ Installing iOS pod dependencies...
Auto-linking React Native module for target `shapes_fetch`: react-native-approov
  ...
Pod installation complete! There are 31 dependencies from the Podfile and 30 total pods installed.
✔ Installed iOS pod dependencies
  Installing Android Approov SDK library...
Android SDK library 2.6.1(3542) written to /Users/skiph/projects/quickrn/play/shapes_fetch/node_modules/@approov/react-native-approov/android/libs/approov.aar
✔ Installed Android Approov SDK library.
  Installing Android Approov config file...
initial SDK configuration written to /Users/skiph/projects/quickrn/play/shapes_fetch/android/app/src/main/assets/approov.config
✔ Installed Android Approov config file.
  Installing Android Approov properties file...
✔ Installed Android Approov properties file.
  Installing iOS Approov SDK library...
approov sdk -getLibrary /Users/skiph/projects/quickrn/play/shapes_fetch/node_modules/@approov/react-native-approov/ios/Approov.xcframework
iOS SDK library 2.6.0(5851) written to /Users/skiph/projects/quickrn/play/shapes_fetch/node_modules/@approov/react-native-approov/ios/Approov.xcframework
✔ Installed iOS Approov SDK library.
  Installing iOS Approov config file...
initial SDK configuration written to /Users/skiph/projects/quickrn/play/shapes_fetch/node_modules/@approov/react-native-approov/ios/approov.config
✔ Installed iOS Approov config file.
  Installing iOS Approov properties file...
✔ Installed iOS Approov properties file.
✔ Found iOS project.
Auto-linking React Native module for target `shapes_fetch`: react-native-approov
Analyzing dependencies
Downloading dependencies
Generating Pods project
Integrating client project
Pod installation complete! There are 31 dependencies from the Podfile and 30 total pods installed.
⚠ on iOS, Approov integrated apps will only attest properly on a physical device or whitelisted simulator.
⚠ on iOS, when targeting a device, ensure a development team is specified in xcode and the device is properly provisioned.

✔ Approov integration completed successfully
3. Register and run your Approov-protected app
WIth Approov integrated, it's time to run your app to build it and then register it with your Approov service.
The newly integrated apps will run on the Android emulator or iOS simulator you used before, but default Approov security policies require API calls to be made from physical devices. Even though Approov is properly integrated, protected APi calls made from an emulator or simulator will not succeed. Refer to Running on an Android emulator or Running on an iOS simulator for instructions on how to workaround this, if desired, during development.
For our shapes example, we will switch to physical devices to check that Approov is truly protecting our API calls. Follow the instructions below for running on Android and iOS devices.
Android Devices
Connect a physical Android device to your host platform over USB. See Run apps on a hardware device for full instructions. Use adb devices to verify that this device is connected and no other device or emulator is running. Then run the run-android command as before to build the inetgrated app:
$ yarn run react-native run-android
Approov is now integrated, but the fetch shapes API calls are still failing because the app is not registered with Approov and appears as an untrusted API client.
You can view javascript logging within the metro server terminal, or view the Android logcat for more details.
To register the Android app with Approov, the react-native-approov package adds a convenient registration command reg-android to the normal react native command line interface.
$ yarn run react-native reg-android
yarn run v1.22.5
✔ Found Approov CLI.
✔ Found Approov management token.
✔ Registered debug app for 1h:
registering app Shapes
0ryxGxdWRXGcFJO27vqV9dJzQ5Fo/XZ81cdF9ihK9mg=com.shapes-1.0[1]-2974  SDK:Android(2.6.1)
registration successful, expires 2021-03-14 15:92:65
✨  Done in 4.76s.
By default, the debug variant is registered with Approov for one hour, useful for debug and testing.
The app will be recognized by Approov within five minutes. Relaunch the app will normally trigger immediate recognition. When successful, you should see that pressing the fetch button returns random shapes as the Shapes app running on your device is now being recognized as an authentic registered app by the Shapes service.
Congratulations on successfully protecting your API calls with Approov!
iOS Devices
Connect a single iOS device to your host platform over USB. See Run an App on a device for setup instructions. Important: you must set up a development team to set up code signing and establish the device provisioning profile.
Once set, run React Native on iOS with an extra --device flag:
$ yarn run react-native run-ios --device
Approov is now integrated, but the 'fetch' shapes API calls are still failing because the app is not registered with Approov and appears as an untrusted API client.
You can view javascript logging within the Metro server, or view more detailed logging on iOS.
To register the iOS app with Approov, the react-native-approov package adds a convenient registration command reg-ios to the normal react native command line interface.
$ yarn run react-native reg-ios
yarn run v1.22.5
✔ Found Approov CLI.
✔ Found Approov management token.
✔ Registered debug app for 1h:
registering app Shapes
0ryxzWdWtXGcFKO26vqV8dJzU5Fo/XZ82cdF9ihK9mg=com.shapes-1.0[1]-3742  SDK:iOS(2.6.0)
registration successful, expires 2021-03-14 15:92:65
✨  Done in 4.76s.
By default, the Debug configuration is registered with Approov for one hour, useful for debug and testing.
The app will be recognized by Approov within five minutes. Unfortunately, rerunning the app with the run-ios command will not work as expected because react-native uses the lldb debugger to launch the app, and the default Approov security policy will block an app running in a debugger from making protected API calls. Instead, run the deploy-ios command:
$ yarn run react-native deploy-ios
This will deploy but not launch the app. Launch the app by hand on your device, and you should see successful fetch shapes calls:
Congratulations on successfully protecting your API calls with Approov!
Common Issues and Questions
These are some common issues or questions you may have about Approov integration.
Establishing an active Approov session
The React Native Approov check and integrate command and the React Native plugin reg-android and reg-ios commands require an active Approov session to run.
First, you must have access to Approov. For a free 30-day trial, sign up at https://www.approov.io/signup. You will receive an email with instructions on how to activate and setup your Approv account.
You must have an Approov session active with at least developer role capabilities. More information about roles and sessions can be found at installing Approov.
Once a session is established, each react-native-approov command will extend your session for one hour.
Checking and updating Approov-protected API domains
Before integrating Approov into your React Native app, you should add all API domains to your account which need API protection. For our shapes service examples, there is one API domain to protect, shapes.approov.io. You can check which API domains are protected using the `approov CLI:
How do I setup my backend service to check for approved API calls?
API calls protected by Approov will include an Approov token which must be checked. Backend quickstarts for common server frameworks, lanquages, and API gateways can be accessed at Backend APIs.
$ approov api --list
1 API domain:
 shapes.approov.io          type:restricted, alg:HS256
If you need to add API domains to your account:
$ approov api -add shapes.approov.io
WARNING: active role is for account <your-account>
WARNING: adding the API will have an immediate impact on your apps in production. If you wish to continue then please enter YES and return: YES
added new API domain shapes.approov.io with type:restricted, alg:HS256
Refer to Managing API domains for more information.
Certificate public key pinning is built in
Approov provides built in support for automatic public key pinning of any Approov-protected API domains. Once integrated, Approov will independently check the certificates used by your API domains and use them to pin your API connections. Certificates can be updated and rotated using the approov CLI without requiring any changes to your deployed apps.
See Approov Public Key Pinning Configuration for more information.
Customizing Approov token passing
When making API calls, Approov tokens are usually passed in headers. It is important that your React Native app and your backend API coordinate on the name of the header which carries the token. The react-native-approov integrate command will prompt you for a header name:
$ npx @approov/react-native-approov integrate

✔ Found project...
...
✔ Specify Approov token header name … Approov-Token
✔ Specify prefix to add to the Approov token string, if any … Bearer
...

✔ Approov integration completed successfully
The default header name is Approov-Token. You may specify prefix string, for example, Bearer, to prefix the token string. The default prefix is nothing.
Binding authorization to Approov tokens
You may bind an Approov token to the value of any other header field. This is almost always used to bind Approov and Authorization tokens. When bound, the backend service verifies the Approov token and further that the Approov token was bound to only that authorization data value. See Token Binding for additional information.
To enable token binding, specify the binding header data name in the in the react-native-approov integrate command:
$ npx @approov/react-native-approov integrate

✔ Found project...
...
✔ Specify binding header data name, if any … Authorization
...

✔ Approov integration completed successfully
The default is an empty name which means token binding is not being used.
The shapes service example will check for data binding using the Authorization header data if it is specified.
Prefetching an Approov token at app launch
Approov will typically attest a running app instance every five minutes. Each attestation fetches a new Approov token and requires communication between the app instance and the Approov service. By default, the first Approov token fetch occurs at the first API call after launch. Alternatively, you may elect to prefetch an Approov token immediately after launch by saying yes at the prefetch prompt in the react-native-approov integrate command:
$ npx @approov/react-native-approov integrate

✔ Found project...
...
✔ Start token prefetch during app launch? … yes
...

✔ Approov integration completed successfully
Troubleshooting Approov rejections
What can you do if you have integrated and registered your app with Approov and your API calls are still being blocked? Consider the following steps:
Your app is attested every five minutes when active. If you recently registered an app which is running, the new Approov token may not have been fetched yet. Relaunching the app may be all that is required.
Have you made any changes to your app, rebuilt it, and then forgotten to update your Approov registration?
Has your Approov registration expired? The default
react-native reg-androidandreact-native reg-iosregistrations expire after 1 hour.Is the device you are using consistent with your Security Policies? For example, apps running on an Android emulator will be rejected by the default security policy. You may change devices or check the approov security policies and/or change security policies for an individual device.
Approov token data is logged to the console, and additional annotations can be added to help explain why a particular Approov token is invalid and your app is not correctly authenticated with the Approov Cloud Service. The various forms of annotations are described here.
You can also check live metrics to identify the cause of attestation failures.
If still stumped, contact [Approov support] for further assistance.
Handling network errors
Networking calls are not 100% reliable, and regardless of Approov, you should have a strategy in place for when your API calls fail.
Your app will periodically make calls to teh Approov service before making your API calls. These calls will periodically fail, and Approov may retry these calls a few times before reporting a networking error. When Approov reports an error, it will be reported at the source of teh API call - a fetch() or axios call for example. If Approov believes the failure is temporary, for example, poor networking connectivity, the calls will return an HTTP response status code of 503 suggesting that the service is unavailable. If the networking appears to be permanently unavailable, for example, no networking permissions, then the service will throw an error. This is consistent with fetch() idioms, and should be compatible with your existing network failure handling strategy.
Updating Android minimum SDK
Approov requires an Android API minimum SDK of 21. Prior to React Native 0.64, the minimum SDK was 16, so it is likely this value needs to be updated when integrating Approov. To update the minimum SDK, open the top-level build.gradle file at <project>/android/build.gradle, and find and change the minSdkVersion value to 21:
// Top-level build file where you can add configuration options common to all sub-projects/modules.

buildscript {
    ext {
        buildToolsVersion = "29.0.3"
        minSdkVersion = 21
        compileSdkVersion = 29
        targetSdkVersion = 29
        ndkVersion = "20.1.5948944"
    }

    ...
}
This value is checked by the @react-native-approov check command.
Updating Android network permissions
On Android, Approov requires both INTERNET and ACCESS_NETWORK_STATE permissions. It is likely that your React Native app will need to add the ACCESS_NETWORK_STATE permission. Open the <project>/android/src/main/AndroidManifest.xml file, and add the extra permission like this:
<manifest xmlns:android="http://schemas.android.com/apk/res/android"
  package="com.shapes_axios">

    <uses-permission android:name="android.permission.INTERNET" />
    <uses-permission android:name="android.permission.ACCESS_NETWORK_STATE" />

    ...
</manifest>
These permissions are checked by the @react-native-approov check command.
Running on an Android emulator
It is likely you developed your React Native project running on an Android emulator, and after Approov integration, your project will still run on an Android emulator. However, Approov's default security policies will reject any app running in an Android emulator. You can workaround this behavior in several ways:
Run your app on a physical device.
Whitelist the emulator so the Approov service always returns a valid token.
This requires you to first identify the app's device ID running on the emulator (see Extracting the Device ID). Once you have extracted the device ID, run an Approov device command to set add the device whitelisting:
$ approov device -add 123-deviceID-abc== -policy default,whitelist,all
Once the app is whitelisted on the emulator, you do not have to register your app before receiving valid Approov tokens.
- Change your account's rejection policies to allow emulators.
With this approach, Approov will attest the app running on the emulator the same as any other device. You must register your app each time it changes in order to receive valid tokens. If you forget to revoke this rejection policy when you deploy your app to production, you may be running with looser security than you intended. To learn more about this approach, see Rejection Policies.
Note, it is strongly recommended that you test your Approov-integrated app on multiple physical devices before deploying to production.
Changing your deployment target on iOS
Both React Native and Approov require a minimum deployment target OS of 10.0, so it is unlikely you need to change this value.
To set the deployment target, open the iOS project in xcode and go to the General settings for your app. In the Deployment Info section, you will see a checked iPhone tab with a deployment value next to it. Select the deployment value and change as needed.
The minimum deployment target is checked by the @react-native-approov check command.
Disabling Flipper on iOS
Flipper is a mobile debugger which is included by default in React Native apps.. Unfortunately, it is not currently compatible with physical iOS devices, and it tends to break most React Native builds. To disable flipper, go into the iOS podfile at <project>/ios/podfile and ensure that the use_flipper!() call is commented out (has a # preceding it on the same line) like this:
require_relative '../node_modules/react-native/scripts/react_native_pods'
require_relative '../node_modules/@react-native-community/cli-platform-ios/native_modules'

install! 'cocoapods', :deterministic_uuids => false, :warn_for_unused_master_specs_repo => false

platform :ios, '10.0'

target 'shapes_axios' do

  ...

  # Enables Flipper.
  #
  # Note that if you have use_frameworks! enabled, Flipper will not work and
  # you should disable the next line.
  # use_flipper!()

  ...

end
Running on an iOS simulator
It is likely you developed your React Native project running on an iOS simulator, and after Approov integration, your project will still run on an iOS simulator. However, Approov is unable to properly attest apps running on an iOS simulator, so it will always return an invalid Approov token. You can workaround this behavior in several ways:
Run your ap on a physical device.
Whitelist the simulator so the Approov service always returns a valid token.
This requires you to first identify your app's device ID on the simulator (see Extracting the Device ID). Once you have extracted the device ID, run an Approov device command to add the device whitelisting:
$ approov device -add 123-deviceID-abc== -policy default,whitelist,all
Once your app is whitelisted on the emulator, you do not have to register your app before receiving valid Approov tokens.
Note, it is strongly recommended that you test your Approov-integrated app on multiple physical devices before deploying to production.
Running on an iOS device
To truly test Approov API proetction, you should be running your integrated app on a real device. Unlike running in on a simulator, running on a physical device requires code signing and device provisioning.
Connect a single iOS device to your host platform over USB and follow the instructions to Run an App on a device You must set up a development team; learn more on the Signing & Capabilities Workflow.
After integrating with Approov, there is a subtle problem running your app using react-native run-ios --device. Everything builds and runs properly, but because react native run-ios uses lldb to launch your app, Approov will always reject the app since it launcheded in a debugger. To work around this, after building your app with run-ios, you must then register your updated app, deploy the app, and finally launch it manually on the device. Here's the command sequence:
$ yarn run react-native run-ios --device
$ yarn run react-native reg-ios
$ yarn run react-native deploy-ios
This can get tedious if you are doing frequent debug loops. Consider whitelisting your app on your development device. This requires you to first identify the app's device ID running on the device (see Extracting the Device ID). After you have extracted the device ID, run an Approov device command to set add the device whitelisting:
approov device -add 123-deviceID-abc== -policy default,whitelist,all
Once your app is whitelisted on the device, you do not have to register your app before receiving valid Approov tokens. Though this does not test Approov attestation, you can now just use the single react-native run-ios --device command to build and run your app.
You can use this same approach when developing on a simulator; see Running on an iOS simulator.
Using Bitcode with iOS
We recommend that you use the native version of the Approov SDK unless you have to use bitcode for other reasons in your release process. The bitcode version can be installed during Approov integration by saying yes at the bitcode prompt:
$ npx @approov/react-native-approov integrate

✔ Found project...
...
✔ Use bitcode for iOS builds (not typical)? … yes
...

✔ Approov integration completed successfully
For React Native, the Approov SDK is always delivered ass an XCFramework. See Getting the iOS SDK as an XCFramework for additional information on the Approov SDK and bitcode.
Make sure you enable bitcode for all configurations in your project. To enable bitcode, open the iOS project in xcode and go to the Build Settings tab for your app. In the Build Options section, checked Enable Bitcode for all configurations.
If you do require bitcode, it is generally easier to develop your app and integrate Approov without it, and then switch to bitcode when you are closer to release.
Other iOS considerations
React Native setup iOS projects using workspaces, so when opening a React Native iOS project in xcode, always open it by selecting the <project>.xcworkspace and not the project.
The react-native-approov commands assume that the name of the iOS workspace is also used as the project's only scheme name. Multiple configurations, such as Debug and Release are supported but not multiple schemes. Please contact support if this is a problem.
Next steps with Approov
Other Approov features you might want to explore:
- Managing your app registrations
- Managing the pins on the API domains to ensure that no Man-in-the-Middle attacks on your app's communication are possible.
- Updating your Security Policy that determines the conditions under which an app will be given a valid Approov token.
- Learning how to Manage Devices that allows you to change the policies on specific devices.
- Understanding how to provide access for other Users of your Approov account.
- Using the Metrics Graphs to see live and accumulated metrics of devices using your account and any reasons for devices being rejected and not being provided with valid Approov tokens. You can also see your billing usage which is based on the total number of unique devices using your account each month.
- Using Service Monitoring emails to receive monthly (or, optionally, daily) summaries of your Approov usage.
- Learning about automated approov CLI usage.
- Investigating other advanced features, such as Offline Security Mode, DeviceCheck Integration, SafetyNet Integration and Android Automated Launch Detection.
Removing Approov from your App
Removing Approov integration for your app just requires removing the @approov/react-native-approov package:
$ yarn remove @approov/react-native-approov
In addition to the package, the Approov SDKs, base configurations, and property files will be removed.
Which Javascript network libraries are supported?
React Native natively implements the XMLHttpRequest (XHR) object. The built in fetch() call uses XHR calls as to popular networking libraries such as axios and frisbee. Any networking calls using XHR route through native React Native and are fully supported by Approov integration.
Networking libraries which are implemented using independent networking stacks rather than XHR do not use React Native networking and are not supported by Approov out of the box. One example is the rn-fetch-blob package, though there is some experimental work to make it compatible. If you have a need to use such a library, contact support, and we will work with you to complete the integration.
Why isn't Expo supported?
Expo is a framework and a platform for universal React applications. There are two expo workflows - managed and bare. Managed apps are built with the expo-cli and are not compatible with React Native native modules. Because of this limitation, Approov cannot function properly in the expo managed environment.
Expo's bare environment provides support for Expo SDKs without the restrictions imposed by the managed environment. This workflow may be compatible with Approov, and we are investigating future support for Approov in this environment.
Integration may fail on Linux when Node installed as a Snap package
There have been issues reported on Linux after installing Node using the Snap package, for example, child_process spawn missing stdout. This may cause package installations to fail when running react-native-approov example and integrate commands. The suggested workaround is to remove the snap node package and reinstall node using the linux distribution's package manager, for example, installing node on ubuntu 20.04.
Getting additional help
If you encounter issues when using react-native-approov which you cannot resolve using this document, please review the React Native developer docs and the Approov user docs for more detailed information.
If you are still stuck, please file an issue at https://github.com/approov/quickstart-react-native/issues, or contact support at https://approov.zendesk.com/hc/en-gb/requests/new.
Command Reference
Approov integration is controlled by the react-native-approov command and several plugins to the react-native CLI.
React-Native-Approov Commands
The command by-itself lists the available sub-commands:
$ npx @approov/react-native-approov

Usage: react-native-approov [options] [command]

Options:
  -V, --version                  output the version number
  -h, --help                     display help for command

Commands:
  check                          Check Approov integration in the current app (special)
  example [options] [app] [dir]  Copy a quickstart example app into a new directory
  integrate [options]            Integrate Approov into the current app
  help [command]                 display help for command
react-native-approov example
Copy a prepared example into your filesystem using the example sub-command:
$ npx @approov/react-native-approov example --help

Usage: react-native-approov example [options] [app] [dir]

Copy a quickstart example app into a new directory

Options:
  --no-prompt  do not prompt for user input
  -h, --help   display help for command
react-native-approov check
Check that your React Native project is ready for Approov integration or is already properly integrated using the check sub-command:
bsim:shapes_fetch skiph$ npx @approov/react-native-approov check --help
Usage: react-native-approov check [options]

Check Approov integration in the current app (special)

Options:
  -h, --help  display help for command
react-native-approov integrate
Integrate Approov into your React Native project using the integrate sub-command:
$ npx @approov/react-native-approov integrate --help

Usage: react-native-approov integrate [options]

Integrate Approov into the current app

Options:
  --token.name <name>      name of Approov token field (default: "Approov-Token")
  --token.prefix <string>  prefix prepended to Approov token string (default: "")
  --binding.name <name>    name of binding field (default: "")
  --init.prefetch          start token fetch at app launch (default: false)
  --bitcode                use bitcode for iOS builds (default: false)
  --no-prompt              do not prompt for user input
  -h, --help               display help for command
React-Native Plugin Commands
Several sub-commands are added to the react-native CLi to support Approov.
react-native reg-android
Register the latest Android app with Approov:
react-native reg-android

register Android debug APK

Options:
  --variant <variant>       select build variant (default: "debug")
  --expireAfter <duration>  expire registration after duration (default: "1h")
  -h, --help                output usage information

Example usage:
  register Android debug APK for 1h (default):
  react-native reg-android

  register Android debug APK for 1 year, 2 days, 3 hours, and 4 minutes:
  react-native reg-android --expireAfter 1y2d3h4m
react-native reg-ios
Register the latest iOS app with Approov:
register iOS debug device IPA

Options:
  --configuration <configuration>  select build configuration (default: "Debug")
  --expireAfter <duration>         expire registration after duration (default: "1h")
  -h, --help                       output usage information

Example usage:
  register iOS debug device IPA for 1h (default):
  react-native reg-ios

  register iOS debug device IPA for 1 year, 2 days, 3 hours, and 4 minutes:
  react-native reg-ios --expireAfter 1y2d3h4m
react-native deploy-ios
Deploy the latest iOS app to a device without launching it:
react-native deploy-ios

deploy iOS debug app to device

Options:
  --configuration <configuration>  select build configuration (default: "Debug")
  -h, --help                       output usage information

Example usage:
  deploy iOS Release app to device:
  react-native deploy-android --configuration Release
Release Notes
Please use https://github.com/approov/quickstart-react-native/issues to request assistance or suggest new features.
Version 2.2.0
- Provides an easy integration of Approov API threat protection into most React Native apps.
- Checks that your React Native app meets the minimum requirements for Approov integration,
- Integrates Approov into your app without writing additional code,
- Registers and successfully deploys your app onto Android and iOS devices.
- Supports all XMLHttpRequest networking such as
fetch,axios, andfrisbee. - Adds on-the-fly certificate pinning updates not requiring an App restart.
- Provides several React Native examples interfacing with an Approov-enabled backend service.
Version 1.x
- Supports manual integration of Approov into react native devices.
License

Copyright © 2021 CriticalBlue, Ltd.