README

@sketchmine/sketch-builder
The sketch-builder is the centerpiece of this library. It takes control over generating .sketch files from any HTML that is provided to the library. It can draw a symbol library or a plain web page. The orchestration for drawing the whole library is done by the @sketchmine/library itself.
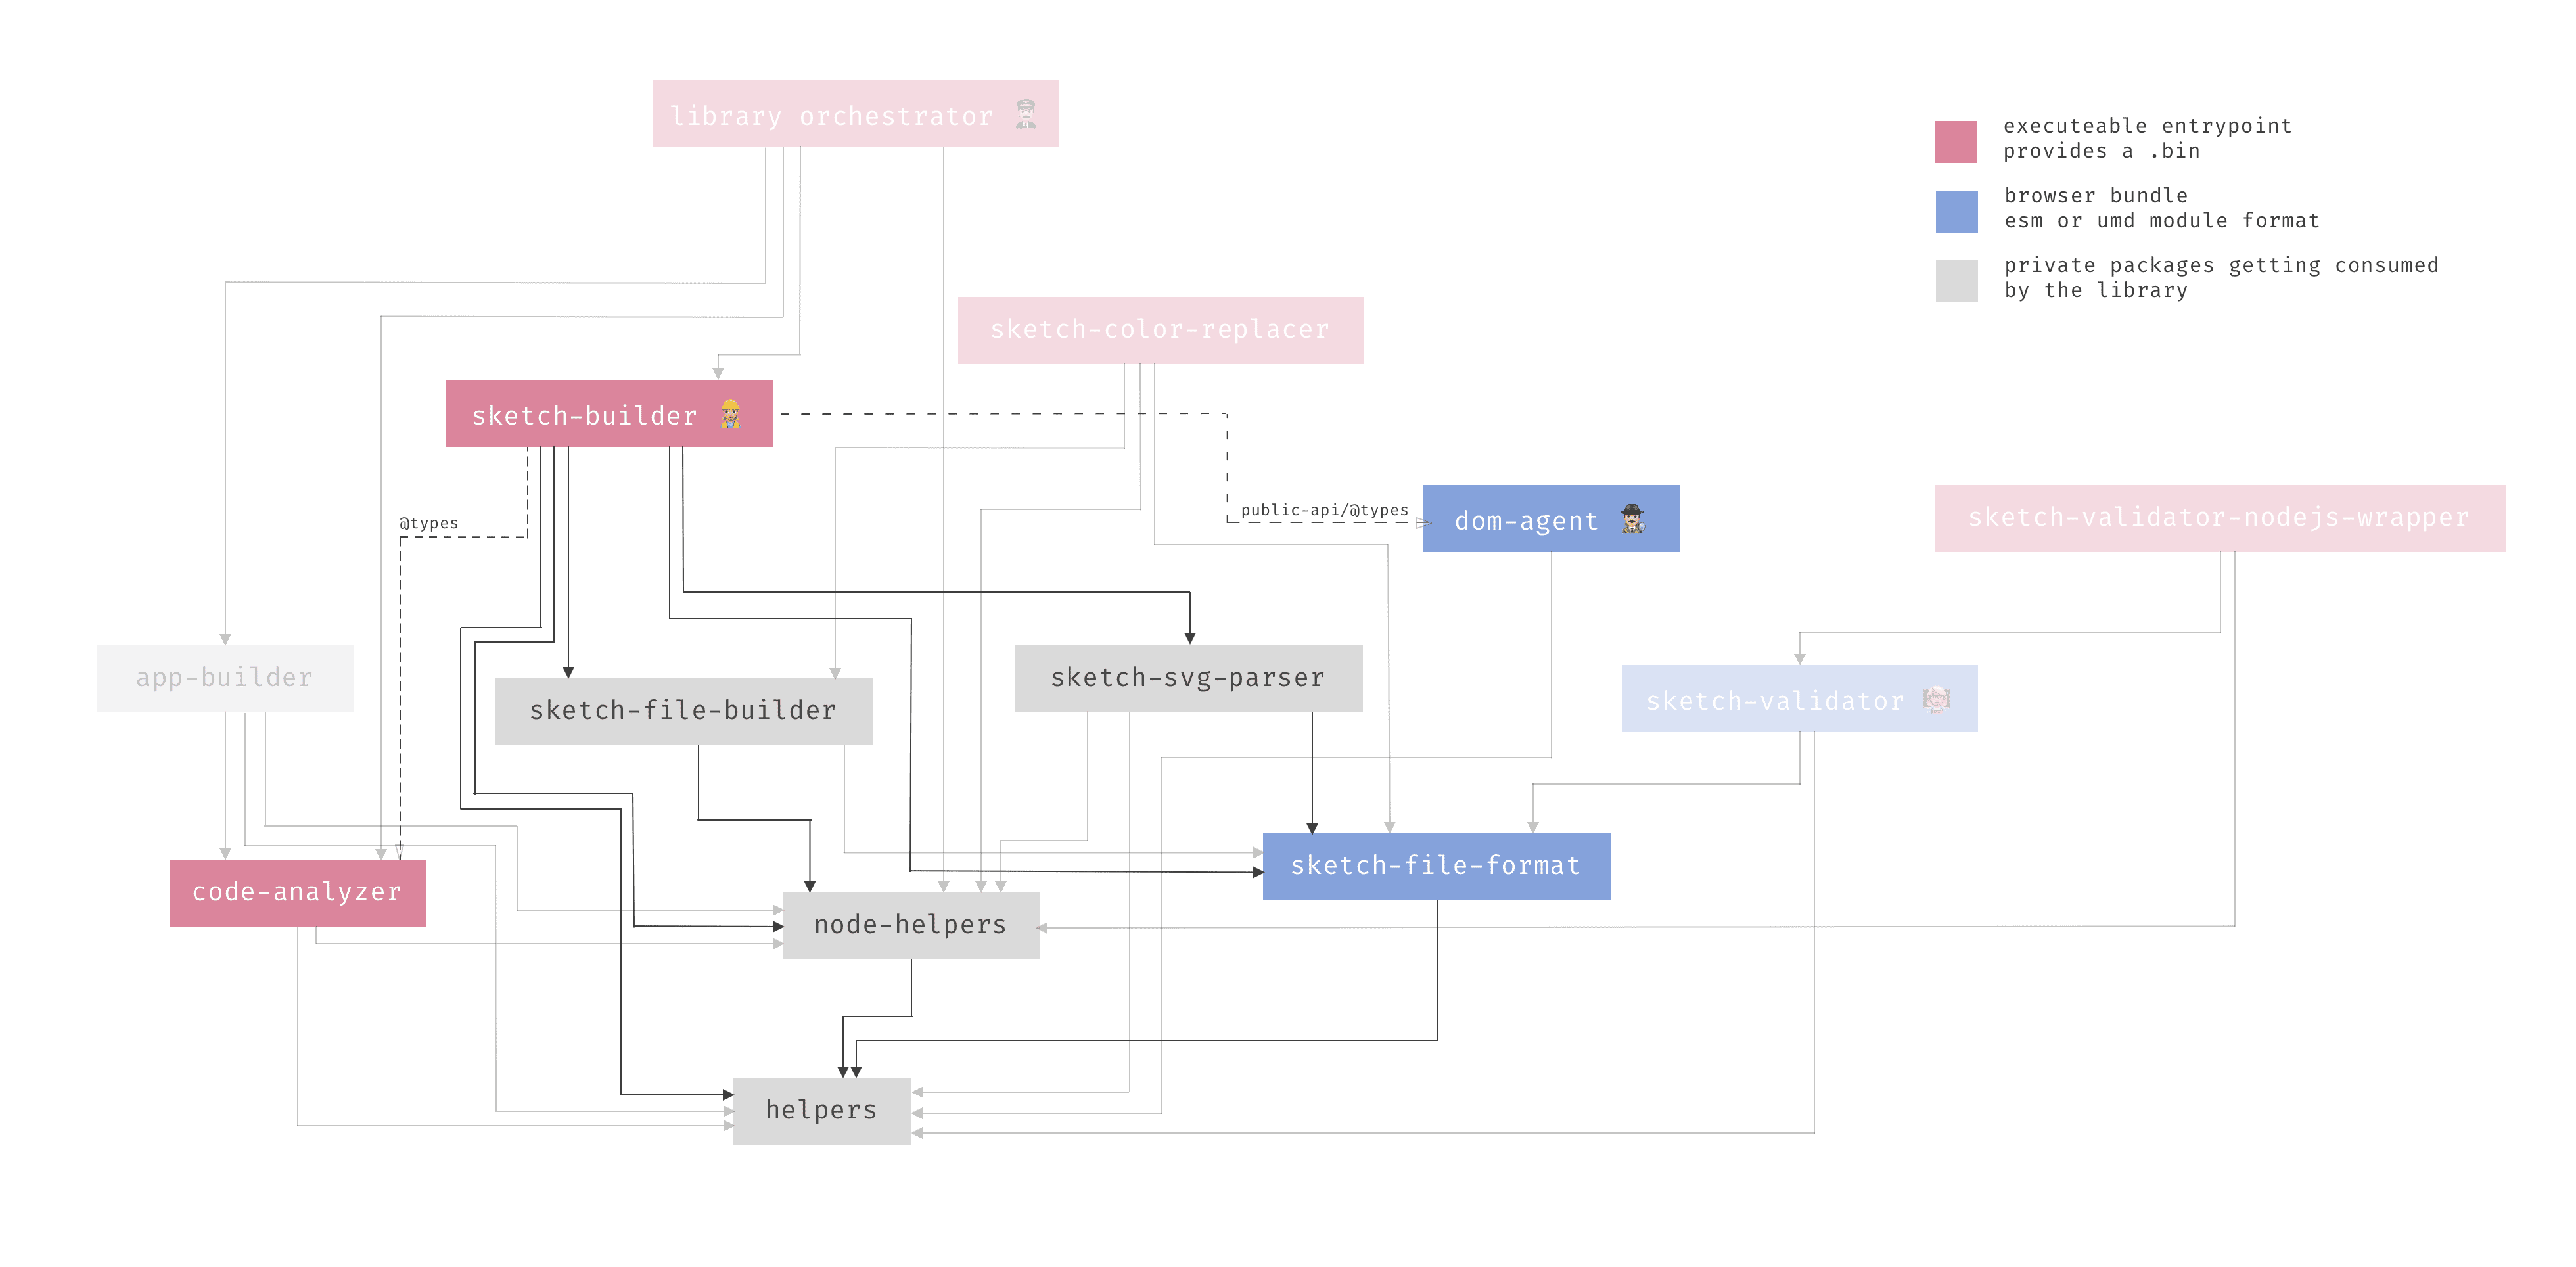
Dependency graph
The CLI
The package can be consumed in two ways. It can be executed via the CLI (command line interface). You have to install the package with Yarn or NPM from @sketchmine/sketch-builder and then proceed with npx skm-sketch-builder -c ... Therefore you have to provide at least one option:
CLI options
| flag | description |
|---|---|
| -h, --help | displays the help page 📓 |
| -c, --config | path to the configuration file ./config.json |
The config.json can have one of two configurations:
- Drawing any other page
- Drawing the Symbols Library
Drawing a page
The first option is to configure it to draw any webpage. A sample configuration for this is provided in the config.smaple-page.json.
TL;DR Configuration options
The basic configuration for drawing a page would look like the folowing JSON structure.
- The Page to be drawn have to be provided via the
hostproperty. - The
rootElementtells the drawer where to start can be any DOM Node. - The
pagesarray is capable for drawing multiple pages (get joined with thehostoptions) - Last but not least the
outFilespecify a folder and a file where it should be written to.
The pages array provides the option to draw multiple pages. if only the root page should be drawn pass an empty string or a /.
{
  "host": {
    "protocol": "https",
    "name": "barista.dynatrace.com"
  },
  "rootElement": "body",
  "pages": ["components/button"],
  "outFile": "_library/barista-dynatrace.sketch"
}
Advanced configuration
View port
For drawing the page a headless chromium called puppeteer is used that can be configured via the chrome property in the config.json.
You can pass the viewport options according to the puppeteer viewport specs.
{
  ...
  "chrome": {
    "defaultViewport": {
      "width": 1200,
      "height": 600,
      "deviceScaleFactor": 1,
      "isMobile": false,
      "hasTouch": false,
      "isLandscape": false
    }
  }
}
Preview image for Sketch
If you want a custom preview image for your Sketch file you can pass a path to any .png file with the "previewImage": "path/to/preview.png", property in the configuration JSON.
Custom dom-agent
If you have your own implementation of the @sketchmine/dom-agent you can provide the path to the source file that should be injected via the "agent": "/path/to/agent.js" property.
Meta infromation for symbol detection
Currently only supported for drawing the @dynatrace library!
With the property "metaInformation": "path/to/meta.json" set (this includes the path to the meta information that is generated with the @sketchmine/code-analyzer and holds all symbols) symbol detection can be processed.
Drawing a symbol library
To draw a library with symbols you need to implement an API that listens to the events that are described in the builder-api. The sample configuration for that is provided under config.smaple-library.json.
In our environment, the property library points to an Angular app that is served under http://localhost:4200. This application is built by the @sketchmine/app-builder. There you can see a sample implementation of the API communication that provides the sketch builder with the information about when to draw and which user interaction should be triggered (for example, clicking an element to open a dialog that should be drawn as a Sketch symbol).
Further, rootElement should be changed to get the first root element of the application.
Last but not least, the type information for the configuration is located under sketch-builder.d.ts.
How to develop
You need to adjust the config.json to your needs, as described in the previous section.
After a yarn install is performed you can go ahead and build it.
How to build
To build the package, Rollup.js is used as a module bundler. The configuration can be found in the rollup.config.js file and is orchestrated by the Yarn package manager.
The package bundle is formatted as commonjs and is meant to be consumed only by Node.js applications.
The build can be started with the following two commands:
yarn buildfor building the package.yarn devfor building and watching the sources of the package.
Running the package
The package can be executed with node like node lib/bin.js. If you need to orchestrate the builder in the script you can import it and provide the config to the main function as Object.
Debugging
For debugging, you can specify specific debug spaces with DEBUG=${space1},${space2},${space3}... node lib/bin or just set DEBUG to true.
If you want to speed up the sketch-builder, you can skip the headless Chrome part and use a static JSON file from the fixtures.
The fixture file is located under /tests/fixtures/library.json.
If you pass the Node environment TRAVERSER=skip-traverser node ... to the node command the fixture file is used.
Available debug spaces for granular logging:
debug(general information about all the drawn symbols with measurements)dom-traverser(result of the DOM Traverser)
Linting
The source code of this package will be linted by our CI environment. To ensure a coding standard and quality use the configured linter tslint. This package extends from the tslint-config-airbnb and the linting configuration extends from the root tslint.json.
Run yarn lint to execute the linter.
Testing the package
To ensure that the sketch-builder is working, write tests and put them in a properly named file.
Note: All tests based on this package should be wrapped in a describe method with the prefix: [sketch-builder] › ... like the following:
// import statements

describe('[sketch-builder] › ${folder} › ${description of the suite}', () => {
  // your tests should be placed here
});
The Jest framework has been selected for tests.
Run yarn test to execute all tests specified for the sketch-builder. Run yarn test -f filename.test to execute only tests that match the provided RegExp for the filename.