README
authing.js
Authing 的 JavaScript SDK 支持 Angular.js,React.js,Vue.js 以及 浏览器原生环境。我们提供了完全一致的接口.

安装

![]()
NPM
当构建大规模应用时,我们推荐使用 npm 进行安装, 它可以与一些模块打包工具很好地配合使用,如 Webpack, Browserify。
# latest stable
$ npm install authing-js-sdk --save
CDN
<script src="https://cdn.jsdelivr.net/npm/authing-js-sdk/dist/authing-js-sdk-browser.min.js"></script>
初始化
先从 Authing 控制台 中获取用户池 ID。
为保证 secret 安全,在服务端的初始化和客户端的初始化有所不同。
服务端
服务端可直接传入 userPoolId 和 secret。
const auth = new Authing({
    userPoolId: 'your_userpool_id',
    secret: 'your_userpool_secret'
});

auth.register({...}).then(info => {})
auth.login({...}).then(info => {})
客户端
客户端只允许调用部分函数,无权调用一些用户池管理函数,如删除用户,获取全部用户列表等。
客户端只需传入用户池 ID
- userPoolId - 用户池 ID,可从 Authing 控制台中获取。
示例
const auth = new Authing({
    userPoolId: 'your_userpool_id'
});

auth.register({...}).then(info => {})
auth.login({...}).then(info => {})
使用方法
Authing SDK 的所有 API 都支持 Promise。
const Authing = require('authing-js-sdk');

// 对 用户池 ID 和 用户池 Secret 进行验证,获取 Access Token
const auth = new Authing({
  userPoolId: 'your_userpool_id',
    secret: 'your_app_secret',
});

auth
  .login({
    email: 'test@testmail.com',
    password: 'testpassword'
  })
  .then(function(user) {
    console.log(user);
  })
  .catch(function(error) {
    console.log(error);
  });
如果你使用 ES6+ 推荐用 await 处理异步,示例如下:
import Authing from 'authing-js-sdk';

const main = async () => {
  //使用async时需要使用 try...catch... 捕捉错误

  let auth = new Authing({
    userPoolId: 'your_userpool_id',
    secret: 'your_app_secret'
  });

  if (auth) {
    let user;

    try {
      user = await auth.login({
        email: 'test@testmail.com',
        password: 'testpassword'
      });
    } catch (error) {
      console.log('登录失败:', error);
    }

    if (user) {
      console.log('login success');
    } else {
      console.log('login failed');
    }
  }
};

main();
超时说明
Authing SDK 的默认请求超时时间是 10s,如果想加大或减小超时时间,请在 SDK 中指定 timeout 参数,以下以在浏览器中初始化为例:
const auth = new Authing({
    userPoolId: 'your_userpool_id',
    timeout: 20000 // 20 秒超时
});

auth.register({...}).then(info => {})
auth.login({...}).then(info => {})
其他参数
- preflight - 是否开启网络状况预检,默认为 false。此参数适用于检查用户的网络是否屏蔽了 authing.cn 这个域名(某些企业的内网会屏蔽这个域名),检查成功不进行任何通知,检查失败后会调用传入的错误处理函数。执行预检之后会导致 SDK 初始化速度变慢,请谨慎使用。
- cdnPreflight - 是否开启 CDN 网络状况预检,默认为 false。此参数适用于检查用户的网络是否可以访问七牛云 CDN(某些开了代理的场景下无法访问),检查成功不进行任何通知,检查失败后调用传入的错误处理函数。执行 CDN 预检之后会导致 SDK 初始化速度变慢,请谨慎使用。
- timeout
- 超时时间,默认为 10000(10 秒)。
- onInitError,
function(err) {}- 错误处理函数,用于处理初始化失败错误、预检错误。
- passwordEncPublicKey
- PEM 格式密码加密公钥,默认为 Authing 官方的加密公钥。私有化部署用户需要传入自己的加密公钥。
- cdnHost
- 图片 CDN host,供私有化部署了 Authing 服务的开发者填写。示例: https://mybucket.yourcdndomain.com,末尾请不要带 "/" 。
API
全部 API 请参考:Javascript 版用户接口, Node.js 版用户接口。
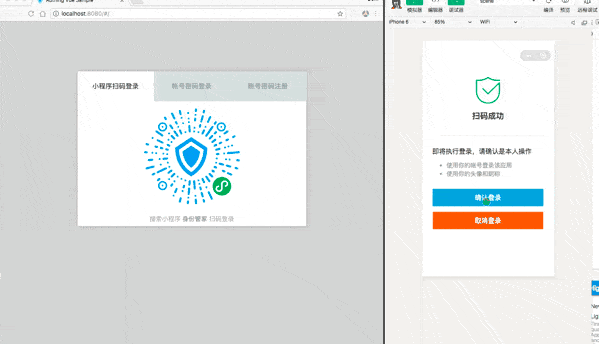
小程序扫码登录
小程序扫码登录指使用 Authing 小程序 身份管家 执行微信登录。
示例:小程序扫码登录
基础用法
使用 startWXAppScaning 方法:
import Authing from 'authing-js-sdk';

const authing = new Authing({
    userPoolId: 'your_userpool_id'
});

authing.startWXAppScaning({
    enableFetchPhone: true // 启用获取手机号
    mount: 'qrcode-node', //二维码挂载点的 HTML 元素 ID,如不写则默认漂浮在文档中间
});
扫码完成后会自动跳到用户配置的 URL 上。
参数说明
authing.startWXAppScaning({
  mount: 'qrcode-node', // 二维码挂载点,如不写则默认漂浮在文档中间
  redirect: true, // 是否执行跳转(在用户后台配置的 URL),默认为 true,相关用户信息回传至 url 上
  onSuccess: function(res) {}, // 登录成功后回调函数,redirect 为 true 时不回调此函数
  onError: function(error) {}, // 登录失败后回调函数,一般为网络问题
  onIntervalStarting: function(intervalNum) {}, // 轮询时的回调函数,intervalNum 为 setInterval 返回的数值,可使用 clearInterval 停止轮询
  onQRCodeLoad: function(qRcode) {}, // 小程序码获取成功后的回调函数,qRcode 为小程序码的相关信息,是一个对象
  onQRCodeShow: function(qRcode) {}, // 小程序码图片加载完成后的回调函数,qRcode 为小程序码的相关信息,是一个对象
  interval: 1500, // 每隔多少秒检查一次,默认 1500

  enableFetchPhone: false, // 是否支持获取手机号(使用小登录扫码)
  useSelfWxapp: false, // 私有化部署了小程序的用户请将此参数设置为 true

  tips: '使用微信扫码登录', // 提示信息,可写 HTML
  successTips: '扫码成功', // 扫码成功的提示信息,默认:扫码成功
  successRedirectTips: '扫码成功,即将跳转', // 扫码成功后跳转前的提示信息,默认:扫码成功,即将跳转
  retryTips: '重试', // 重试扫码的提示信息,默认:重试
  failedTips: '网络出错,请重试' // 扫码失败的提示信息,默认:网络出错,请重试
});
若想动态修改提示信息,请使用以下四个方法:
  // 修改重试扫码的提示信息
  authing.updateRetryTips(tips: string)

  // 修改扫码失败的提示信息
  authing.updateFailedTips(tips: string)

  // 修改扫码成功的提示信息
  authing.updateSuccessTips(tips: string)

  // 修改扫码成功后跳转前的提示信息
  authing.updateSuccessRedirectTips(tips: string)
了解更多,请查看:使用小程序扫码登录
APP 扫码登录 Web
基础用法
使用 qrcode.startScanning 方法:
import Authing from 'authing-js-sdk';

const authing = new Authing({
    userPoolId: 'your_userpool_id'
});

authing.qrcode.startScanning({
  onSuccess(userInfo) {
    alert('扫码成功,请打开控制台查看用户信息')
    console.log(userInfo);
    // 存储 token 到 localStorage 中
    localStorage.setItem('token', userInfo.token);
  }
})
这会在将用于扫描登录的二维码到文档中间:

参数说明
authing.qrcode.startScanning({
    mount: '', // 可选,二维码挂载点,如不写则默认漂浮在文档中间
    interval: 1000, // 可选,轮询间隔时间,默认为 800 ms

    onPollingStart: (intervalNum) => {},
    onResult: (res) => {},
    onScanned: (userInfo) => {},
    onSuccess: (data) => {
        const { ticket, userInfo } = data;
    },
    onCancel: () => {},
    onExpired: () => {},
    onError: (data) => {},

    onQRCodeShow: (qrcode) => {},
    onQRCodeLoad: (qrcode) => {},
    onQRCodeLoadFaild: (error) => {},
    tips: '使用 <strong> APP </strong> 扫码登录',
    scannedTips: '用户已扫码,等待确认',
    canceledTips: '用户取消授权',
    expiredTips: '二维码已过期',
    successTips: '扫码成功',
    retryTips: '重试',
    failedTips: '网络出错,请重试'
})
完整参数:
- options
- mount
可选。挂载点 Dom ID,如不写则默认漂浮在文档中间。 - interval: 可选。轮询时间间隔,单位为 ms,默认为 800 ms。
- onPollingStart: 轮询开始时会被回调,且只会被调用一次。参数 intervalNum 为 setInterval 返回的数值,可使用 clearInterval 停止轮询。
- onResult: 每次查询获取到数据都会回调,参数 res 示例如下:
- mount
{
    "code": 200,
    "message": "查询二维码状态成功",
    "data": {
        "qrcodeId": "5e05f6027fde537d950f7da9", // 二维码 ID
        "scanned": false, // 是否已被扫描
        "expired": false, // 是否已过期
        "success": false, // 是否同意授权
        "canceled": false, // 是否取消授权
        "status": 0, //   - 0: 未知状态,即还未扫码,或者已经扫码但用户还没有点击同意授权或者取消授权。- 1: 用户同意授权。-1: 用户取消授权
        "userInfo": {},
        "ticket": "", // 可用于换取完整用户信息,仅在 APP 端用户同意授权之后才返回
        "description": "二维码还没有被扫描"
    }
}
- onScanned: 用户扫码时会被回调,且只会被回调一次。参数 userInfo 只包含了用户昵称和头像,开发者可以将其展示在扫码框中,如下所示:

- onSuccess: 用户同意授权之后将会被回调,且只会回调一次,之后轮询结束。参数 data 是一个字典,包含两个字段:ticket 和 userInfo。出于安全性考虑,默认情况下,userInfo 只会包含昵称(nickname)和头像(photo)两个字段,开发者也可以在后台配置使其返回完整用户信息,详情见下文。 ticket 可以用来换取完整的用户信息,相关接口见下文。
- onCancel:用户取消授权只会会被回调,且只会回调一次,之后轮询结束。
- onExpired:二维码失效时被回调,且只会回调一次,之后轮询结束。
- onError:每次查询失败时都会被回调。参数 data 示例如下:完整的错误代码可见 {"code": 2241,"message": "二维码不存在","data": null}
- onQRCodeLoad:二维码首次成功加载时回调。参数 qrcode 是一个字典,包含两个字段:qrcodeId、qrcodeUrl。
- onQRCodeShow:二维码首次出现在盘面上时回调。参数 qrcode 同上。
- onQRCodeLoadFaild:二维码加载失败时会被回调。
了解更多
了解更多,请查看:使用 APP 扫码登录 Web
自定义请求链接
Authing 构造函数包含一个名为 host 对象,可接收自定义的请求链接(适合私有部署 Authing 的用户使用),使用方法如下:
const auth = new Authing({
  userPoolId: 'xxxx',
  secret: 'xxxxxx',
  host: {
    user: 'https://users.authing.cn/graphql',
    oauth: 'https://oauth.authing.cn/graphql'
  }
});
host 对象中 user 和 oauth 的默认值是 Authing 官方的请求链接:
Node.js 其他生态中间件
当在浏览器使用时,我们会将用户 token 以 '_authing_token' 字段存在 localStorage 中,后面都会从 localStorage 中读取并进行验证。
了解更多报错的详情,请查看错误代码。
获取用户池 ID 和用户池 Secret,请点击这里。
Get Help
- Join us on Gitter: #authing-chat
License
MIT