README
Cordova Plugin Camera Preview
Cordova plugin that allows camera interaction from Javascript and HTML
Releases are being kept up to date when appropriate. However, this plugin is under constant development. As such it is recommended to use master to always have the latest fixes & features.
PR's are greatly appreciated. Maintainer(s) wanted.
Features
- Start a camera preview from HTML code.
- Maintain HTML interactivity.
- Drag the preview box.
- Set camera color effect.
- Send the preview box to back of the HTML content.
- Set a custom position for the camera preview box.
- Set a custom size for the preview box.
- Set a custom alpha for the preview box.
- Set the focus mode, zoom, color effects, exposure mode, white balance mode and exposure compensation
- Tap to focus
Installation
Use any one of the installation methods listed below depending on which framework you use.
To install the master version with latest fixes and features
cordova plugin add https://github.com/cordova-plugin-camera-preview/cordova-plugin-camera-preview.git

ionic cordova plugin add https://github.com/cordova-plugin-camera-preview/cordova-plugin-camera-preview.git

meteor add cordova:cordova-plugin-camera-preview@https://github.com/cordova-plugin-camera-preview/cordova-plugin-camera-preview.git#[latest_commit_id]

<plugin spec="https://github.com/cordova-plugin-camera-preview/cordova-plugin-camera-preview.git" source="git" />
or if you want to use the last released version on npm
cordova plugin add cordova-plugin-camera-preview

ionic cordova plugin add cordova-plugin-camera-preview

meteor add cordova:cordova-plugin-camera-preview@X.X.X

<gap:plugin name="cordova-plugin-camera-preview" />
iOS Quirks
If you are developing for iOS 10+ you must also add the following to your config.xml
<config-file platform="ios" target="*-Info.plist" parent="NSCameraUsageDescription" overwrite="true">
  <string>Allow the app to use your camera</string>
</config-file>

<!-- or for Phonegap -->

<gap:config-file platform="ios" target="*-Info.plist" parent="NSCameraUsageDescription" overwrite="true">
  <string>Allow the app to use your camera</string>
</gap:config-file>
Android Quirks (older devices)
When using the plugin for older devices, the camera preview will take the focus inside the app once initialized.
In order to prevent the app from closing when a user presses the back button, the event for the camera view is disabled.
If you still want the user to navigate, you can add a listener for the back event for the preview
(see onBackButton)
Methods
startCamera(options, [successCallback, errorCallback])
Starts the camera preview instance.
Options: All options stated are optional and will default to values here
x- Defaults to 0y- Defaults to 0width- Defaults to window.screen.widthheight- Defaults to window.screen.heightcamera- SeeCAMERA_DIRECTION- Defaults to front cameratoBack- Defaults to false - Set to true if you want your html in front of your previewtapPhoto- Defaults to true - Does not work if toBack is set to false in which case you use the takePicture methodtapFocus- Defaults to false - Allows the user to tap to focus, when the view is in the foregroundpreviewDrag- Defaults to false - Does not work if toBack is set to falsedisableExifHeaderStripping- Defaults to false - Android Only - Disable automatic rotation of the image, and let the browser deal with it (keep reading on how to achieve it)storeToFile- Defaults to false - Android Only - Capture images to a file and return back the file path instead of returning base64 encoded data.
let options = {
  x: 0,
  y: 0,
  width: window.screen.width,
  height: window.screen.height,
  camera: CameraPreview.CAMERA_DIRECTION.BACK,
  toBack: false,
  tapPhoto: true,
  tapFocus: false,
  previewDrag: false
};

CameraPreview.startCamera(options);
When setting the toBack to true, remember to add the style below on your app's HTML or body element:
html, body, .ion-app, .ion-content {
  background-color: transparent;
}
When both tapFocus and tapPhoto are true, the camera will focus, and take a picture as soon as the camera is done focusing.
stopCamera([successCallback, errorCallback])
CameraPreview.stopCamera();
switchCamera([successCallback, errorCallback])
CameraPreview.switchCamera();
show([successCallback, errorCallback])
CameraPreview.show();
hide([successCallback, errorCallback])
CameraPreview.hide();
takePicture(options, successCallback, [errorCallback])
quality defaults to 85 and specifies the quality/compression value: 0=max compression, 100=max quality.
CameraPreview.takePicture({width:640, height:640, quality: 85}, function(base64PictureData){
  /*
    base64PictureData is base64 encoded jpeg image. Use this data to store to a file or upload.
    Its up to the you to figure out the best way to save it to disk or whatever for your application.
  */

  // One simple example is if you are going to use it inside an HTML img src attribute then you would do the following:
  imageSrcData = 'data:image/jpeg;base64,' +base64PictureData;
  $('img#my-img').attr('src', imageSrcData);
});

// OR if you want to use the default options.

CameraPreview.takePicture(function(base64PictureData){
  /* code here */
});
getSupportedFocusModes(cb, [errorCallback])
FOCUS_MODE for possible values that can be returned.
CameraPreview.getSupportedFocusModes(function(focusModes){
  focusModes.forEach(function(focusMode) {
    console.log(focusMode + ', ');
  });
});
setFocusMode(focusMode, [successCallback, errorCallback])
focusMode-FOCUS_MODE
CameraPreview.setFocusMode(CameraPreview.FOCUS_MODE.CONTINUOUS_PICTURE);
getFocusMode(cb, [errorCallback])
FOCUS_MODE for possible values that can be returned.
CameraPreview.getFocusMode(function(currentFocusMode){
  console.log(currentFocusMode);
});
getSupportedFlashModes(cb, [errorCallback])
FLASH_MODE for possible values that can be returned
CameraPreview.getSupportedFlashModes(function(flashModes){
  flashModes.forEach(function(flashMode) {
    console.log(flashMode + ', ');
  });
});
setFlashMode(flashMode, [successCallback, errorCallback])
FLASH_MODE for details about the possible values for flashMode.
CameraPreview.setFlashMode(CameraPreview.FLASH_MODE.ON);
getFlashMode(cb, [errorCallback])
FLASH_MODE for possible values that can be returned
CameraPreview.getFlashMode(function(currentFlashMode){
  console.log(currentFlashMode);
});
getHorizontalFOV(cb, [errorCallback])
CameraPreview.getHorizontalFOV(function(getHorizontalFOV){
  console.log(getHorizontalFOV);
});
getSupportedColorEffects(cb, [errorCallback])
Currently this feature is for Android only. A PR for iOS support would be happily accepted
COLOR_EFFECT for possible values that can be returned.
CameraPreview.getSupportedColorEffects(function(colorEffects){
  colorEffects.forEach(function(color) {
    console.log(color + ', ');
  });
});
setColorEffect(colorEffect, [successCallback, errorCallback])
COLOR_EFFECT for details about the possible values for colorEffect.
CameraPreview.setColorEffect(CameraPreview.COLOR_EFFECT.NEGATIVE);
setZoom(zoomMultiplier, [successCallback, errorCallback])
CameraPreview.setZoom(2);
getZoom(cb, [errorCallback])
CameraPreview.getZoom(function(currentZoom){
  console.log(currentZoom);
});
getMaxZoom(cb, [errorCallback])
CameraPreview.getMaxZoom(function(maxZoom){
  console.log(maxZoom);
});
getSupportedWhiteBalanceModes(cb, [errorCallback])
WHITE_BALANCE_MODE for details about the possible values returned.
CameraPreview.getSupportedWhiteBalanceModes(function(whiteBalanceModes){
  console.log(whiteBalanceModes);
});
getWhiteBalanceMode(cb, [errorCallback])
WHITE_BALANCE_MODE for details about the possible values returned.
CameraPreview.getWhiteBalanceMode(function(whiteBalanceMode){
  console.log(whiteBalanceMode);
});
setWhiteBalanceMode(whiteBalanceMode, [successCallback, errorCallback])
WHITE_BALANCE_MODE for details about the possible values for whiteBalanceMode.
CameraPreview.setWhiteBalanceMode(CameraPreview.WHITE_BALANCE_MODE.CLOUDY_DAYLIGHT);
getExposureModes(cb, [errorCallback])
EXPOSURE_MODE for details about the possible values returned.
CameraPreview.getExposureModes(function(exposureModes){
  console.log(exposureModes);
});
getExposureMode(cb, [errorCallback])
EXPOSURE_MODE for details about the possible values returned.
CameraPreview.getExposureMode(function(exposureMode){
  console.log(exposureMode);
});
setExposureMode(exposureMode, [successCallback, errorCallback])
EXPOSURE_MODE for details about the possible values for exposureMode.
CameraPreview.setExposureMode(CameraPreview.EXPOSURE_MODE.CONTINUOUS);
getExposureCompensationRange(cb, [errorCallback])
CameraPreview.getExposureCompensationRange(function(expoxureRange){
  console.log("min: " + exposureRange.min);
  console.log("max: " + exposureRange.max);
});
getExposureCompensation(cb, [errorCallback])
CameraPreview.getExposureCompensation(function(expoxureCompensation){
  console.log(exposureCompensation);
});
setExposureCompensation(exposureCompensation, [successCallback, errorCallback])
CameraPreview.setExposureCompensation(-2);
CameraPreview.setExposureCompensation(3);
setPreviewSize([dimensions, successCallback, errorCallback])
CameraPreview.setPreviewSize({width: window.screen.width, height: window.screen.height});
getSupportedPictureSizes(cb, [errorCallback])
CameraPreview.getSupportedPictureSizes(function(dimensions){
  // note that the portrait version, width and height swapped, of these dimensions are also supported
  dimensions.forEach(function(dimension) {
    console.log(dimension.width + 'x' + dimension.height);
  });
});
getCameraCharacteristics(cb, [errorCallback])
CameraPreview.getCameraCharacteristics(function(characteristics){
  console.log(characteristics);
});
Example Characteristics:
{
  "CAMERA_CHARACTERISTICS": [
    {
      "INFO_SUPPORTED_HARDWARE_LEVEL": 1,
      "LENS_FACING": 1,
      "SENSOR_INFO_PHYSICAL_SIZE_WIDTH": 5.644999980926514,
      "SENSOR_INFO_PHYSICAL_SIZE_HEIGHT": 4.434999942779541,
      "SENSOR_INFO_PIXEL_ARRAY_SIZE_WIDTH": 4032,
      "SENSOR_INFO_PIXEL_ARRAY_SIZE_HEIGHT": 3024,
      "LENS_INFO_AVAILABLE_FOCAL_LENGTHS": [
        {
          "FOCAL_LENGTH": 4.199999809265137
        }
      ]
    },

    {
      "INFO_SUPPORTED_HARDWARE_LEVEL": 0,
      "LENS_FACING": 0,
      "SENSOR_INFO_PHYSICAL_SIZE_WIDTH": 3.494999885559082,
      "SENSOR_INFO_PHYSICAL_SIZE_HEIGHT": 2.625999927520752,
      "SENSOR_INFO_PIXEL_ARRAY_SIZE_WIDTH": 2608,
      "SENSOR_INFO_PIXEL_ARRAY_SIZE_HEIGHT": 1960,
      "LENS_INFO_AVAILABLE_FOCAL_LENGTHS": [
        {
          "FOCAL_LENGTH": 2.0999999046325684
        }
      ]
    }
  ]
}
tapToFocus(xPoint, yPoint, [successCallback, errorCallback])
let xPoint = event.x;
let yPoint = event.y
CameraPreview.tapToFocus(xPoint, yPoint);
onBackButton(successCallback, [errorCallback])
CameraPreview.onBackButton(function() {
  console.log('Back button pushed');
});
getBlob(url, [successCallback, errorCallback])
When working with local files you may want to display those on certain containers like canvas, given that file:// is not always a valid url type, you need to first convert it explicitly to a blob, before you push it further into the display side. The function getBlob will do the proper conversion for you, and if succedeed will pass the content on it's callback function as first argument.
function displayImage(content) {
  var ctx = $("canvas").getContext('2d');

  img.onload = function(){
    ctx.drawImage(img, 0, 0)
  }

  img.src = URL.createObjectURL(blob);
}

function takePicture() {
  CameraPreview.takePicture({width: app.dimension.width, height: app.dimension.height}, function(data){
    if (cordova.platformId === 'android') {
      CameraPreview.getBlob('file://' + data, function(image) {
        displayImage(image);
      });
    } else {
      displayImage('data:image/jpeg;base64,' + data);
    }
  });
}
storeToFile
When capturing large images you rather want those to be stored into a file instead of having those base64 enconded, as enconding at least on Android is very expensive. With the feature storeToFile enabled the plugin will capture the image into a temporary file inside the application temporary cache (the same place where Cordova will extract your assets). NOTE: this method will overwrite any previous captured image for sake of simplicity, so if you want to capture multiple images and keep those, you will need assistance from some other plugin to rename the file or store somewhere else, this is made by design to keep the plugin simple. This method is better used with disableExifHeaderStripping to get the best possible performance.
Example:
<script src="https://raw.githubusercontent.com/blueimp/JavaScript-Load-Image/master/js/load-image.all.min.js"></script>

<p><div id="originalPicture" style="width: 100%"></div></p>
let options = {
  x: 0,
  y: 0,
  width: window.screen.width,
  height: window.screen.height,
  camera: CameraPreview.CAMERA_DIRECTION.BACK,
  toBack: false,
  tapPhoto: true,
  tapFocus: false,
  previewDrag: false,
  disableExifHeaderStripping: true,
  storeToFile: true
};
....

function gotRotatedCanvas(canvasimg) {
  var displayCanvas = $('canvas#display-canvas');
  loadImage.scale(canvasimg, function(img){
    displayCanvas.drawImage(img)
  }, {
    maxWidth: displayCanvas.width,
    maxHeight: displayCanvas.height
  });
}

CameraPreview.getSupportedPictureSizes(function(dimensions){
  dimensions.sort(function(a, b){
    return (b.width * b.height - a.width * a.height);
  });
  var dimension = dimensions[0];
  CameraPreview.takePicture({width:dimension.width, height:dimension.height, quality: 85}, function(path){
    var image = 'file://' + path;
    let holder = document.getElementById('originalPicture');
    let width = holder.offsetWidth;
    loadImage(
      image,
      function(canvas) {
        holder.innerHTML = "";
        if (app.camera === 'front') {
          // front camera requires we flip horizontally
          canvas.style.transform = 'scale(1, -1)';
        }
        holder.appendChild(canvas);
      },
      {
        maxWidth: width,
        orientation: true,
        canvas: true
      }
    );
  });
});
disableExifHeaderStripping
If you want to capture large images you will notice in Android that performace is very bad, in those cases you can set this flag, and add some extra Javascript/HTML to get a proper display of your captured images without risking your application speed.
Example:
<script src="https://raw.githubusercontent.com/blueimp/JavaScript-Load-Image/master/js/load-image.all.min.js"></script>

<p><div id="originalPicture" style="width: 100%"></div></p>
let options = {
  x: 0,
  y: 0,
  width: window.screen.width,
  height: window.screen.height,
  camera: CameraPreview.CAMERA_DIRECTION.BACK,
  toBack: false,
  tapPhoto: true,
  tapFocus: false,
  previewDrag: false,
  disableExifHeaderStripping: true
};
....

function gotRotatedCanvas(canvasimg) {
  var displayCanvas = $('canvas#display-canvas');
  loadImage.scale(canvasimg, function(img){
    displayCanvas.drawImage(img)
  }, {
    maxWidth: displayCanvas.width,
    maxHeight: displayCanvas.height
  });
}

CameraPreview.getSupportedPictureSizes(function(dimensions){
  dimensions.sort(function(a, b){
    return (b.width * b.height - a.width * a.height);
  });
  var dimension = dimensions[0];
  CameraPreview.takePicture({width:dimension.width, height:dimension.height, quality: 85}, function(base64PictureData){
    /*
      base64PictureData is base64 encoded jpeg image. Use this data to store to a file or upload.
      Its up to the you to figure out the best way to save it to disk or whatever for your application.
    */

    var image = 'data:image/jpeg;base64,' + imgData;
    let holder = document.getElementById('originalPicture');
    let width = holder.offsetWidth;
    loadImage(
      image,
      function(canvas) {
        holder.innerHTML = "";
        if (app.camera === 'front') {
          // front camera requires we flip horizontally
          canvas.style.transform = 'scale(1, -1)';
        }
        holder.appendChild(canvas);
      },
      {
        maxWidth: width,
        orientation: true,
        canvas: true
      }
    );
  });
Settings
FOCUS_MODE
| Name | Type | Default | Note |
|---|---|---|---|
| FIXED | string | fixed | |
| AUTO | string | auto | |
| CONTINUOUS | string | continuous | IOS Only |
| CONTINUOUS_PICTURE | string | continuous-picture | Android Only |
| CONTINUOUS_VIDEO | string | continuous-video | Android Only |
| EDOF | string | edof | Android Only |
| INFINITY | string | infinity | Android Only |
| MACRO | string | macro | Android Only |
FLASH_MODE
| Name | Type | Default | Note |
|---|---|---|---|
| OFF | string | off | |
| ON | string | on | |
| AUTO | string | auto | |
| RED_EYE | string | red-eye | Android Only |
| TORCH | string | torch |
CAMERA_DIRECTION
| Name | Type | Default |
|---|---|---|
| BACK | string | back |
| FRONT | string | front |
COLOR_EFFECT
| Name | Type | Default | Note |
|---|---|---|---|
| AQUA | string | aqua | Android Only |
| BLACKBOARD | string | blackboard | Android Only |
| MONO | string | mono | |
| NEGATIVE | string | negative | |
| NONE | string | none | |
| POSTERIZE | string | posterize | |
| SEPIA | string | sepia | |
| SOLARIZE | string | solarize | Android Only |
| WHITEBOARD | string | whiteboard | Android Only |
EXPOSURE_MODE
| Name | Type | Default | Note |
|---|---|---|---|
| AUTO | string | auto | IOS Only |
| CONTINUOUS | string | continuous | |
| CUSTOM | string | custom | |
| LOCK | string | lock | IOS Only |
Note: Use AUTO to allow the device automatically adjusts the exposure once and then changes the exposure mode to LOCK.
WHITE_BALANCE_MODE
| Name | Type | Default | Note |
|---|---|---|---|
| LOCK | string | lock | |
| AUTO | string | auto | |
| CONTINUOUS | string | continuous | IOS Only |
| INCANDESCENT | string | incandescent | |
| CLOUDY_DAYLIGHT | string | cloudy-daylight | |
| DAYLIGHT | string | daylight | |
| FLUORESCENT | string | fluorescent | |
| SHADE | string | shade | |
| TWILIGHT | string | twilight | |
| WARM_FLUORESCENT | string | warm-fluorescent |
IOS Quirks
It is not possible to use your computers webcam during testing in the simulator, you must device test.
Sample App
cordova-plugin-camera-preview-sample-app for a complete working Cordova example for Android and iOS platforms.
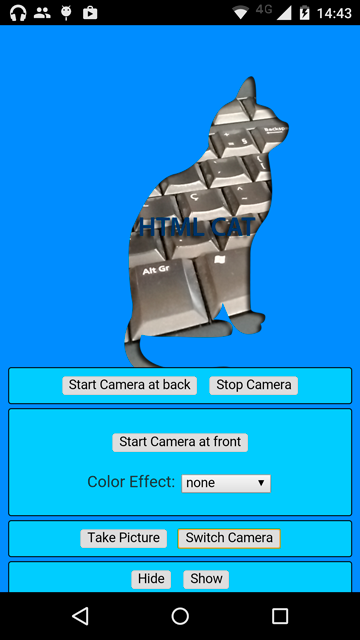
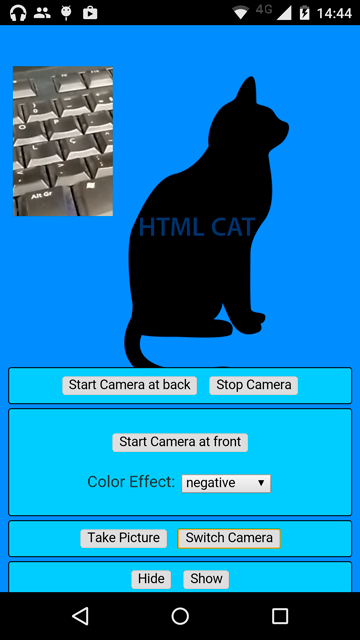
Screenshots
Credits
Maintained by Weston Ganger - @westonganger
Created by Marcel Barbosa Pinto @mbppower