README
flow-view
is a visual editor for dataflow programming
Installation
Using npm
With npm do
npm install flow-view
Using a CDN
Try this in your HTML page
<script type="module">
  import { FlowView } from 'https://unpkg.com/flow-view';

  const flowView = new FlowView();
</script>
Usage
GUI
Try demo here.
- Drag on canvas to translate all items.
- Click on item to select it.
- Click while pressing SHIFT to enable multi selection.
- Drag selected items to translate them.
- Drag from a node output to a node input to create an edge.
- Press BACKSPACE to delete selected items.
- Double click on canvas to open the selector.
- Type into the selector then press ENTER to create a new node.
Constructor
Create a FlowView instance and pass it a container argument. It will create
a flow-view custom element and attach it to the container. If no argument is
provided, default container will be document.body. Be aware that the
flow-view custom element will fit the whole height of its container, so make
sure to style properly to avoid a zero height container.
<!DOCTYPE html>
<html>
  <body>
    <script type="module">
      import { FlowView } from 'https://unpkg.com/flow-view';

      const flowView = new FlowView({ container: document.body });
    </script>
  </body>
</html>
If some flow-view custom element is already in the page, it can be passed to a
FlowView instance via the element argument.
<!DOCTYPE html>
<html>
  <body>
    <flow-view id="my-view"></flow-view>

    <script type="module">
      import { FlowView } from 'https://unpkg.com/flow-view';

      const flowView = new FlowView({ element: document.getElementById('my-view') });
    </script>
  </body>
</html>
Add a list to define which nodes are available. It makes sense to be provided in the majority of use cases.
flowView.addNodeLabels([
  "Marge",
  "Homer",
  "Bart",
  "Lisa",
]);
node(id)
Get flow-view node by id.
const node = flowView.node('abc');
edge(id)
Get flow-view edge by id.
const edge = flowView.edge('abc');
graph
Access current flow-view graph.
console.log(flowView.graph);
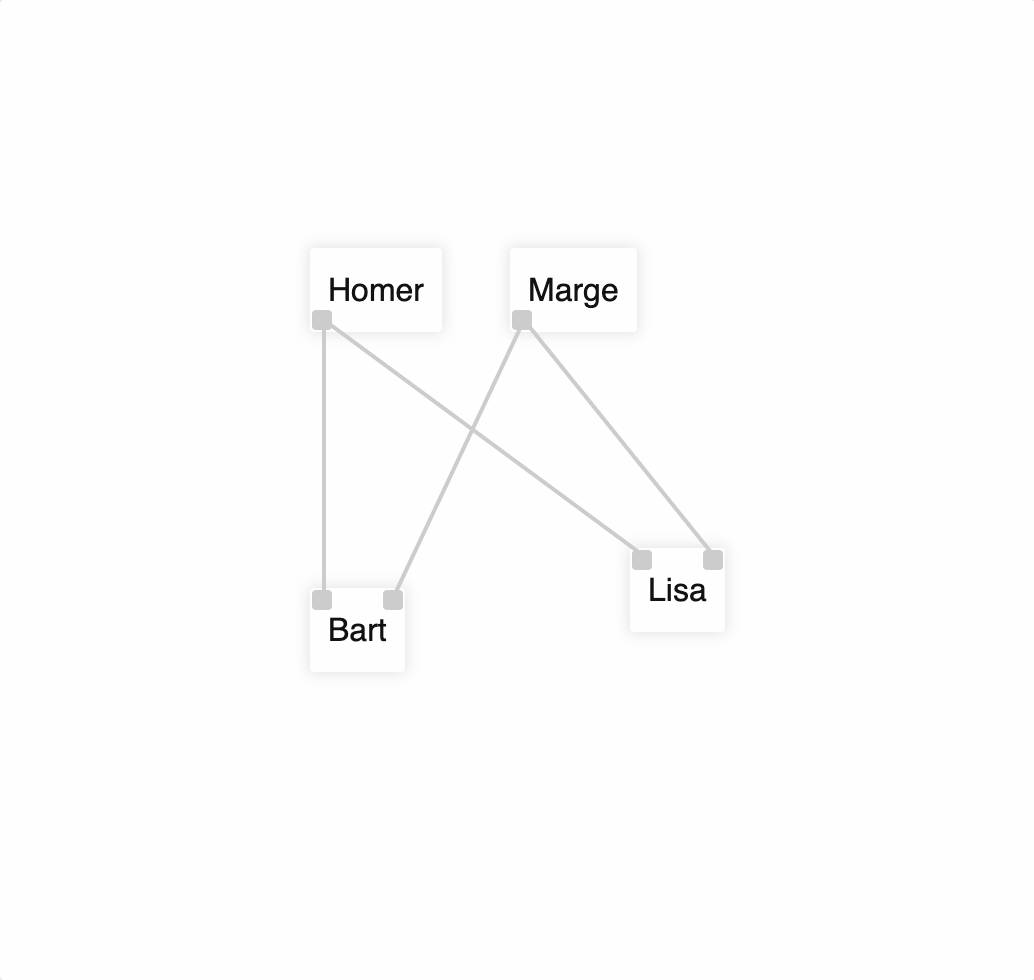
loadGraph({ nodes = [], edges = [] })
Load a flow-view graph.
flowView.loadGraph({
  nodes: [
    {
      id: "dad",
      label: "Homer",
      x: 60,
      y: 70,
      outputs: [{ id: "children" }],
    },
    {
      id: "mom",
      label: "Marge",
      x: 160,
      y: 70,
      outputs: [{ id: "children" }],
    },
    {
      id: "son",
      label: "Bart",
      x: 60,
      y: 240,
      inputs: [{ id: "father" }, { id: "mother" }],
    },
    {
      id: "daughter",
      label: "Lisa",
      x: 220,
      y: 220,
      inputs: [{ id: "father" }, { id: "mother" }],
    },
  ],
  edges: [
    { from: ["dad", "children"], to: ["son", "father"] },
    { from: ["dad", "children"], to: ["daughter", "father"] },
    { from: ["mom", "children"], to: ["son", "mother"] },
    { from: ["mom", "children"], to: ["daughter", "mother"] },
  ],
});
clearGraph()
Empty current graph.
flowView.clearGraph();
newNode() and newEdge()
Create nodes and edges programmatically. See programmatic example here.
// Create two nodes.

const node1 = flowView.newNode({
  label: "Hello",
  inputs: [{}, {}],
  outputs: [{ id: "output1" }],
  x: 100,
  y: 100,
  width: 80,
});
const node2 = flowView.newNode({
  label: "World",
  inputs: [{ id: "input1" }],
  width: 100,
  x: 250,
  y: 400,
});

// Connect nodes with an edge.
flowView.newEdge({
  from: [node1.id, "output1"],
  to: [node2.id, "input1"],
});
deleteNode() and deleteEdge()
Delete nodes and edges programmatically. Notice that when a node is deleted, all its connected edges are deleted too.
const nodeId = 'abc';
const edgeId = '123';

flowView.deleteNode(nodeId);
flowView.deleteEdge(edgeId);
onChange(callback)
React to flow-view changes. See demo code here.
Callback signature is ({ action, data }, info) => void, where
- action can be
CREATE_NODE,DELETE_NODE, ecc - data change based on action
- info can contain
{ isLoadGraph: true }or other optional information.
Just take advantage of autocompletion and suggestion provided by typings definitions.