README
The Best Ionic v1.x starter template
Reinventing the wheel, again! Sorry Ionic Team... but there are many noobs learning in Youtube!
Are you a noob? Use this template.
Are you a master? Shut up and use this template! Talk is cheap, show me the code (Pull Request).

Introduction
You need to obfuscate your code and reduce the size of your mobile applications. With this project you can work with Gulp in the best way, allowing improve your development workflow. This project seeks to improve the following tasks:
- Design your application with a maintainable code using Sass and writing less code using Autoprefixer. Concatenate and Minify styles in a stylesheet.
- Concatenate and Uglify javascript files using Source maps to debug the code easily.
- Compress images to reduce the size of your application.
- Compress html templates, respecting your structure.
- Clean unnecessary files downloaded with Bower.
- Use CSS animations with Animate.css.
- Use SQLite with a service pattern. You can use Pre-filled databases.
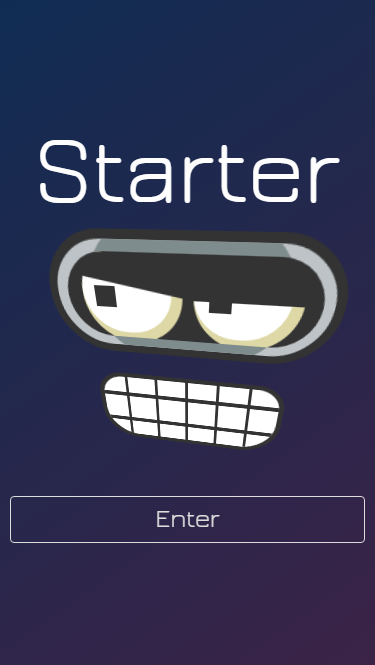
Demo
Do you want to see this starter in action? Visit https://jdnichollsc.github.io/Ionic-Starter-Template/ yay!
Automatically deployed to GitHub Pages using Gulp - Check the last task into gulpfile.js
Projects using this template
- Hartford Fashion Week - Created by Matthew Seremet
- IonPhaser
- Ionic ElastiChat
- Ionic Drag and Drop
- Game of Drones
Do you have a project using this template? Let me know to share it with everyone!
Instructions
- Download this template.
- Execute the command
npm install - Execute the command
gulp - Run Ionic:
ionic serveto test on the browser (Gulp is running by default).ionic run android --livereloadto test on the device.
- Modify this template and create your hybrid mobile app.
Template Structure
| Path | Explanation |
|---|---|
./app/img/ |
Images in your app. |
./app/js/ |
Scripts (Controllers, Services, Directives, etc). |
./app/scss/ |
The styles of your app using Sass. |
./app/templates/ |
Views in your app. (Only html files) |
./app/index.html |
The init page. |
./www/css/ |
Other css styles like Animate.css, etc. |
./www/lib |
Download scripts using bower. |
Using bower to download libraries (npm preen included)
- Download the script. Eg:
bower install ionic-datepicker --save - Add the path of the files that you will use in
bower.jsonfromwww/lib. Eg:
"preen": {
    //... More libraries
    "ionic-datepicker": [
        "dist/*.js"
        //Other files and folders will be deleted to reduce the size of your app
    ]
}
- Run gulp in the CLI. Eg:
gulporgulp lib - That's all, folks!!
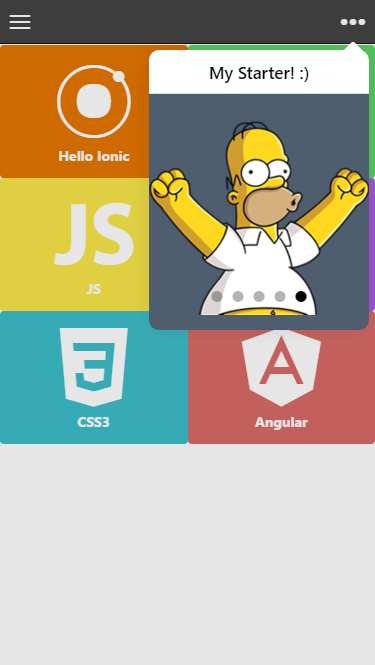
Animate elements using Animate.css
- Do you want to animate Modals? This template have an example. More examples here
//Using the Modals service in this template
Modals.openModal($scope, 'templates/modals/users.html', 'animated rotateInDownLeft');
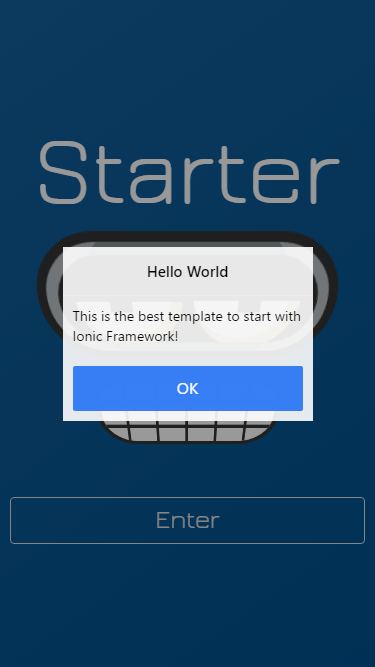
- Do you want to animate Popups and other elements? See an example:
$ionicPopup.alert({
    title: 'Hello World',
    template: 'This is the best template to start with Ionic Framework!',
    cssClass: 'animated bounceInDown'
});
SQLite databases on Android, iOS and Windows (Using cordova-sqlite-ext plugin)
This template include an example (pre-populated database), you can test in the browser using Google Chrome or in your Device.
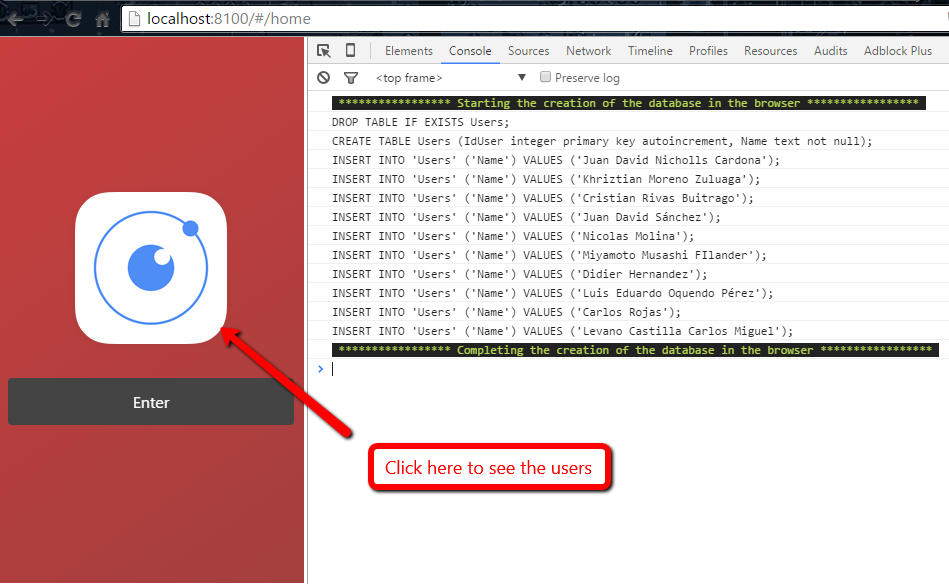
- Debug in the browser: Test using the
./app/js/queries.jsfile to create your queries (Drop tables, create tables, insert data, etc). - Debug in the device: Test using the
./www/pre.dbfile, you can edit the database using DB Browser for SQLite
Note: If you don't want to use SQLite, you must perform the following steps:
- Remove
./www/pre.dbfile. - Remove
./app/js/queries.jsfile. - Remove
./app/js/services/sqlite.jsfile. - Uninstall the plugin using the CLI:
ionic plugin rm cordova-sqlite-ext --save - Remove the following line from
./app/js/app.jsfile:
$sqliteService.preloadDataBase(true);
Ionic Tips
- Ionic View LifeCycle: More here
$scope.$on('$ionicView.beforeEnter', function(){
  alert("Before to enter to the view");
});
$scope.$on('$ionicView.afterEnter', function(){
  alert("After to enter to the view");
});
- Reload the current state:
$state.go($state.current, {}, {reload: true});
- Disable the back option before to navigate to other state:
$ionicHistory.nextViewOptions({
    disableBack: true,
    disableAnimate : true,
    historyRoot  : true
});
- Clear the cache:
$ionicHistory.clearCache();
- Clear the history:
$ionicHistory.clearHistory();
- Change the direction before to navigate to other state:
$ionicViewSwitcher.nextDirection('back');
- Navigate to other state:
$state.go("app.login");
- Disable the drag to open the side menu:
$ionicSideMenuDelegate.canDragContent(false);
- Check the current platform
var deviceInformation = ionic.Platform.device();

var isWebView = ionic.Platform.isWebView();
var isIPad = ionic.Platform.isIPad();
var isIOS = ionic.Platform.isIOS();
var isAndroid = ionic.Platform.isAndroid();
var isWindowsPhone = ionic.Platform.isWindowsPhone();

var currentPlatform = ionic.Platform.platform();
var currentPlatformVersion = ionic.Platform.version();
- Disabling the tap system (To disable the tap for an element and all of its children elements)
<div data-tap-disabled="true">
    <div id="google-map"></div>
</div>
- Using Ionic gestures with options from Angular Directives
$ionicGesture.on('hold', function (e) {
  //Code...
}, element, { hold_threshold: 20 });
- Ionic trigger events
ionic.trigger("hold", { target: document.getElementsByClassName("item")[0] });
- Execute when device is ready
ionic.Platform.ready(function(){
  //Code...
});
Global configuration:
- Enable the native scrolling (Enable or Disable jsScrolling):
$ionicConfigProvider.scrolling.jsScrolling(false);
- Set the Maximum number of view elements to cache in the DOM:
$ionicConfigProvider.views.maxCache(5);
- Center align the title in the navBar:
$ionicConfigProvider.navBar.alignTitle('center');
- Disable swipeback on iOS:
$ionicConfigProvider.views.swipeBackEnabled(false);
- Set the back button text to empty:
$ionicConfigProvider.backButton.previousTitleText(false).text('');
- Change Ionic gestures options:
ionic.Gestures.gestures.Hold.defaults.hold_threshold = 20;
Platform Customization
Platform CSS Class Browser platform-browser Cordova platform-cordova Webview platform-webview iOS platform-ios iPad platform-ipad Android platform-android Windows Phone platform-windowsphone - Dynamically Loading Templates
.state('tab', {
  templateUrl: function() {
    if (ionic.Platform.isAndroid()) {
        return  "templates/home-android.html";
    }
    return "templates/home.html";
  }
});
Crosswalk
Improve the performance of your HTML, CSS, and JavaScript if is required.
| Command | Action |
|---|---|
ionic browser list |
Show all the browsers available by platform |
ionic browser rm crosswalk |
Remove a browser |
ionic browser add crosswalk |
Install the Chromium browser for Android |
ionic browser add crosswalk@10.39.235.15 |
Specifies a version of Chromium |
ionic browser add crosswalk-lite |
Install the Crosswalk lite version |
ionic browser revert android |
Remove any custom browser that was installed for the platform by replacing it with the system default browser |
npm commands
| Command | Action |
|---|---|
npm i ionic cordova bower gulp -g |
Install Ionic, Cordova, Bower and Gulp packages globally |
npm cache clean |
Remove the cache to force update the packages. Useful to solve npm issues using the CLI. |
Ionic commands
| Command | Action |
|---|---|
ionic login |
To get logged in the CLI and use the Ionic services |
ionic upload |
Upload your app to Ionic repository and debug remotely (Your clients) using the useful Ionic View App |
ionic serve |
Test on the browser |
ionic serve --lab |
Test on the browser iOS and Android version |
ionic lib update |
Update Ionic library files |
ionic resources |
Generate icons and splash screens. The images are located in ./resources/ directory. More info here. |
ionic resources --icon |
Generate only the icons. icon.png, icon.psd or icon.ai is located in ./resources/ directory |
ionic resources --splash |
Generate only the splash screens. splash.png, splash.psd or splash.ai is located in ./resources/ directory |
ionic resources ios --icon |
Generate icons per platform |
Cordova commands
| Command | Action |
|---|---|
cordova platform add android |
Add the platform to build your app. android - ios - windows |
cordova platform rm android |
Remove the platform |
cordova plugin add git_url --save |
Add a plugin to use native capabilities. Native Devs are your friends |
| cordova plugin list | See the plugins that you're using. Find more here! |
cordova plugin rm plugin_name --save |
Remove a plugin |
| cordova build windows -- --appx=8.1-win --archs="x86" | Build the app to Windows (Open the Solution platforms/windows/*.sln on Visual Studio) |
Tools
| Name | Description |
|---|---|
| Visual Studio Code | Build and debug your app using a extension |
| GapDebug | Only debug in the device |
| GenyMotion | Better Android Emulation |
Visual Studio Code commands and shortcuts
| Command/Shortcut | Action |
|---|---|
code . |
Open the editor from CLI |
F1 |
Open the Command Palette |
Ctrl + Shift + N |
Open other Visual Studio Code instance |
Ctrl + } |
Toogle comment code |
Ctrl + ñ |
Open the Integrated Terminal |
Sign to Android (Commands)
cordova build --release androidkeytool -genkey -v -keystore my-release-key.keystore -alias alias_name -keyalg RSA -keysize 2048 -validity 10000jarsigner -verbose -sigalg SHA1withRSA -digestalg SHA1 -keystore my-release-key.keystore HelloWorld-release-unsigned.apk alias_namezipalign -v 4 HelloWorld-release-unsigned.apk HelloWorld.apk
Links
- Market place
- Facebook group
- Codepen
- Spanish Presentation
- Ionic CLI
- Ionic Framework Examples
- Ionic Services

Personal comments
Ionic, seriously? The cache is the best... but, How is possible to know if a specific view is cached? (From a directive)
Microsoft, seriously? Help to improve existing cordova plugins instead of create new plugins only for Windows platform!
Apple, seriously? Thanks for nothing! I need a MAC or the help of a friend to build for iOS... Are we playing Who Wants to be a Millionaire?
Happy coding
Made with <3
