README

Homebridge Denon TV


Homebridge plugin for Denon/Marantz AV Receivers series X/SR. Tested with Denon AVR-X6300H and Marantz SR6013.
This plugin is based upon the official documentation for communicating with and controlling these Denon and Marantz receivers, located here: Denon Control Protocol 2020
Package Requirements
| Package | Installation | Role | Required |
|---|---|---|---|
| Homebridge | Homebridge Wiki | HomeKit Bridge | Required |
| Config UI X | Config UI X Wiki | Web User Interface | Recommended |
| Denon TV | npm install -g homebridge-denon-tv |
Plug-In | Required |
Note
- For homebridge-denon-tv versions 3.6.0 and above the minimum required version of Homebridge is 1.3.x.
- If update to 3.15.0 need remove the accessory frome HomeKit app and add it again.
Troubleshooting
- If for some reason the device is not displayed in HomeKit app try this procedure:
- Go to
./homebridge/persist. - Remove
AccessoryInfo.xxxfile which contain Your device data:{"displayName":"AV Receiver"}. - Next remove
IdentifierCashe.xxxfile with same name asAccessoryInfo.xxx. - Restart Homebridge and try add it to the HomeKit app again.
- Go to
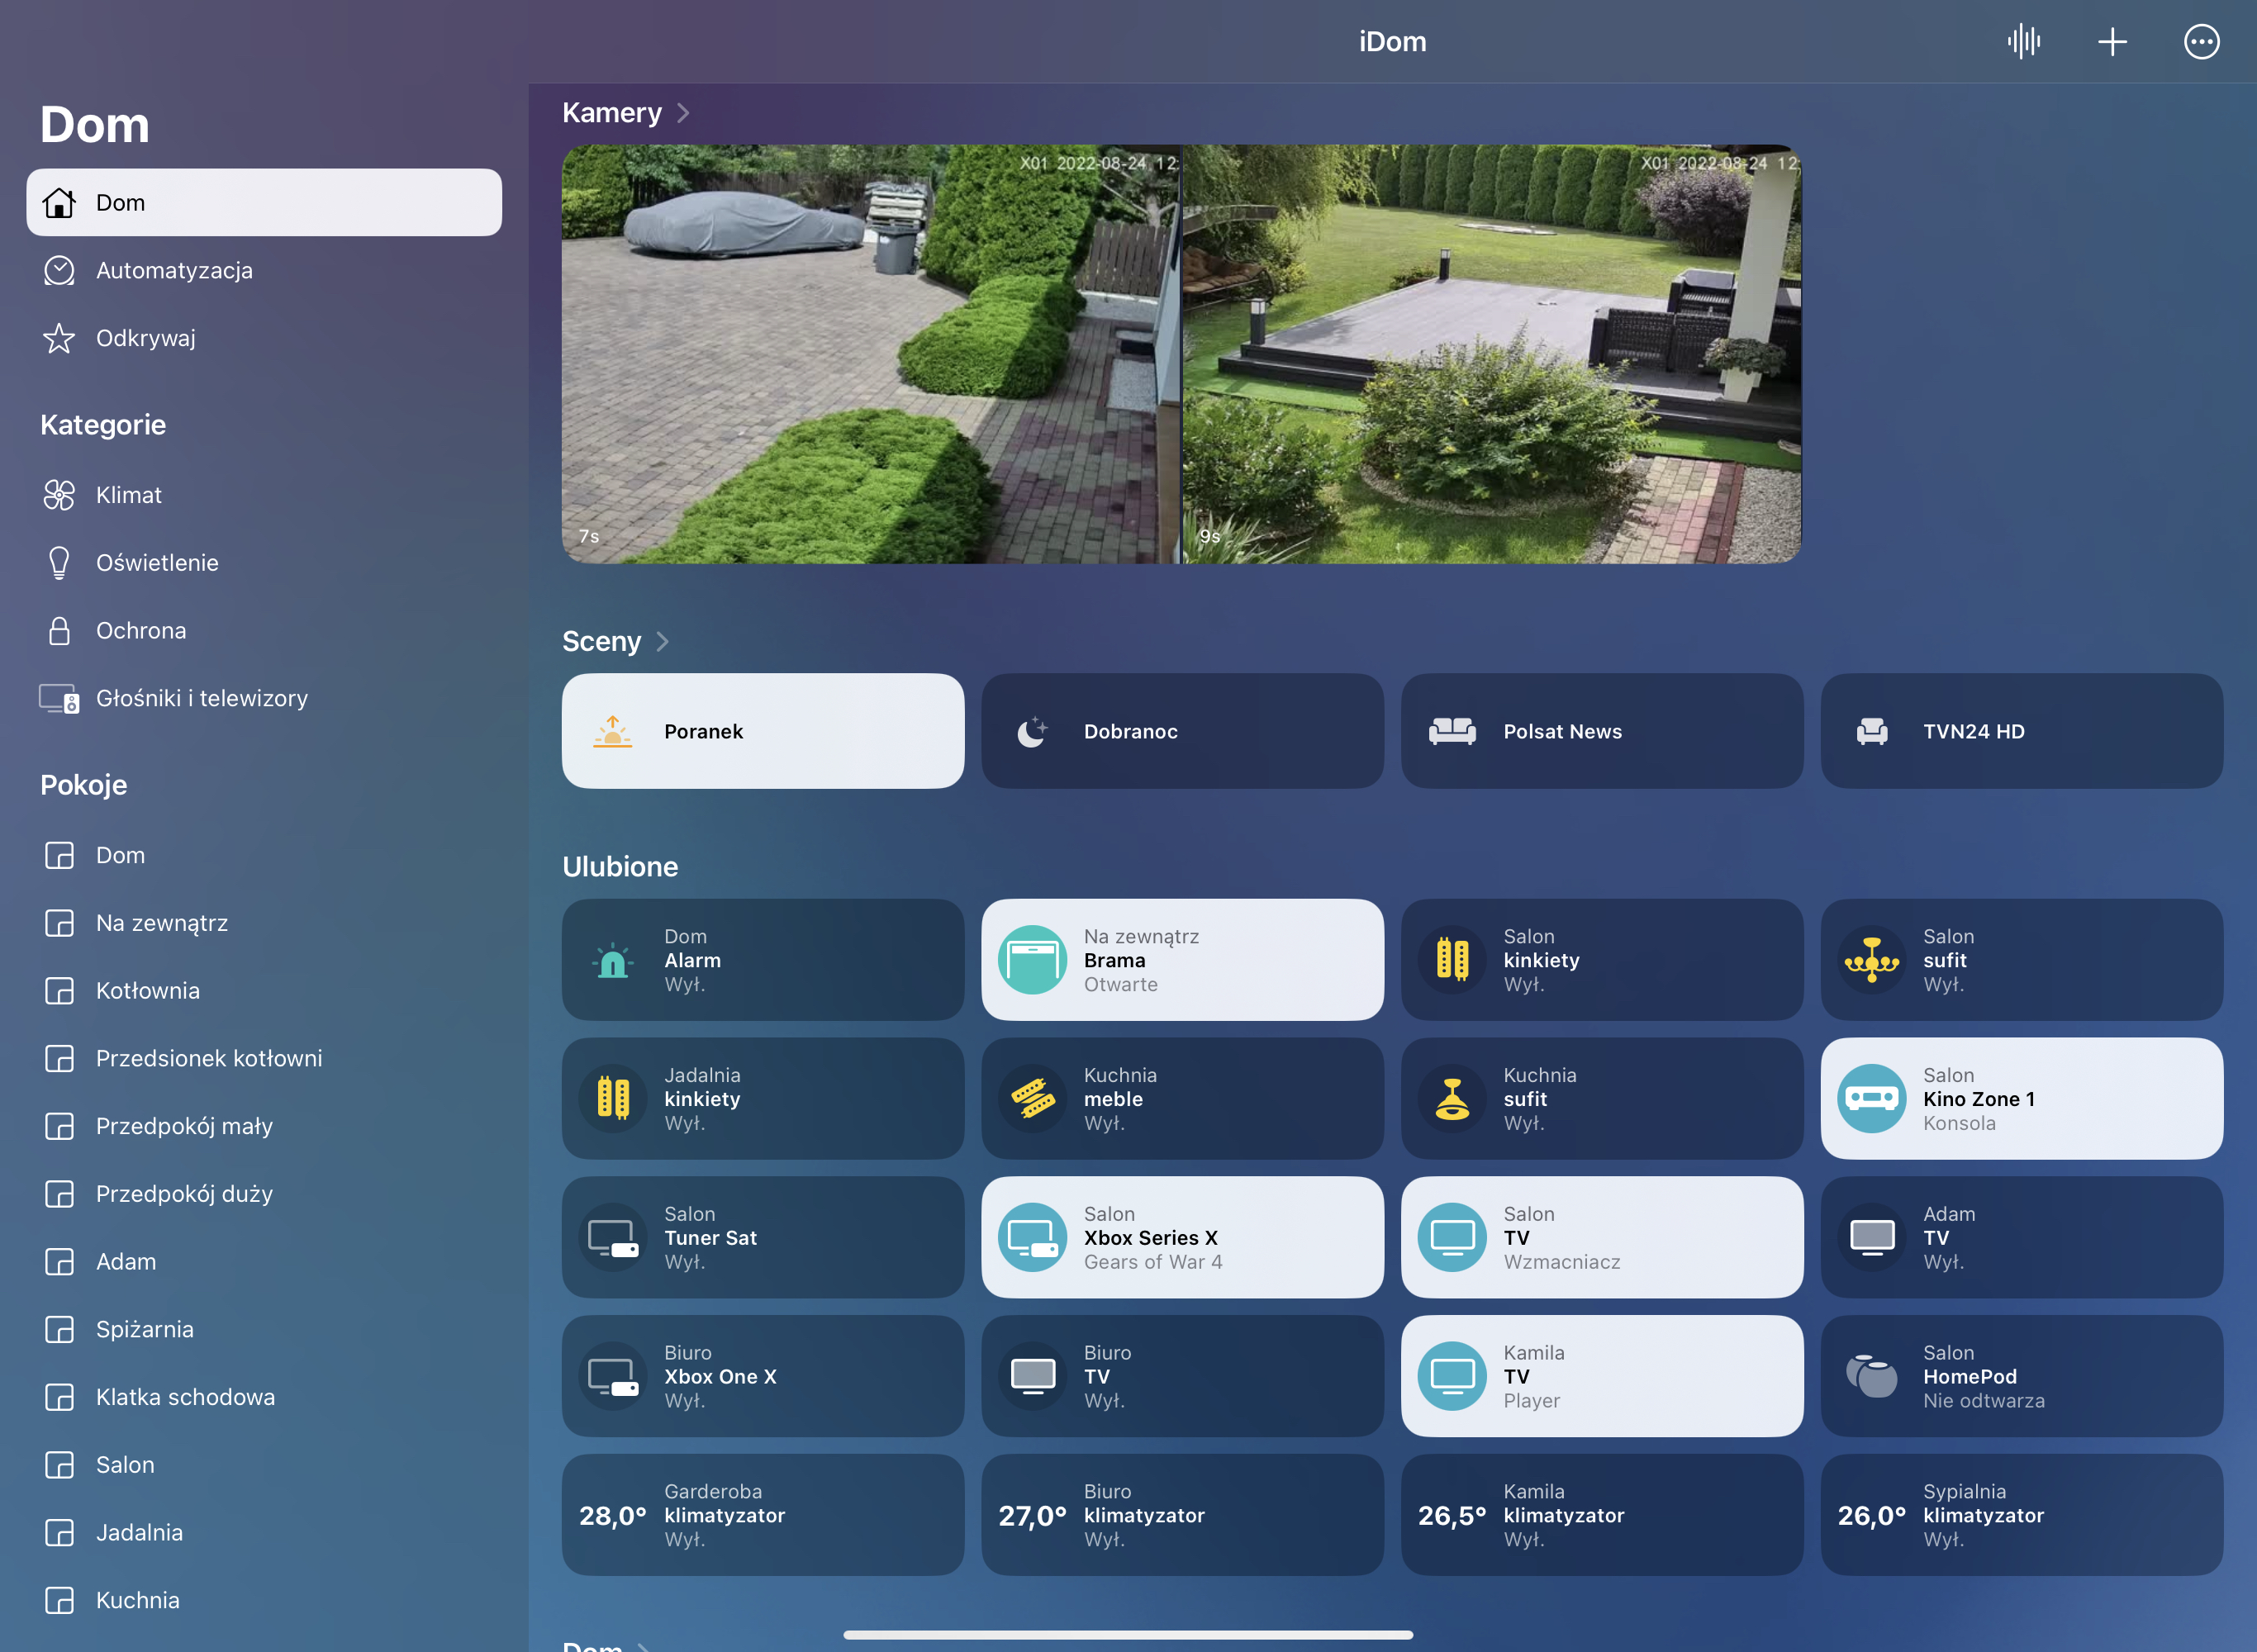
Features and How To Use Them
- Multi Zone control.
- Power ON/OFF short press tile in HomeKit app.
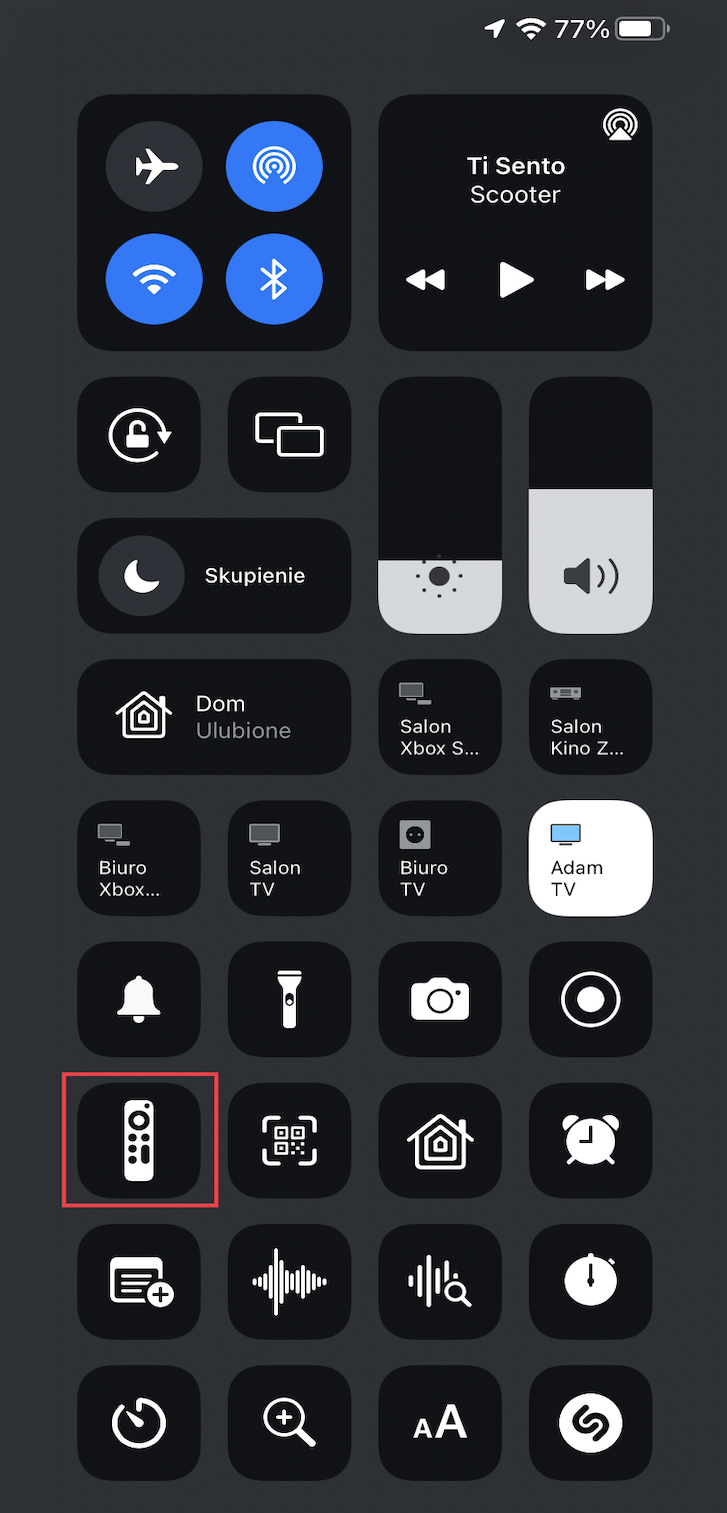
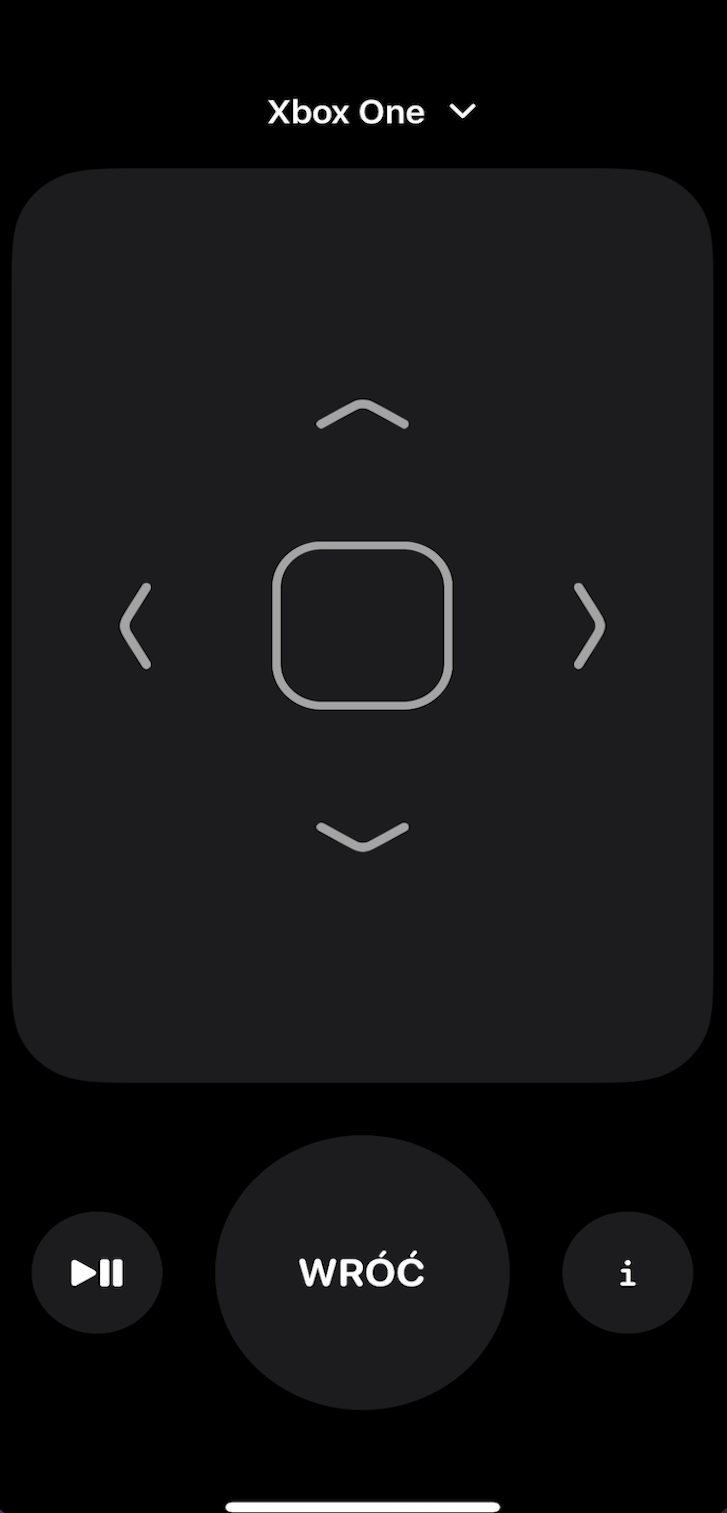
- RC/Media control is possible after you go to the RC app on iPhone/iPad.
- Speaker control is possible after you go to RC app on iPhone/iPad
Speaker Service. - Legacy Volume and Mute control is possible throught extra
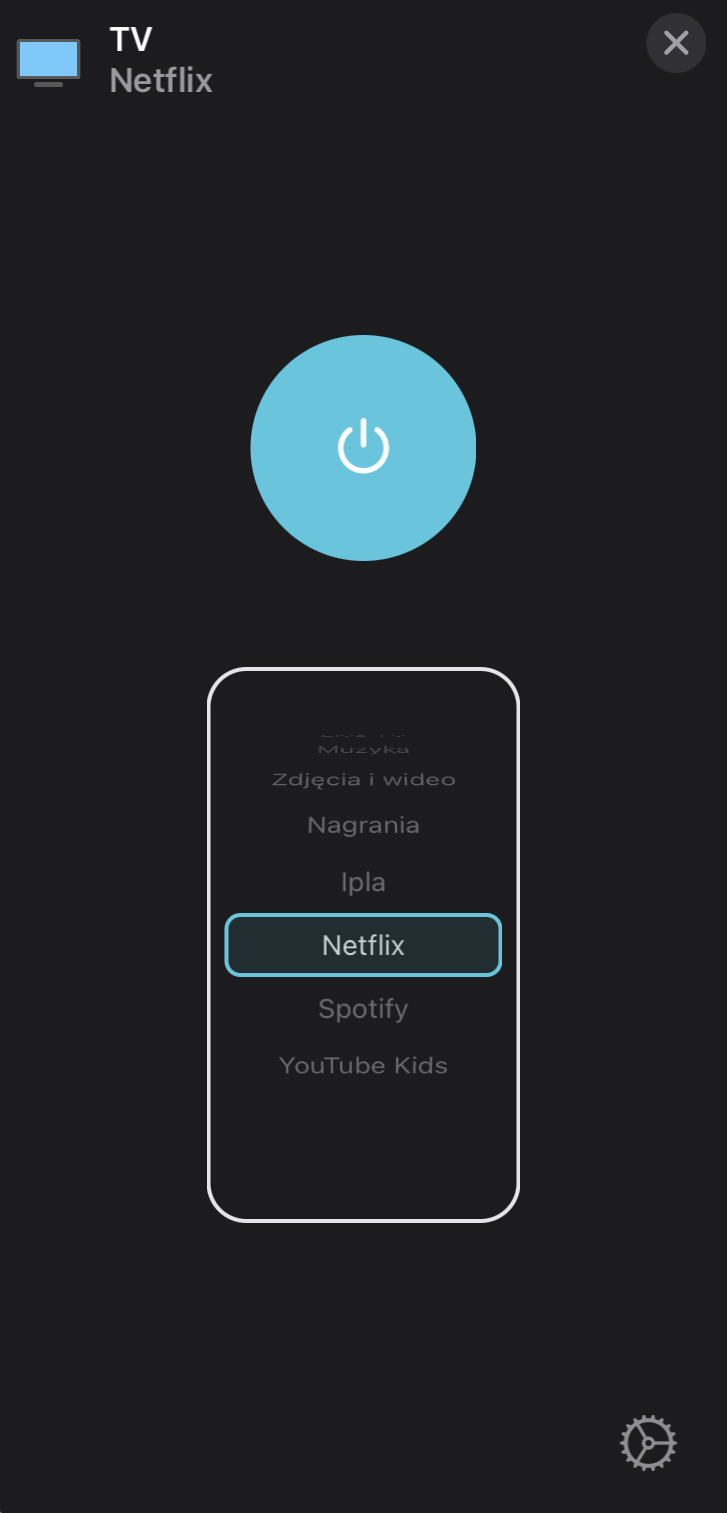
lightbulb/fan(slider). - Inputs can be changed using Inputs selector in HomeKit.app, additionally can create separate tile.
- Surrounds can be changed using Surrounds selector in HomeKit.app, additionally can create separate tile.
- Digital Input Modes can be controlled by creating separate tile in the buttons section.
- Siri can be used for all functions, some times need create legacy buttons/switches/sensors.
- Automations can be used for all functions, some times need create legacy buttons/switches/sensors.
- MQTT Client publisch all available data from device.
Configuration
Install and use Homebridge Config UI X plugin to configure this plugin (Highly Recommended). The sample configuration can be edited and used manually as an alternative. See the sample-config.json file in this repository for an example or copy the example below into your config.json file, making the apporpriate changes before saving it. Be sure to always make a backup copy of your config.json file before making any changes to it.
| Key | Description |
|---|---|
name |
Here set the accessory Name to be displayed in Homebridge/HomeKit. |
host |
Here set the Hsostname or Address IP of TV. |
port |
Here set the API communication port, if 8080 is not working try to use port 80 which some receivers use alternatively. |
zoneControl |
Selects which zone will be controlled by this section (0 - Main Zone, 1 - Zone 2, 2 - Zone 3, 3 - Surround Mode) or choice from the configurations GUI |
enableDebugMode |
If enabled, deep log will be present in homebridge console. |
disableLogInfo |
If enabled, disable log info, all values and state will not be displayed in Homebridge log console. |
disableLogDeviceInfo |
If enabled, add ability to disable log device info by every connections device to the network. |
volumeControl |
Here choice what a additional volume control mode You want to use (None, Slider, Fan). |
switchInfoMenu |
If enabled, I button change its behaviour in RC app between Menu and INFO. |
masterPower |
If enabled, then the power switch for that zone (typically you would only use this for the Main Zone) will turn the entire receiver ON or OFF/STANDBY rather than just the zone itself |
masterVolume |
If enabled, then the volume for that zone (typically you would only use this for the Main Zone) will set the entire receiver UP or DOWN rather than just the zone itself |
masterMute |
If enabled, then the mute switch for that zone (typically you would only use this for the Main Zone) will muted the entire receiver ON or OFF rather than just the zone itself |
inputs.name |
Here set Input Name which You want expose to the Homebridge/HomeKit. |
inputs.reference |
Choose from available inputs, the inputs that should be published to and appear in HomeKit app in the device tile as inputs list |
inputs.mode |
Choose from available inputs mode. |
inputs.switch |
If enabled, the tile for that input will be expose to the Homebridge/HomeKit and can be used for HomeKit automation. |
inputs.displayType |
Here select display type in HomeKit app, possible Button, Switch, Motion Sensor, Occupancy Sensor. |
buttonsMainZone.name |
Here set Button Name which You want expose to the Homebridge/HomeKit. |
buttonsMainZone.reference |
Here choice function for additional control button for Main Zone. |
buttonsMainZone.displayType |
Here select display type in HomeKit app, possible Button, Switch. |
buttonsZone2.name |
Here set Button Name which You want expose to the Homebridge/HomeKit. |
buttonsZone2.reference |
Here choice function for additional control button for Zone 2. |
buttonsZone2.displayType |
Here select display type in HomeKit app, possible Button, Switch. |
buttonsZone3.name |
Here set Button Name which You want expose to the Homebridge/HomeKit. |
buttonsZone3.reference |
Here choice function for additional control button for Zone 3. |
buttonsZone3.displayType |
Here select display type in HomeKit app, possible Button, Switch. |
surrounds.name |
Here set Surround Mode Name which You want expose to the Homebridge/HomeKit. |
surrounds.reference |
Here choice Surround Mode, the mode that should be published to and appear in HomeKit app in the extra tile as Surrounds List. |
surrounds.switch |
If enabled, the tile for that surround mode will be expose to the Homebridge/HomeKit and can be used for HomeKit automation. |
surrounds.displayType |
Here select display type in HomeKit app, possible Button, Switch, Motion Sensor, Occupancy Sensor. |
enableMqtt |
If enabled, MQTT Broker will start automatically and publish all awailable PV installation data. |
mqttHost |
Here set the IP Address or Hostname for MQTT Broker.) |
mqttPort |
Here set the Port for MQTT Broker, default 1883.) |
mqttPrefix |
Here set the Prefix for Topic or leave empty.) |
mqttAuth |
If enabled, MQTT Broker will use authorization credentials. |
mqttUser |
Here set the MQTT Broker user. |
mqttPasswd |
Here set the MQTT Broker password. |
AV Surround Mode |
This extra Accessory will control all functions of Main Zone except (Inputs and Buttons). |
{
    "platform": "DenonTv",
    "devices": [
        {
            "name": "AV Main Zone",
            "host": "192.168.1.5",
            "port": 8080,
            "zoneControl" : 0,
            "volumeControl": 0,
            "masterPower": false,
            "masterVolume": false,
            "masterMute": false,
            "switchInfoMenu": false,
            "disableLogInfo": false,
            "disableLogDeviceInfo": false,
            "enableDebugMode": false,
            "inputs": [
                {
                    "name": "Xbox One",
                    "reference": "GAME",
                    "mode": "SI",
                    "switch": false,
                    "displayType": 0
                },
                {
                    "name": "Television",
                    "reference": "TV",
                    "mode": "SI",
                    "switch": false,
                    "displayType": 0
                }
            ],
            "buttonsMainZone": [
                {
                    "name": "POWER ON",
                    "reference": "ZMON",
                    "displayType": 0
                }
            ],
            "enableMqtt": false,
            "mqttHost": "192.168.1.33",
            "mqttPort": 1883,
            "mqttPrefix": "home/denon",
            "mqttAuth": false,
            "mqttUser": "user",
            "mqttPass": "password"
        },
        {
            "name": "AV Zone 1",
            "host": "192.168.1.5",
            "port": 8080,
            "zoneControl" : 1,
            "volumeControl": 0,
            "masterPower": false,
            "masterVolume": false,
            "masterMute": false,
            "switchInfoMenu": false,
            "disableLogInfo": false,
            "disableLogDeviceInfo": false,
            "enableDebugMode": false,
            "inputs": [
                {
                    "name": "Xbox One",
                    "reference": "GAME",
                    "mode": "SI",
                    "switch": false,
                    "displayType": 0
                },
                {
                    "name": "Television",
                    "reference": "TV",
                    "mode": "SI",
                    "switch": false,
                    "displayType": 0
                }
            ],
            "buttonsZone2": [
                {
                    "name": "POWER ON",
                    "reference": "Z2ON",
                    "displayType": 0
                }
            ],
            "enableMqtt": false,
            "mqttHost": "192.168.1.33",
            "mqttPort": 1883,
            "mqttPrefix": "home/denon",
            "mqttAuth": false,
            "mqttUser": "user",
            "mqttPass": "password"
        },
        {
            "name": "AV Zone 2",
            "host": "192.168.1.5",
            "port": 8080,
            "zoneControl" : 2,
            "volumeControl": 0,
            "masterPower": false,
            "masterVolume": false,
            "masterMute": false,
            "switchInfoMenu": false,
            "disableLogInfo": false,
            "disableLogDeviceInfo": false,
            "enableDebugMode": false,
            "inputs": [
                {
                    "name": "Xbox One",
                    "reference": "GAME",
                    "mode": "SI",
                    "switch": false,
                    "displayType": 0
                },
                {
                    "name": "Television",
                    "reference": "TV",
                    "mode": "SI",
                    "switch": false,
                    "displayType": 0
                }
            ],
            "buttonsZone3": [
                {
                    "name": "POWER ON",
                    "reference": "Z3ON",
                    "displayType": 0
                }
            ],
            "enableMqtt": false,
            "mqttHost": "192.168.1.33",
            "mqttPort": 1883,
            "mqttPrefix": "home/denon",
            "mqttAuth": false,
            "mqttUser": "user",
            "mqttPass": "password"
        },
        {
            "name": "AV Surround Mode",
            "host": "192.168.1.5",
            "port": 8080,
            "zoneControl" : 3,
            "volumeControl": 0,
            "masterPower": false,
            "masterVolume": false,
            "masterMute": false,
            "switchInfoMenu": false,
            "disableLogInfo": false,
            "disableLogDeviceInfo": false,
            "enableDebugMode": false,
            "surrounds": [
                {
                    "name": "MCH Stereo",
                    "reference": "MCH STEREO",
                    "switch": false,
                    "displayType": 0
                },
                {
                    "name": "Stereo",
                    "reference": "STEREO",
                    "switch": false,
                    "displayType": 0
                }
            ],
            "enableMqtt": false,
            "mqttHost": "192.168.1.33",
            "mqttPort": 1883,
            "mqttPrefix": "home/denon",
            "mqttAuth": false,
            "mqttUser": "user",
            "mqttPass": "password"
        }
    ]
}
Adding to HomeKit
Each accessory needs to be manually paired.
- Open the Home
 app on your device.
 - Tap the
 .
. - Tap Add Accessory, and select I Don't Have a Code or Cannot Scan or More Options.
- Select Your accessory.
- Enter the Homebridge PIN or scan the QR code, this can be found in Homebridge UI or Homebridge logs.
- Complete the accessory setup.
Limitations
- That maximum Services for 1 accessory is 100. If Services > 100, accessory stop responding.
- To solve this problem the plugin counts the number of Services and not allow add more as 100.
- If You have configured more as 100 Services some inputs or buttons will not be available in the HomeKit app.
- The Services in this accessory are:
- Information.
- Speaker.
- Lightbulb.
- Fan.
- Television.
- Inputs, which may range from 6 to 100 as each input is 1 service.
- Buttons, which may range from 6 to 100 as each button is 1 service.
What's New
Development
Please feel free to create a Pull request and help in development. It will be highly appreciated.