README

Konnected Homebridge Plugin
Homebridge users get 15% off at konnected.io through 12/31/2021.
Use code HOMEBRIDGE2021 at checkout!
Supported Features
- Native HomeKit Security System Control
- Arm/Disarm Security System
- Optional Home/Stay and Night Modes
- Configurable Sensor Security System Triggering
- Configurable Entry Delay Times
- Traditional Alarm System Integration
- Panic Button via Alarm Siren Switch
- Inverting Sensors
- Switch Trigger States (high vs low)
- Sensor States
- Contact
- Motion
- Glass Break
- Temperature
- Humidity
- Smoke
- Water Leak
- Switches/Actuators
- Beeper
- Siren
- Strobe Light
- Generic Switch
Upcoming Features
- Professional 24/7 smart home monitoring (powered by Noonlight)
Installation
- Install homebridge:
npm install -g homebridge - Install this plugin:
npm install -g homebridge-konnected - Update your configuration file
Configuration
Starter Settings for config.json:
The following two fields are required for the Konnected plugin to start.
{
  "name": "Konnected",
  "platform": "konnected"
}
What to Expect:
After loading this plugin for the first time, it will attempt to discover the Konnected panel(s) on the same local network as Homebridge. Once discovered, the plugin will try to:
- adjust the Homebridge config.json file with details of the discovered panel(s), assigning a name, a unique identifier, the IP address, and port for each panel;
- provision each panel, the result is a fresh panel with unassigned zones in Homebridge.
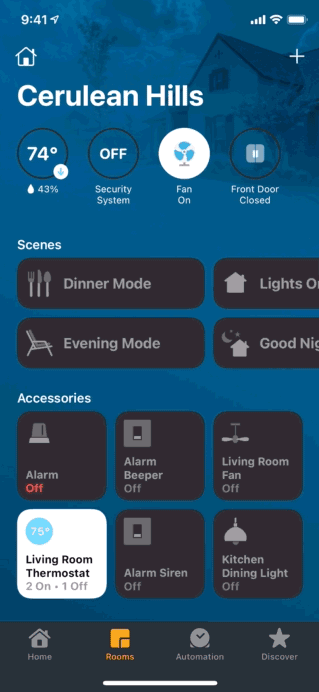
Once the plugin has completed the above two steps, you should also notice that a new security tile 'Konnected Alarm' is exposed in your HomeKit app's default room. You can rename this to whatever you want.
For the security system tile to have any meaningful function you must add zones with sensors on your panel(s) to your config.json file in Homebridge.
Plugin and Zone Settings Example for config.json:
The best way to generate an error-free config.json is by installing and using the Config UI X Plugin for Homebridge. The Konnected Homebridge plugin binds to the Config UI X configuration GUI which makes setting up the zones a trivial process.
For those without Config UI X, or are running this on HOOBS < 4.0, please see the following example configuration for this plugin:
{
  "name": "Konnected",
  "platform": "konnected",
  "advanced": {
    "listenerPort": 5000,
    "listenerIP": "192.168.2.213",
    "discoveryTimeout": 10,
    "entryDelaySettings": {
      "delay": 60,
      "pulseDuration": 975,
      "pulsePause": 25,
      "pulseRepeat": -1
    }
  },
  "panels": [
    {
      "name": "Konnected V1/V2",
      "uuid": "8f655392-a778-4fee-97b9-123456789abc",
      "ipAddress": "192.168.1.110",
      "port": 12345,
      "blink": true,
      "zones": [
        {
          "enabled": true,
          "zoneNumber": "1",
          "zoneType": "beeper",
          "zoneLocation": "Front Entrance",
          "switchSettings": {
            "trigger": 1,
            "pulseDuration": 1000,
            "pulsePause": 500,
            "pulseRepeat": 3,
          }
        },
        {
          "enabled": true,
          "zoneNumber": "2",
          "zoneType": "contact",
          "zoneLocation": "Front Entrance",
          "binarySensorSettings": {
            "invert": false,
            "audibleBeep": true,
            "triggerableModes": [
              "0",
              "1",
              "2"
            ]
          }
        }
      ]
    },
    {
      "name": "Konnected Pro",
      "uuid": "8f655392-a778-4fee-97b9-123456789abd",
      "ipAddress": "192.168.1.120",
      "port": 54321,
      "blink": false,
      "zones": [
        {
          "enabled": true,
          "zoneNumber": "alarm1",
          "zoneType": "siren",
          "zoneLocation": "Hallway",
          "switchSettings": {
            "trigger": 1
          }
        },
        {
          "enabled": false,
          "zoneNumber": "4",
          "zoneType": "temphumid",
          "zoneLocation": "Kitchen",
          "environmentalSensorSettings": {
            "pollInterval": 10
          }
        }
      ]
    }
  ]
}
Configuration Field Explanations:
- "platform": (required) Must always be "konnected"
- "name": (required) Can be anything, it is the name that will appear in your Homebridge log.
- "advanced": An object of optional advanced plugin settings:
- "listenerIP": (optional) If the system hosting Homebridge/HOOBS has multiple active network adapters (e.g., wifi, ethernet, etc.), use this field to force the network IPv4 address that this plugin will listen for zone state changes on.*
- "listenerPort": (optional) Use this field to force the network port that this plugin will listen for zone state changes on (between 1000 and 65535).
- "discoveryTimeout": (optional) A length of time in seconds (between 1 and 300) to allow this plugin to discover all of Konnected panels on the network.
- "entryDelaySettings": (optional) An object of settings related to the period of delay after someone enters (violates) the security system. If there is a beeper present, by default it will have a constant sound, but if you use the example values, it will produce a long tone once every second so you know how much time you have to disarm the security system:
- "delay": (optional) The entry delay before the security system is triggered and the siren zone is triggered (in seconds).
- "pulseDuration": (optional) Beeper setting for how long the its pulse is maintained in the on state for when the system is violated (in milliseconds, e.g. 975).
- "pulsePause": (conditional - required if pulseRepeat exists) Beeper setting for how long the it pauses between pulses (in milliseconds, e.g. 25).
- "pulseRepeat": (conditional - required if pulsePause exists) Beeper setting for how many times it repeats the pulse sequence (infinite = -1, e.g., -1)
- "panels": A panel must exist to associate different sensors and actuators with zones. This section is an array of objects that represent the various panel details and features as well as zones:
- "name" (required) The name of the specific panel.
- "UUID" (required/auto-generated/readonly) The unique identifier for the panel.
- "ipAddress" (required/auto-generated/changeable) The active IP address of the panel.
- "port" (required/auto-generated/changeable) The active network port of the panel.
- "blink" (optional) Blink panel LED when zones change/report their state. (Values: true or false).
- "zones": (optional) An array of objects that represent assigned zones on the panel:
- "enabled": Conveniently lets you to create zone settings in the config.json file but not have them actually be provisioned in the panel nor create an accessory in HomeKit. (Values: true or false).
- "zoneNumber": (quoted number "#") Depending on the panel, the following assignments are allowed:
- V1/V2 Panel: "1" through "6", "out" or "alarm".
- Pro Panel: "1" through "12", "alarm1", "out", "alarm2_out2".
- "zoneType": any one of the following:
- "contact"
- "motion"
- "glass"
- "temperature"
- "temphumid" or "temperature_humidity" (will expose two sensors in HomeKit)
- "water"
- "smoke"
- "beeper" (actuator switch)
- "siren" (actuator switch)
- "strobe" (actuator switch)
- "switch" (actuator switch)
- "zoneLocation": (optional) Custom name for the zone's location (E.g., Kitchen).
- "binarySensorSettings": (optional) Binary-sensors-only settings (not temperature or humidity sensors):
- "invert": (optional) Flip the state of a zone sensor's input. (Values: true or false).
- "audibleBeep": (optional) Whether or not the sensor should trigger the beeper when its state changes. (Values: true or false).
- "triggerableModes": (optional) Choose which modes this sensor will trigger the security system alarm. Any one of the following:
- "0" for home/stay mode
- "1" for away mode
- "2" for night mode
- "environmentalSensorSettings": (optional) Temperature or humidity sensor settings:
- "pollInterval": (optional) Length of time in minutes that this sensor will report its value. (Values between 1 and 1440, default is 3).
- "switchSettings": (optional) Switch-only settings when actuating the switch:
- "trigger": (optional) Force the state of a switch when it is triggered to 'ON'. (Values: "high" or "low", unselected default is "high").
- "pulseDuration": (optional) How long the pulse is maintained in the on state for (in milliseconds).
- "pulsePause": (conditional - required if pulseRepeat exists) Pause between pulses (in milliseconds).
- "pulseRepeat": (conditional - required if pulsePause exists) Times to repeat pulse sequence (infinite = -1)
- "triggerableModes": (optional/experimental) Choose which modes this switch will also trigger the security system alarm. Any one of the following:
- "0" for home/stay mode
- "1" for away mode
- "2" for night mode
Particulars
Security System Modes:
There are four main states for most traditional alarm systems (thanks to @ShaunBennett for nicely writing out their suggested purpose):
- Home/Stay: You might want to freely roam your house while the perimeter is secure, yet be alerted when smoke/water/CO sensors detect problems or front/side doors/gates are opened unexpectedly.
- Night: You sleep upstairs and want to only have motion sensors downstairs trigger the security system at night.
- Away: Set as many binary sensors as you like to detect changes and trigger the security system.
- Disarmed: Nothing will trigger the security system at all.
That being said, HomeKit has the ability to programmatically hide both the Home/Stay mode and the Night mode if you don't use them. What's even better – this plugin will dynamically choose whether or not these security system modes are needed based on what triggerable modes are selected for sensors or switches.
If you don't want a Night mode for the security system, remove the Night mode from the triggerable mode setting for all sensors and switches; the same goes for the Home/Stay mode as well.
Triggering Beeper, Siren, and Strobe Actuators:
The Konnected Homebridge plugin affords some automatic conveniences when actuating Beepers, Sirens and Strobe zones. This means that if you wish to have any of these types of devices working in your security system, they must be specifically set in the zone to be a "beeper", "siren", or "strobe".
Homebridge will automatically find the beepers, sirens and strobe switches, no matter what panel they are on, and actuate them based on their configuration.
For Example:
When the security system is in a state of 'entry delay', beeper zones may be triggered to warn a user that the system is armed and needs to be disarmed. When the security system has passed the time of 'entry delay' and becomes triggered, the alarm should sound and the siren and strobe light zones will be triggered.
The great thing is that you can have multiple beepers, or sirens and strobe lights all fire off as one – but exist on different panels and zones across your house.
Troubleshooting
Missing/Stale Accessories:
Sometimes you may need to reboot Homebridge once-more after changes made to the configuration for the zone accessories to show up the first time or to reflect the changes and work properly in HomeKit. This is partially because this Homebridge plugin uses a cache to keep it performant and needs to rebuild it once on launch, and then read from it on second launch to update the accessories in HomeKit.
Also it's always good to restart the HomeKit app after changes made to the Homebridge configuration as HomeKit does some background cleanup to the states and presence of devices in its accessory database.
Check the Forums:
Before anything, please review the Konnected Homebridge Forum to see if there's already a similar issue reported where a solution has been proposed.
If you cannot resolve the issue, please Post a Forum Topic with the following details:
- Describe the Bug
- Steps to Reproduce
- Expected Behavior
- Attach Files to Support Your Experience:
- Screenshots
- Log Snapshot (txt file)
- Homebridge System:
- Node.js Version
- NPM Version
- Homebridge/HOOBS Version
- Operating System: (Raspbian / Ubuntu / Debian / Windows / macOS / Docker)
- Process Supervisor: (Docker / Systemd / init.d / pm2 / launchctl / hb-service / other / none)
- Konnected Panel(s):
- Panel Hardware Version
- Firmware Version
- Addon Panel(s)
- Interface Panel(s)
- Any Additional Relevant Information
"Did You Try Rebooting It?":
Sometimes fixing a problematic Homebridge/HOOBS/HomeKit accessory is as simple as deleting Homebridge's cachedAccessories file.
First stop Homebridge/HOOBS.
Delete the
cachedAccessoriesfile which is commonly located in its respective folder:- Homebridge:
- Linux-based/MacOS:
~/.homebridge/accessories/cachedAccessories - Windows:
$HOME\.homebridge\Accessories\cachedAccessories
- Linux-based/MacOS:
- HOOBS:
- HOOBSBox/Linux-based/MacOS:
- v3.x:
~/.hoobs/etc/accessories/cachedAccessories - v4.x:
/var/lib/hoobs/accessories/cachedAccessories Windows(HOOBS does not work on Windows)
- Homebridge:
Once the file is deleted, start up Homebridge/HOOBS and allow it to regenerate your accessories and the cache.
WARNING: Be careful to not delete the persist folder or its contents! Your Homebridge and devices will become unresponsive and you will have to completely re-pair the Homebridge bridge (remove and re-scan the QR-code for Homebridge and set up all of your accessories/devices again).