README
Overview
CanvasPlus is a universal Node.js and browser library, which adds image processing capabilities onto the HTML5 Canvas API. In Node.js we rely on the amazing canvas module, which is built on the Cairo graphics library. In the browser we simply extend (well, wrap) the native canvas.
Check out our live demo playground to try out the library in your favorite browser.
Features
- Load images from buffers, files or URLs
- Resize with special modes including cover, contain, and letterbox
- Render text with extra features
- Multi-line, paragraph text
- Custom character spacing and line spacing
- Word-wrap
- Auto-scale to fit line or paragraph
- Quantization into indexed mode for PNGs and GIFs
- Optional dithering
- Super-fast quantize mode
- Curves
- Similar to Adobe Photoshop's Curves filter
- Optionally apply different curves to each channel
- Macro functions including Posterize, Solarize, Invert, Gamma, Sepia, etc.
- Adjust hue, saturation, brightness, contrast and color temperature
- Normalize (Auto-Enhance)
- Generate histogram data
- Access EXIF Metadata
- Auto-Orient
- Convolution Kernel
- Macro functions including Emboss, Find Edges, Blur, Gaussian Blur, Sharpen
- Crop images
- Manual or automatic based on corner pixel
- Rotation and flip horizontal / vertical
- Save as JPEG, PNG or GIF
- True support for indexed palette PNGs and GIFs
- True support for alpha PNGs, even indexed alpha
Why
There are already some extremely cool image processing libraries out there. I played with several, but none of them provided all the features I needed. Specifically, I needed fast JPEG load and save, fast resize, TrueType / OpenType font support, advanced text rendering features like word wrap and auto-scale, quantization to 8-bit indexed mode with dithering, and curves. I also wanted a universal library that worked in the browser as well as Node.js. That being said, I want to recommend some amazing free libraries that you should absolutely check out:
| Library | Notes |
|---|---|
| LWIP | Very nice, fast engine with a clean API. Only missing text rendering, curves, and 8-bit quantization. |
| JIMP | Incredible pure-JS engine that does just about everything. However, JPEG load/save and resize are too slow for me. Also, no TrueType / OpenType font support, and there are some licensing issues. Otherwise this is very, very cool. |
| Sharp | Very fast (uses libvips), and cool SVG integration. Missing text rendering, curves, 8-bit quantization, and browser support. |
| GM | I love this library, but it actually just shells out to the command-line GraphicsMagick/ImageMagick binary, so there are some performance concerns. Also, no advanced text features, no curves, and no browser support. |
Table of Contents
- Usage
- API
- Development
- Acknowledgments
- License
Usage
Node.js
Use npm to install the module:
npm install pixl-canvas-plus
Please note that the canvas module dependency is a binary compiled library, which depends on Cairo being preinstalled on your machine. See their installation wiki for assistance. That being said, canvas v2.x comes with precompiled binaries for macOS, Windows and Linux, so it might just slip right in.
Here is a simple usage example:
var CanvasPlus = require('pixl-canvas-plus');
var canvas = new CanvasPlus();

canvas.load( 'waterfall.jpg', function(err) {
    if (err) throw err;

    canvas.resize({
        "width": 640,
        "height": 480,
        "mode": "fit"
    });

    canvas.adjust({
        "brightness": -20,
        "contrast": 20
    });

    canvas.write({"format":"jpeg", "quality":90}, function(err, buf) {
        if (err) throw err;

        // 'buf' will be a binary buffer containing final image...
        require('fs').writeFileSync('my_image.jpg', buf);
    });

});
Browser
For the browser we use the native built-in HTML5 Canvas API, and there are no dependencies. Simply download and host this pre-built file (compiled using browserify) on your own web server:
https://raw.githubusercontent.com/jhuckaby/canvas-plus/master/canvas-plus.js
This will expose a global CanvasPlus class in the window object. Here is how to use it:
<script src="canvas-plus.js"></script>
<script>
    var canvas = new CanvasPlus();

    canvas.load( 'waterfall.jpg', function(err) {
        if (err) throw err;

        canvas.resize({
            "width": 640,
            "height": 480,
            "mode": "fit"
        });

        canvas.adjust({
            "brightness": -20,
            "contrast": 20
        });

        canvas.write({"format":"jpeg","quality":90}, function(err, buf) {
            if (err) throw err;

            // 'buf' will be a binary buffer containing final image...
            var blob = new Blob( [ buf ], { type: "image/jpeg" } );
            var object_url = URL.createObjectURL( blob );

            // insert new image into DOM
            var img = new Image();
            img.src = object_url;
            document.body.appendChild( img );
        });

    });
</script>
Creating
To create a blank canvas, and optionally fill with a background color, you can pass arguments to the constructor, like this:
var canvas = new CanvasPlus( 640, 480 );
var canvas = new CanvasPlus( 640, 480, "#FF0000" );
Or you can use the explicit create() method:
var canvas = new CanvasPlus();
canvas.create({
    width: 640,
    height: 480,
    background: "#FF0000"
});
The background color can be any CSS-compatible color string, including RGBA, e.g. rgba(255, 0, 0, 0.5).
Loading
You can load images from a variety of sources, including buffers, files and URLs. JPEGs, PNGs and GIFs are supported, and possibly others depending on your environment:
| Environment | Sources | Image Formats |
|---|---|---|
| Node.js | Buffer, File Path, URL | JPEG, PNG, GIF |
| Browser | ArrayBuffer, File, Blob, URL | JPEG, PNG, GIF, BMP, WebP (Chrome only) |
To load an image, pass the source (e.g. file path, URL) to the load() method. Please note that this is an asynchronous call, so you need to provide a callback, or you can use the promise / async / await pattern with Node 8+. Example with callback:
var canvas = new CanvasPlus();

canvas.load( 'waterfall.jpg', function(err) {
    if (err) throw err;
});
Or with Node 8+:
try {
    await canvas.load( 'waterfall.jpg' );
}
catch (err) {
    // handle error here
}
In Node.js this example would look for a waterfall.jpg file on disk in the current directory. In the browser this would be treated as a URL to waterfall.jpg relative to the current page.
Note that loading images in the browser requires that the file is hosted on the same domain as the page, or is hosted on a server that sends back proper CORS headers. However, if you need to load an image from a 3rd party URL that does not support CORS, you can use the special loadRemote() method. This works well enough, but due to browser security restrictions we will not have access to the raw binary bytes, so features like EXIF data and Auto-Orient are not available.
Saving
To save the contents of your canvas to a binary image format, use the write() method. This will compress the image into a JPEG, PNG or GIF, and provide you with a Buffer object. Please note that this is an asynchronous call, so you need to provide a callback, or you can use the promise / async / await pattern with Node 8+. Example with callback:
canvas.write({"format":"jpeg", "quality":90}, function(err, buf) {
    if (err) throw err;

    // 'buf' will be a binary buffer containing final image
});
Or with Node 8+:
try {
    var buf = await canvas.write({"format":"jpeg", "quality":90});
    // 'buf' will be a binary buffer containing final image
}
catch (err) {
    // handle error here
}
The format property should be one of jpeg, png or gif. The quality property is only used for JPEGs, and should be a number from 0 to 100.
Note that in the browser the buffer is provided using the buffer module, which is is a subclass of Uint8Array. So there is no need to explicitly convert to typed array -- just use the buffer as you would a native Uint8Array.
Errors
All filter functions are synchronous, so they do not follow the callback pattern. So by default all filter methods do not throw (however you can enable this behavior if you want, see below). Instead, they set an internal error state which you can query after the fact. Example:
canvas.adjust({
    "brightness": -20,
    "contrast": 20
});
if (canvas.getLastError()) {
    // an error occurred
    var err = canvas.getLastError();
}
This works even if you chain multiple filter calls together. CanvasPlus will "abort" the chain on the first error. Example:
canvas.desaturate().normalize().solarize().sepia().rotate(45);

if (canvas.getLastError()) {
    // an error occurred
    var err = canvas.getLastError();
}
If you would prefer to use try/catch, you can enable throw mode by calling set() before running any filters:
canvas.set('throw', true);

try {
    canvas.adjust({
        "brightness": -20,
        "contrast": 20
    });
}
catch (err) {
    // an error occurred
}
Logging
To enable basic debug logging, use the set() method to enable the debug parameter. Example:
canvas.set('debug', true);
Example debug log, which is emitted using console.log() (and console.error() for errors):
[DEBUG] Setting property: debug: true
[DEBUG] Loading image data from file: 640x480.jpg
[DEBUG] Loading image from buffer {"size":296673}
[DEBUG] Image ping: {"height":480,"width":640,"type":"jpg"}
[DEBUG] Setting property: width: 640
[DEBUG] Setting property: height: 480
[DEBUG] Setting property: format: jpg
[DEBUG] Setting property: mode: image
[DEBUG] Setting property: origWidth: 640
[DEBUG] Setting property: origHeight: 480
[DEBUG] Setting property: origFormat: jpg
[DEBUG] Image load complete
[DEBUG] Resizing image to target size: 320x240 {"mode":"Fit","gravity":"center","background":"","orig_width":640,"orig_height":480,"target_width":320,"target_height":240,"dest_width":320,"dest_height":240,"canvas_width":320,"canvas_height":240,"x":0,"y":0}
[DEBUG] Setting property: width: 320
[DEBUG] Setting property: height: 240
[DEBUG] Creating new canvas: 320x240 {"background":"(transparent)"}
[DEBUG] Setting property: mode: rgba
[DEBUG] Canvas created successfully
[DEBUG] Image resize complete
[DEBUG] Adjusting image {"brightness":-20,"contrast":20,"hue":0,"saturation":0}
[DEBUG] Image adjustment complete
[DEBUG] Setting property: file: out.png
[DEBUG] Setting property: format: png
[DEBUG] Compressing image to format: png
[DEBUG] Compressing into 32-bit PNG {"compression":9,"filter":"PNG_ALL_FILTERS"}
[DEBUG] PNG compression complete
[DEBUG] Image compression complete {"size":165279}
[DEBUG] Saving to file: out.png
[DEBUG] Image write complete
In Node.js, you can attach a log agent compatible with our pixl-logger module, or write your own that implements the interface. Example of the former:
var Logger = require('pixl-logger');
var columns = ['hires_epoch', 'date', 'hostname', 'component', 'category', 'code', 'msg', 'data'];
var logger = new Logger( 'logs/debug.log', columns );

canvas.attachLogAgent( logger );
Example custom logger implementation:
var logger = {
    debug: function(level, msg, data) {
        if (data) msg += " (" + JSON.stringify(data) + ")";
        console.log('[DEBUG]['+level+'] ' + msg);
    },
    error: function(code, msg, data) {
        if (data) msg += " (" + JSON.stringify(data) + ")";
        console.log('[ERROR]['+code+'] ' + msg);
    }
};

canvas.attachLogAgent( logger );
API
General
create
The create() method creates a new blank canvas, or replaces one if it already exists. It accepts an object containing the following properties:
| Property Name | Type | Description |
|---|---|---|
width |
Integer | (Required) Canvas width in pixels. |
height |
Integer | (Required) Canvas height in pixels. |
background |
String | Optional background color (any CSS color string). |
Example use:
canvas.create({
    width: 640,
    height: 480,
    background: "#FF0000"
});
The background color can be any CSS-compatible color string, including RGBA, e.g. rgba(255, 0, 0, 0.5). If omitted, the canvas is initialized to transparent black.
Canvases are always created in 32-bit RGBA mode.
load
The load() method loads an image into CanvasPlus. It accepts buffers, files and URLs. For image formats, JPEGs, PNGs and GIFs are supported, and possibly others depending on your environment. Please note that this is an asynchronous call, so you need to provide a callback as the 2nd argument. Example use:
canvas.load( 'waterfall.jpg', function(err) {
    if (err) throw err;
});
In Node.js this example would look for a waterfall.jpg file on disk in the current directory. In the browser this would be treated as a URL to waterfall.jpg relative to the current page.
Alternatively you can import an existing canvas using importCanvas(), or an image object using importImage().
Auto-Orient
By default, CanvasPlus will automatically orient (rotate) your image on load, so it is always right-side up. This is accomplished by detecting the image's EXIF data, if present, and reading the special orientation flag. Many digital cameras do not fix image rotation when shots are taken, and instead simply include an EXIF flag in the files, indicating the camera's orientation.
If you do not want this behavior for some reason, you can disable the feature by calling set() before loading your image, and disabling the autoOrient parameter. Example:
var canvas = new CanvasPlus();
canvas.set('autoOrient', false);

canvas.load( 'waterfall.jpg', function(err) {
    if (err) throw err;
});
loadRemote
The loadRemote() method is a special, browser-only API, which allows you to load 3rd party image URLs. That is, images that are hosted on 3rd party domains, and do not provide proper CORS headers. Example use:
var url = "https://upload.wikimedia.org/wikipedia/commons/thumb/6/61/HTML5_logo_and_wordmark.svg/1024px-HTML5_logo_and_wordmark.svg.png";

canvas.loadRemote( url, function(err) {
    if (err) throw err;
});
Note that due to browser security restrictions we have no access to the raw binary bytes, so features like EXIF data and Auto-Orient are not available when using loadRemote().
write
The write() method will compress your canvas into a JPEG, PNG or GIF, and provide you with a Buffer object. Please note that this is an asynchronous call, so you need to provide a callback.
canvas.write({"format":"jpeg", "quality":90}, function(err, buf) {
    if (err) throw err;

    // 'buf' will be a binary buffer containing final image
});
The format property should be one of jpeg, png or gif. The quality property is only used for JPEGs, and should be a number from 0 to 100.
Note that in the browser the buffer is provided using the buffer module, which is is a subclass of Uint8Array. So there is no need to explicitly convert to typed array. Just use the buffer as you would a native Uint8Array.
clone
The clone() method makes a copy of your canvas, including the raw pixel data, settings and all. This is a synchronous call, and the new cloned object is returned. Example use:
var copy = canvas.clone();
Filters
All filter methods are synchronous, and do not require a callback. You can also chain them together, like this:
canvas.desaturate().brightness(-15).contrast(30).invert();
adjust
Live Demo: Adjust Brightness/Contrast
The adjust() method allows you to adjust the image hue, saturation, brightness, and/or contrast. It accepts an object containing the following properties:
| Property Name | Type | Description |
|---|---|---|
hue |
Integer | Adjust hue (-360 to 360). |
saturation |
Integer | Adjust saturation (-255 to 255). |
brightness |
Integer | Adjust brightness (-255 to 255). |
contrast |
Integer | Adjust contrast (-255 to 255). |
clip |
Object | Optional clipping rectangle (see Clipping below). |
Example use:
canvas.adjust({
    "brightness": -15,
    "contrast": 30
});
The following method shortcuts are provided for convenience:
| Method Name | Example |
|---|---|
hue |
canvas.hue( 180 ); |
saturation |
canvas.saturation( -128 ); |
brightness |
canvas.brightness( 64 ); |
contrast |
canvas.contrast( 32 ); |
Note: If you want to completely desaturate an image, check out the desaturate() filter below, as it is considerably faster than using adjust().
blur
Live Demo: Blur
The blur() method applies a simple box blur to your image, using a custom convolution kernel. This is a fast blur filter, but isn't particularly high quality. It accepts an object containing the following properties:
| Property Name | Type | Description |
|---|---|---|
amount |
Integer | (Required) Blur amount (2 to 100). |
edges |
String | How to calculate out-of-bounds pixels, can be one of repeat, wrap, mirror or discard (case-insensitive). Defaults to repeat. |
channels |
String | Which channels to apply the filter to, defaults to rgba. See Channels. |
clip |
Object | Optional clipping rectangle (see Clipping below). |
Example use:
canvas.blur({
    "amount": 5
});
See Also: gaussianBlur()
border
Live Demo: Border
The border() method draws a border around your canvas, with a custom size and color. It accepts an object containing the following properties:
| Property Name | Type | Description |
|---|---|---|
size |
Integer | (Required) Size of the border in pixels. |
color |
String | (Required) Color of the border (any CSS color string). |
mode |
String | (Required) Border render mode (inside, center or outside). |
The mode can be one of inside (draw on top of edge pixels), outside (expand canvas by border size), or center (draw border half inside, half outside). The latter two modes will actually expand the canvas to accommodate the border.
Example use:
canvas.border({
    "size": 5,
    "color": "#FF0000",
    "mode": "inside"
});
Note that transparent colors aren't supported for this filter.
composite
Live Demo: Composite
The composite() method superimposes a separate image or canvas atop the current one. The source can be another CanvasPlus object, a native HTML5 Canvas object, or a native Image object. Several parameters are provided for positioning, scaling and setting the compositing mode. The method accepts an object containing the following properties:
| Property Name | Type | Description |
|---|---|---|
image |
Object | (Required) Source image or canvas to superimpose atop current canvas. |
width |
Integer | Optional desired width, will trigger a resize during composite. |
height |
Integer | Optional desired height, will trigger a resize during composite. |
gravity |
String | Image starting position (alignment), which can be further adjusted with margins and/or offsets. See Gravity. |
marginX |
Integer | Horizontal margin in pixels, defaults to 0. |
marginY |
Integer | Vertical margin in pixels, defaults to 0. |
offsetX |
Integer | Horizontal offset in pixels, defaults to 0. |
offsetY |
Integer | Vertical offset in pixels, defaults to 0. |
opacity |
Float | Image opacity (0.0 to 1.0), defaults to 1.0. |
mode |
String | Composite rendering mode, see globalCompositeOperation, defaults to source-over. |
antialias |
String | Image scaling quality, one of best, good, fast or nearest. Defaults to best. See Anti-Aliasing. |
Example use:
canvas.composite({
    "image": my_other_canvas,
    "gravity": "northwest",
    "marginX": 10,
    "marginY": 10
});
Note that when width and/or height are specified here, the image is resized in exact (scale) mode.
convolve
Live Demo: 3x3 Sharpen Kernel
The convolve() method applies a custom convolution kernel to the canvas. This is used to apply effects such as blur, sharpen, emboss, find edges, and more. The method accepts an object containing the following properties:
| Property Name | Type | Description |
|---|---|---|
matrix |
Array | (Required) An array of numbers for the convolution matrix. The length should be a perfect square (e.g. 9, 16, 25). |
offset |
Integer | Optionally offset the destination channel values, causing a brightening effect (used by emboss). |
edges |
String | How to calculate out-of-bounds pixels, can be one of repeat, wrap, mirror or discard. Defaults to repeat. |
channels |
String | Which channels to apply the filter to, defaults to rgba. See Channels. |
clip |
Object | Optional clipping rectangle (see Clipping below). |
Example use:
canvas.convolve({
    "matrix": [ // 3x3 sharpen
        0, -1, 0,
        -1, 5, -1,
        0, -1, 0
    ]
});
crop
Live Demo: Square Earth
The crop() method crops the canvas down to the specified size, at the specified coordinates (top-left corner). All values are specified in pixels. The method accepts an object containing the following properties:
| Property Name | Type | Description |
|---|---|---|
x |
Integer | (Required) The coordinate of the left side of the crop rectangle. |
y |
Integer | (Required) The coordinate of the top side of the crop rectangle. |
width |
Integer | (Required) The width of the crop rectangle. |
height |
Integer | (Required) The width of the crop rectangle. |
Example use:
canvas.crop({
    "x": 50,
    "y": 50,
    "width": 200,
    "height": 200
});
Note that cropping regenerates the underlying canvas object. It effectively creates a new canvas at the final cropped size, then copies the source into the destination, then discards the source.
See Also: trim()
curves
Live Demo: Increase mid-tones (see below for more)
The curves() method applies a tonality curve to all the pixels in your canvas. You need only provide key points, and all the curve values are interpolated using monotone cubic interpolation (similar to how Photoshop does it). Curves are used to implement all kinds of common image filters, including gamma adjustment, inversion, posterize, solarize, normalize, sepia, and color temperature. But here you can supply your own custom curve by specifying key points, including different curves per channel if desired. The method accepts an object containing the following properties:
| Property Name | Type | Description |
|---|---|---|
rgb |
Array | An array of curve points for the red, green and blue channels together (same curve applied to all). |
red |
Array | An array of curve points for the red channel specifically. |
green |
Array | An array of curve points for the green channel specifically. |
blue |
Array | An array of curve points for the blue channel specifically. |
alpha |
Array | An array of curve points for the alpha channel specifically. |
clip |
Object | Optional clipping rectangle (see Clipping below). |
You can specify the curve points in two ways. First, a simple one-dimensional array of "Y" axis values (each 0 - 255), which are evenly distributed over the "X" axis, from darkest to lightest. And second, an array of X/Y pairs specifying a more precise curve. Example of the former:
canvas.curves({
    "rgb": [0, 191, 255] // increase mid-tones
});
To better explain how this works, here is a table with some common curves, a visualization, and a live demo of each:
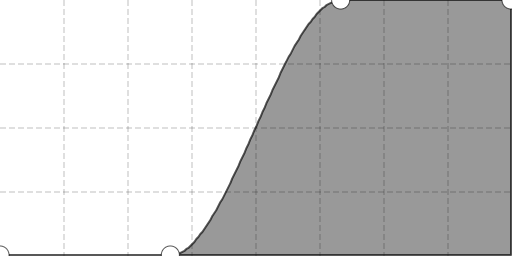
| Curve Points | Visualization | Description | Demo Link |
|---|---|---|---|
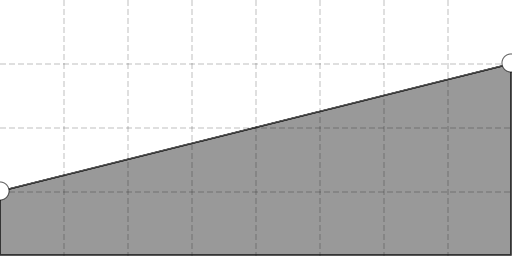
[0, 255] |
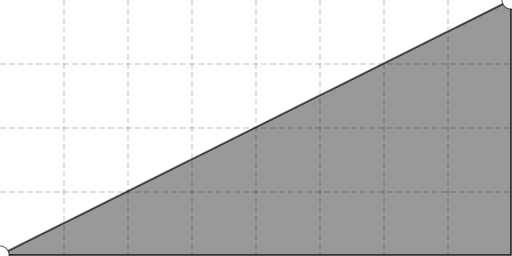 |
Baseline (no change) | Live Demo |
[63, 255] |
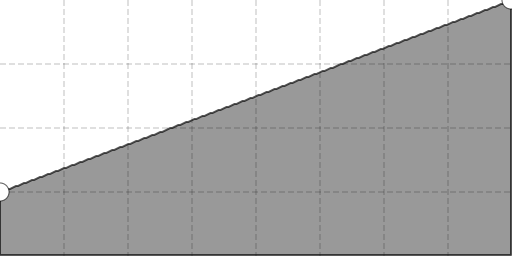 |
Increase brightness | Live Demo |
[0, 127] |
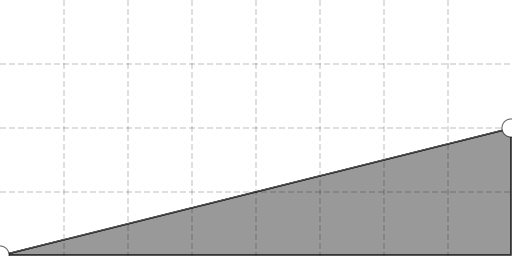 |
Decrease brightness | Live Demo |
[0, 0, 255, 255] |
 |
Increase contrast | Live Demo |
[63, 191] |
 |
Decrease contrast | Live Demo |
[0, 191, 255] |
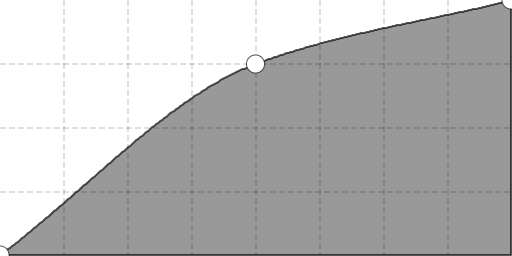 |
Increase mid-tones | Live Demo |
[0, 63, 255] |
 |
Decrease mid-tones | Live Demo |
[0, 96, 160, 216, 255] |
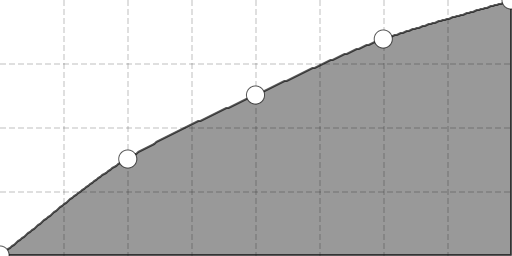 |
Increase shadow detail | Live Demo |
[255, 0] |
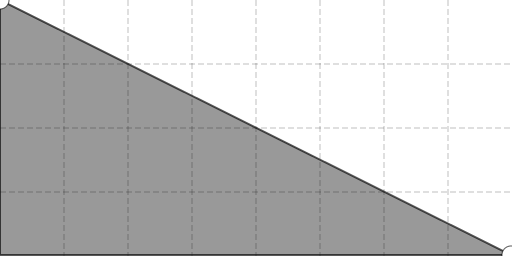 |
Invert image | Live Demo |
[0, 127, 0] |
 |
Solarize effect | Live Demo |
[0, 255, 0, 255] |
 |
Alice in Wonderland | Live Demo |
You can also specify different curves to each channel. For example, here is one way to apply a sepia tone effect to an image:
canvas.desaturate().curves({
    "green": [0, 108, 255],
    "blue": [0, 64, 255]
});
As mentioned above, you can alternatively specify an array of X/Y pairs for the key points, to describe a more precise curve. Here is an example of that:
canvas.curves({
    "rgb": [
        [0, 0],
        [32, 192],
        [255, 255]
    ]
});
Note that if your point array contains exactly 256 elements, and is a simple one-dimensional array of integers, then no interpolation is performed, and the points are mapped exactly to each value as specified.
desaturate
Live Demo: Desaturate
The desaturate() method removes all color from your canvas, resulting in a pure grayscale image. Instead of averaging the channels together, they are weighted in such a way that the grayscale output is more natural-looking (see relative luminance).
This is similar to calling adjust() and setting the saturation to -255, however desaturate() is much faster. The method accepts an object containing the following properties:
| Property Name | Type | Description |
|---|---|---|
clip |
Object | Optional clipping rectangle (see Clipping below). |
Example use:
canvas.desaturate();
draw
Live Demo: Draw Primitives
The draw() method allows you to draw primitive geometric objects onto the canvas, such as rectangles, lines, or custom shapes. This is basically just a convenience wrapper around the HTML5 Canvas drawing API. The method accepts an object containing the following properties:
| Property Name | Type | Description |
|---|---|---|
params |
Object | Optional parameters to set on the canvas context, e.g. fillStyle, strokeStyle. |
commands |
Object | An array of commands to run on the canvas context, e.g. ['fill']. |
Here is an example:
canvas.draw({
    params: {
        fillStyle: '#888888',
        strokeStyle: '#000000'
    },
    commands: [
        ['rect', 50, 50, 100, 100],
        ['fill'],
        ['stroke']
    ]
});
This example would draw a filled + stroked rectangle onto the canvas. The params object can contain any properties you want to set on the canvas context before running the draw commands (i.e. colors, stroke width, line caps, etc.), and the commands array contains each draw call to make. Each element in the commands array should be a nested array containing the draw call name (e.g. rect), followed by any additional arguments required by the call, such as coordinates for a rectangle, or points for a moveTo / lineTo.
Using this syntax, you can draw complex shapes by calling any of the HTML5 Canvas API draw methods. Here is an example which draws a filled triangle:
canvas.draw({
    params: {
        fillStyle: '#000000'
    },
    commands: [
        ['beginPath'],
        ['moveTo', 75, 70],
        ['lineTo', 100, 75],
        ['lineTo', 100, 25],
        ['fill']
    ]
});
Convenience properties are provided for drawing simple rectangles and lines, to make the syntax a little easier for common use cases. Here is the list of optional properties:
| Property Name | Type | Description |
|---|---|---|
line |
Array | An array of 4 coordinates, the first two being the X/Y of the line start point, and the latter two being the X/Y of the line end point. |
rect |
Array | An array of 4 coordinates, the first two being the X/Y of the rectangle's top-left corner, and the latter two being the width and height. |
fill |
String | Setting this to a color will set the canvas context fillStyle property, and append a ['fill'] command to the end of the list. |
stroke |
String | Setting this to a color will set the canvas context strokeStyle property, and append a ['stroke'] command to the end of the list. |
Examples:
canvas.draw({
    "rect": [ 75, 75, 200, 200 ],
    "fill": "#888888",
    "stroke": "#000000"
});

canvas.draw({
    "line": [ 150, 100, 350, 300 ],
    "stroke": "#ff0000"
});
emboss
Live Demo: Emboss
The emboss() method applies an emboss filter to the canvas, which is implemented using a 3x3 convolution kernel. The method accepts an object containing the following properties:
| Property Name | Type | Description |
|---|---|---|
channels |
String | Which channels to apply the filter to, defaults to rgb. See Channels. |
clip |
Object | Optional clipping rectangle (see Clipping below). |
Example use:
canvas.emboss();
This is equivalent to calling desaturate(), followed by convolve() with the following parameters:
canvas.desaturate().convolve({
    matrix: [2, 0, 0, 0, -1, 0, 0, 0, -1],
    offset: 127,
    edges: 'repeat',
    channels: 'rgb'
});
expand
Live Demo: Expand
The expand() method increases the canvas size, while not resizing the image itself. This is essentially a "reverse crop". You can specify an alignment (gravity) for positioning the existing image on the expanded canvas, and an optional background color. The method accepts an object containing the following properties:
| Property Name | Type | Description |
|---|---|---|
width |
Integer | Number of pixels to increase the width by (this is a delta). |
height |
Integer | Number of pixels to increase the height by (this is a delta). |
gravity |
String | Image position (alignment) of pre-existing pixels on new expanded canvas. See Gravity. |
background |
String | Background color for canvas expansion (any CSS color string). Fully transparent if omitted. |
Example use:
canvas.expand({
    "width": 100,
    "height": 100,
    "gravity": "center"
});
This would increase the canvas size by 100px horizontally and vertically, essentially adding a 50px transparent border on all sides of the image.
Note that expanding regenerates the underlying canvas object. It effectively creates a new canvas at the expanded size, then copies the source into the destination, then discards the source.
findEdges
Live Demo: Find Edges
The findEdges() method applies a Sobel operator to the canvas, resulting in a strong highlight of all the apparent edges in the image. This uses a 3x3 convolution kernel. The method accepts an object containing the following properties:
| Property Name | Type | Description |
|---|---|---|
channels |
String | Which channels to apply the filter to, defaults to rgb. See Channels. |
clip |
Object | Optional clipping rectangle (see Clipping below). |
Example use:
canvas.findEdges();
This is equivalent to calling desaturate(), followed by convolve() with the following parameters:
canvas.desaturate().convolve({
    matrix: [-1, -1, -1, -1, 8, -1, -1, -1, -1],
    offset: 0,
    edges: 'repeat',
    channels: 'rgb'
});
flatten
Live Demo: Flatten
The flatten() method effectively removes the alpha channel from your canvas, resulting in a fully opaque image. Of course, the alpha channel still technically exists, as all canvases are RGBA, but this allows you to remove all transparency. You can choose to place a background color matte behind the image, or simply set the direct alpha values to 255. The method accepts an object containing the following properties:
| Property Name | Type | Description |
|---|---|---|
background |
String | Optional background color (any CSS color string). |
clip |
Object | Optional clipping rectangle (see Clipping below). |
Example use:
canvas.flatten({
    "background": "#000000"
});
When a background is specified, the underlying canvas object is regenerated. The library effectively creates a new canvas with the specified background color, superimposes the source onto the destination, then discards the source.
If you omit the background property (or it evaluates to false) then the alpha pixel values are all set to 255 in a direct sense. This may expose otherwise "hidden" visual elements in your image, depending on how it was encoded.
Note that flattening the canvas sets an internal alpha flag to false, which indicates that PNG and GIF output should not contain any alpha information. You can manually get/set this flag using get() and set(), although you should rarely need to.
gamma
Live Demo: Gamma Adjust
The gamma() method applies a gamma correction curve to your canvas. Values less than 1.0 will lighten the image, whereas values greater than 1.0 will darken it. The method accepts an object containing the following properties:
| Property Name | Type | Description |
|---|---|---|
amount |
Float | Gamma correction value, typically in the range 0.25 to 4.0. The default value is 1.0 (no change). |
channels |
String | Which channels to apply the filter to, defaults to rgb. See Channels. |
clip |
Object | Optional clipping rectangle (see Clipping below). |
Example use:
canvas.gamma({
    "amount": 0.5
});
gaussianBlur
Live Demo: Gaussian Blur
The gaussianBlur() method applies a Gaussian blur to your image, using a custom convolution kernel. This is a rather computationally expensive filter, but is much higher quality than the standard blur. It accepts an object containing the following properties:
| Property Name | Type | Description |
|---|---|---|
amount |
Integer | (Required) Blur amount (3 to 100). |
sigma |
Integer | Gaussian sigma operator (defaults to amount / 3). |
edges |
String | How to calculate out-of-bounds pixels, can be one of repeat, wrap, mirror or discard (case-insensitive). Defaults to repeat. |
channels |
String | Which channels to apply the filter to, defaults to rgba. See Channels. |
clip |
Object | Optional clipping rectangle (see Clipping below). |
The amount is really just the size of one dimension of the Gaussian convolution matrix (it is squared to compute the full matrix size), so the larger the amount the slower the operation is. The sigma actually controls the amount of blurring that occurs. For best results, set sigma to 1/3 of amount (this is the default behavior if sigma is omitted).
Example use:
canvas.gaussianBlur({
    "amount": 9
});
invert
Live Demo: Invert
The invert() method inverts all colors in the image (i.e. creates a photographic negative), or can be restricted to certain specified channels. The method accepts an object containing the following properties:
| Property Name | Type | Description |
|---|---|---|
channels |
String | Which channels to apply the filter to, defaults to rgb. See Channels. |
clip |
Object | Optional clipping rectangle (see Clipping below). |
Example use:
canvas.invert();
Inversion is implemented using a curve, and is functionally equivalent to calling:
canvas.curves({
    "rgb": [255, 0]
});
mask
Live Demo: Apply Mask
The mask() method applies a separate image or canvas as a mask onto the current one. Meaning, the alpha channel of one is applied to the other. The source can be another CanvasPlus object, a native HTML5 Canvas object, or a native Image object. Several parameters are provided for positioning and scaling the mask. The method accepts an object containing the following properties:
| Property Name | Type | Description |
|---|---|---|
image |
Object | (Required) Source image or canvas to apply as a mask. |
width |
Integer | Optional desired width, will trigger a resize during composite. |
height |
Integer | Optional desired height, will trigger a resize during composite. |
gravity |
String | Image starting position (alignment), which can be further adjusted with margins and/or offsets. See Gravity. |
marginX |
Integer | Horizontal margin in pixels, defaults to 0. |
marginY |
Integer | Vertical margin in pixels, defaults to 0. |
offsetX |
Integer | Horizontal offset in pixels, defaults to 0. |
offsetY |
Integer | Vertical offset in pixels, defaults to 0. |
opacity |
Float | Mask opacity (0.0 to 1.0), defaults to 1.0. |
antialias |
String | Mask scaling quality, one of best, good, fast or nearest. Defaults to best. See Anti-Aliasing. |
Example use:
canvas.mask({
    "image": my_mask_image,
    "gravity": "center"
});
Masking is effectively the same as calling composite() with the mode set to destination-in.
Note that when width and/or height are specified, the mask is resized in exact (scale) mode.
normalize
Live Demo: Normalize
The normalize() method stretches the image contrast to cover the entire range of possible values. So for example, if the image never reaches full back and/or full white, this will increase the contrast so both sides are maxed. The method accepts an object containing the following properties:
| Property Name | Type | Description |
|---|---|---|
channels |
String | Which channels to apply the filter to, defaults to rgb. See Channels. |
clip |
Object | Optional clipping rectangle (see Clipping below). |
Example use:
canvas.normalize();
Normalize is implemented by requesting a histogram to locate the white and black points, and then applying a custom curve.
opacity
Live Demo: Half Transparent
The opacity() method fades the canvas out towards pure transparent, or a custom background color. The method accepts an opacity float, or an object containing the following properties:
| Property Name | Type | Description |
|---|---|---|
opacity |
Float | The target image opacity from 0.0 (transparent) to 1.0 (opaque). |
background |
String | Optional background color, defaults to transparent. |
Example use:
canvas.opacity({
    opacity: 0.5,
    background: 'red'
});
If you are only specifying opacity (no background), you can just pass the number as the sole argument:
canvas.opacity( 0.5 );
posterize
Live Demo: Posterize
The posterize() method reduces the image to a limited number of color levels per channel. Smaller level amounts have the most obvious effect. The method accepts an object containing the following properties:
| Property Name | Type | Description |
|---|---|---|
levels |
Integer | (Required) Number of levels to allow per channel. |
channels |
String | Which channels to apply the filter to, defaults to rgb. See Channels. |
clip |
Object | Optional clipping rectangle (see Clipping below). |
Example use:
canvas.posterize({
    "levels": 4
});
Posterize is implemented using a custom stair-step curve.
quantize
Live Demo: Quantize
The quantize() method reduces your image to a fixed number of unique colors, then generates a palette and converts the canvas into indexed mode. This is used for saving GIFs and indexed PNGs. We rely on the awesome image-q library here, which is slow but produces beautiful results. The method accepts an object containing the following properties:
| Property Name | Type | Description |
|---|---|---|
colors |
Integer | (Required) Number of unique colors in the palette (2 - 256). |
dither |
Boolean | Dither option for quantization. Defaults to false (disabled). |
ditherType |
String | Dithering algorithm for quantization. Defaults to FloydSteinberg. |
Example use:
canvas.quantize({
    "colors": 32,
    "dither": true
});
Quantize should always be the last filter applied before calling write(). Calling any other filters after quantization will convert the canvas back to RGBA mode, which is likely not what you want.
The supported dithering algorithms are FloydSteinberg, Stucki, Atkinson, Jarvis, Burkes, and Sierra. They each have different trade-offs, and produce slightly different results. See Dithering Algorithms for more information.
Note that quantization includes and preserves alpha transparency in the palette, unless you first flatten your canvas.
quantizeFast
Live Demo: Quantize Fast
The quantizeFast() method works similarly to quantize(), in that it reduces your image to a fixed number of unique colors, then generates a palette and converts the canvas into indexed mode. However, this algorithm is approximately 10X faster. It does this by "crushing" (a.k.a posterizing) the image, optionally dithering it at the same time, then simply building a palette of all unique colors. This generally produces lower quality results than quantize() (depending on the image), but at a fraction of the CPU cost. The method accepts an object containing the following properties:
| Property Name | Type | Description |
|---|---|---|
colors |
Integer | Target number of colors in the palette, defaults to 256. |
crushRGB |
Integer | Optional starting number of posterization levels for the RGB channels, defaults to 16. |
crushAlpha |
Integer | Optional starting number of posterization levels for the Alpha channel, defaults to 16. |
dither |
Boolean | Optional pattern dither, defaults to false (disabled). |
Example use:
canvas.quantizeFast({
    "colors": 256,
    "dither": true
});
The Quantize Fast algorithm will begin by crushing the image at the specified (or default) posterize levels, and see if the target number of colors was achieved. If not, it will crush further by reducing the posterization levels, and keep trying until the palette size is equal to or less than the colors parameter. To optimize for speed, depending on the image and with possible quality loss, you can change the starting crushRGB and/or crushAlpha to values below 16.
It is important to note that Quantize Fast may not achieve the exact number of colors you want in your palette, but it tries to get as close as possible without going over. The algorithm builds its own palette based on the total unique colors after "crushing" (posterizing) the image. You can control the level of posterization of course, and adjust it differently for the RGB and Alpha channels. The higher the crushRGB and crushAlpha values are, the more unique colors are produced. Also, while dithering is provided here as an option, only a pattern dither is supported.
Note that quantization includes and preserves alpha transparency in the palette, unless you first flatten your canvas.
resize
Live Demo: Resize
The resize() method scales the canvas to the desired pixel width and/or height. Several modes are available, to control how your image is scaled to fit the target dimensions. You can also control the gravity (alignment), direction (e.g. shrink only, enlarge only), and anti-alias settings. The method accepts an object containing the following properties:
| Property Name | Type | Description |
|---|---|---|
width |
Integer | Desired canvas width in pixels. Can be omitted if height is specified. |
height |
Integer | Desired canvas height in pixels. Can be omitted if width is specified. |
mode |
String | Resize mode, one of fit, fitPad, fitOver or scale (case-insensitive). Defaults to fit. See below. |
background |
String | Background padding color, for fitPad mode only. |
gravity |
String | Image alignment, which can be further adjusted with offsets. See Gravity. |
direction |
String | Resize direction restriction, one of shrink, enlarge, or both. Defaults to both. |
antialias |
String | Resize scaling quality, one of best, good, fast or nearest. Defaults to best. See Anti-Aliasing. |
offsetX |
Integer | Horizontal offset in pixels, defaults to 0. |
offsetY |
Integer | Vertical offset in pixels, defaults to 0. |
delta |
Boolean | Interpret width and height as delta offsets, not absolute values. Defaults to false. |
Example use:
canvas.resize({
    "width": 640,
    "height": 480,
    "mode": "fit"
});
If either width or height are omitted, they will be extrapolated from the other, maintaining the original aspect ratio. Here is an example which scales the canvas down to 50% width, maintaining its aspect ratio:
canvas.resize({
    "width": canvas.get('width') / 2
});
Actually, you can just specify percentage as a string with a % suffix, which has the same effect:
canvas.resize({
    "width": "50%"
});
Here is a description of all the available resize modes:
| Resize Mode | Alias | Description |
|---|---|---|
fit |
contain |
The default mode. Will resize so the image "fits" into the destination width/height without exceeding either value, and maintaining the original aspect ratio. Similar to the CSS background-size: contain rule. |
fitPad |
letterbox |
This mode scales the image similar to fit, but then adds background padding to fill in the extra area (if any), so the final image size exactly matches your desired dimensions, but the original image aspect ratio is also preserved. This is similar to film letterboxing. The background property controls the padding color, and gravity controls the image alignment. |
fitOver |
cover |
This mode scales the image in such a way that it fits "over" the destination width/height, covering the entire area. The aspect ratio is maintained, and the extra content is cropped off. This is similar to the CSS background-size: cover rule. |
scale |
exact |
This mode scales the image to your exact specifications, ignoring the aspect ratio, and distorting as needed. |
Note that resizing regenerates the underlying canvas object. It effectively creates a new canvas at the target size, then copies the source into the destination, applying the resize at the same time, then finally discards the source.
sepia
Live Demo: Sepia Tone
The sepia() method applies a sepia tone filter to your image, using a custom curve. This is a commonly used filter which gives a photograph an "old western" look. The method accepts an object containing the following properties:
| Property Name | Type | Description |
|---|---|---|
clip |
Object | Optional clipping rectangle (see Clipping below). |
Example:
canvas.sepia();
This is equivalent to calling desaturate(), followed by curves() using the following properties:
canvas.desaturate().curves({
    green: [0, 108, 255],
    blue: [0, 64, 255]
});
sharpen
Live Demo: Sharpen
The sharpen() method applies a simple sharpen effect to your image, using a custom 3x3 convolution kernel. It accepts an object containing the following properties:
| Property Name | Type | Description |
|---|---|---|
edges |
String | How to calculate out-of-bounds pixels, can be one of repeat, wrap, mirror or discard (case-insensitive). Defaults to repeat. |
channels |
String | Which channels to apply the filter to, defaults to rgba. See Channels. |
clip |
Object | Optional clipping rectangle (see Clipping below). |
Example use:
canvas.sharpen({
    "edges": "repeat"
});
This is equivalent to calling convolve() with the following properties:
canvas.convolve({
    "matrix": [0, -1, 0, -1, 5, -1, 0, -1, 0],
    "edges": "repeat"
});
solarize
Live Demo: Solarize
The solarize() method applies a solarisation filter to your canvas, which basically inverts all colors above half brightness. This can be restricted to certain specified channels if desired. The method accepts an object containing the following properties:
| Property Name | Type | Description |
|---|---|---|
channels |
String | Which channels to apply the filter to, defaults to rgb. See Channels. |
clip |
Object | Optional clipping rectangle (see Clipping below). |
Example use:
canvas.solarize();
Solarisation is implemented using a custom sawtooth inverted-V curve, and is similar to calling:
canvas.curves({
    "rgb": [0, 127, 0]
});
However, the solarize() method uses a 256-element curve array, with an exact sawtooth inverted-V shape.
temperature
Live Demo: Color Temperature
The temperature() method simulates increasing or decreasing the image's color temperature. Increasing the temperature produces a "warmer" (redder) image, and decreasing it produces a "cooler" (bluer) image. The method accepts an object containing the following properties:
| Property Name | Type | Description |
|---|---|---|
amount |
Integer | Amount to increase or decrease temperature. Range is -255 to 255. |
clip |
Object | Optional clipping rectangle (see Clipping below). |
Example use:
canvas.temperature({
    "amount": -128
});
This is a very simple implementation of color temperature, which applies a curve to increase the red or blue channels in a linear fashion, based on the supplied amount. This filter is only for visual effect, and doesn't pertain to any photographic or color standard. I'm sure there are much better and more accurate algorithms out there.
text
Live Demos: Basic Meme, [Auto-Shrink](https://jhuckaby.github.io/canvas-plus-playground/?t=create/eyJ3aWR0aCI6NjAwLCJoZWlnaHQiOjIwMCwiYmFja2dyb3VuZCI6IiNmZmZmZmYifQ%3D%3D&t=text/eyJ0ZXh0IjoiVGhpcyB0ZXh0IG5vcm1hbGx5IHdvdWxkbid0IGZpdCBvb