README
Bash Profile in JavaScript
Easy to customize, built on top of the power of JavaScript and Bash, it ads a bunch of aliases, functions, features and extra funcionality for your bash profile.
Features
- Fully customizable using JavaScript
- Applies to PS1
- Terminal comands to enable or disable it (restoring your previous PS1)
- Allows you to dinamically turn on and off parts of PS1
- PS2 with line numbers
- Auto completes git commands
- Shows current branch and git state (also customizable)
- Lots of Extra aliases (check the aliases section for more info about it)
- Extra functions
- Suport themes (coming with 6 themes for you to extend and customize...see below)
- Move easily from one theme to another
- Protects some actions (like deleting or change permissions to root path)
- Auto installs fonts for you (although, you might need to select them in your terminal settings)
- Ensures colors...everywhere... grep, git, ls...
- More tools, like time, battery and readOnly...
- Extendable...you can customize your theme with any extra string, allowing you to use JavaScript to decide what to show
- Create aditional, customizable parts for $PS1

Installing it
Easy like sunday morning!
npm install -g @nasc/termtools
Applying it
Run this command and, if everything went well, your terminal should be good looking by now!
termtools apply
This will also install the fonts you will need, if they are not already there.
Oh Oh!
Seing weird characters? No worries, follow the tips your own terminal will give you.
At any time, you can run termtools check to validate the characters and some colors.
The font we are using (and was already installed for you) is:
"Droid Sans Mono for Powerline Plus Nerd File Types Mono"
All you gotta do is go to your terminal settings and edit your profile changing its font face/family to that one.
In Visual Studio Code, you can add the settings for the integrated terminal (ctrl/cmd+",", digite "terminal.integrated.fontFamily" to find it easily):
"terminal.integrated.fontFamily": "Droid Sans Mono for Powerline Plus Nerd File Types Mono"
You should be able to run termtools check and see this message:
Removing it (restore)
Want to see your PS1 as it was before (will also loose all the aliases and extra functions we had applied to your bash).
 termtools remove
 # or
 termtools restore
To bring it back, just run the apply command again:
termtools apply
Reloading it
You will probably not need to reload it anytime soon, but just in case...
After installed and applied, you have three ways to reload it. They will reload the whole bash profile (applying any updates that might be outdated).
# alternative 1
termtools reload
#alternative 2
reload
# alternative 3
termtools restore
termtools apply
Git integration
If you are navigating in a directory that happens to belong to a Git Repository, you will see its current branch in your terminal.
Also, the color indicates the current status of your branch and you might see symbols identifying your branch as behind, ahead or diverged.
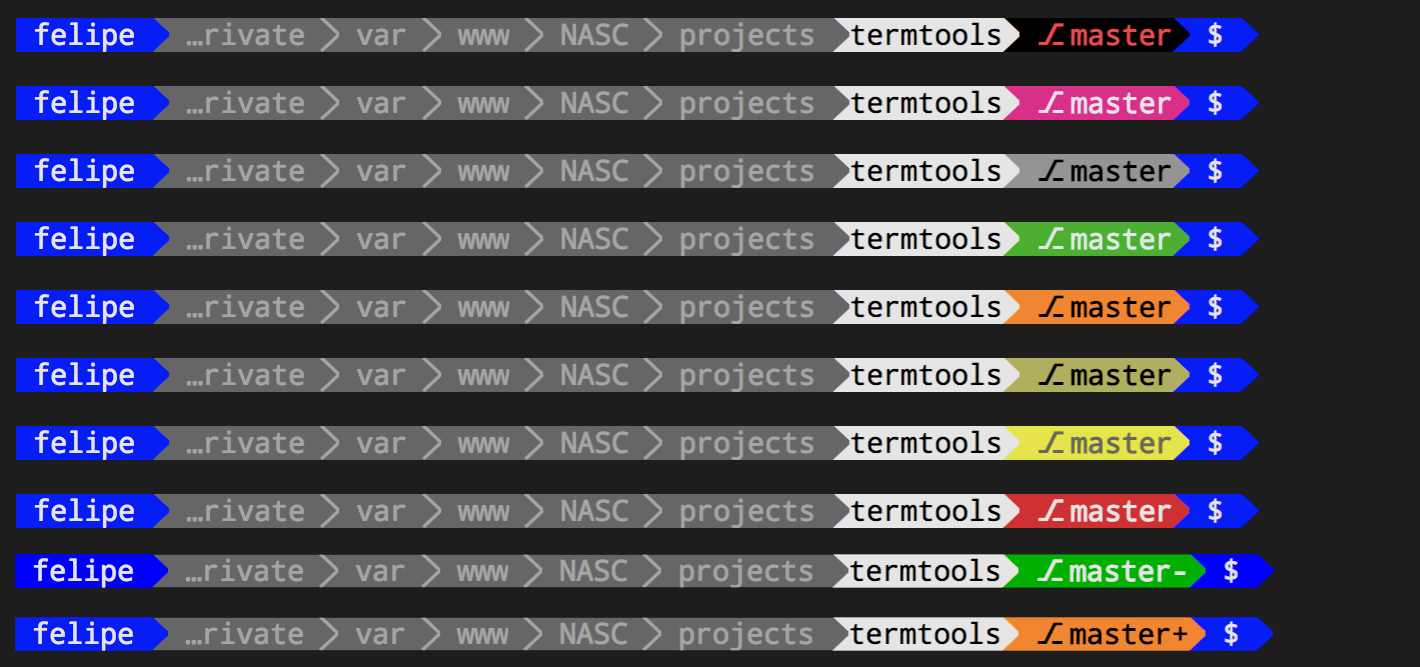
PS2
We also change your PS2 a little, adding line numbers for your multiple lined commands:
Themes
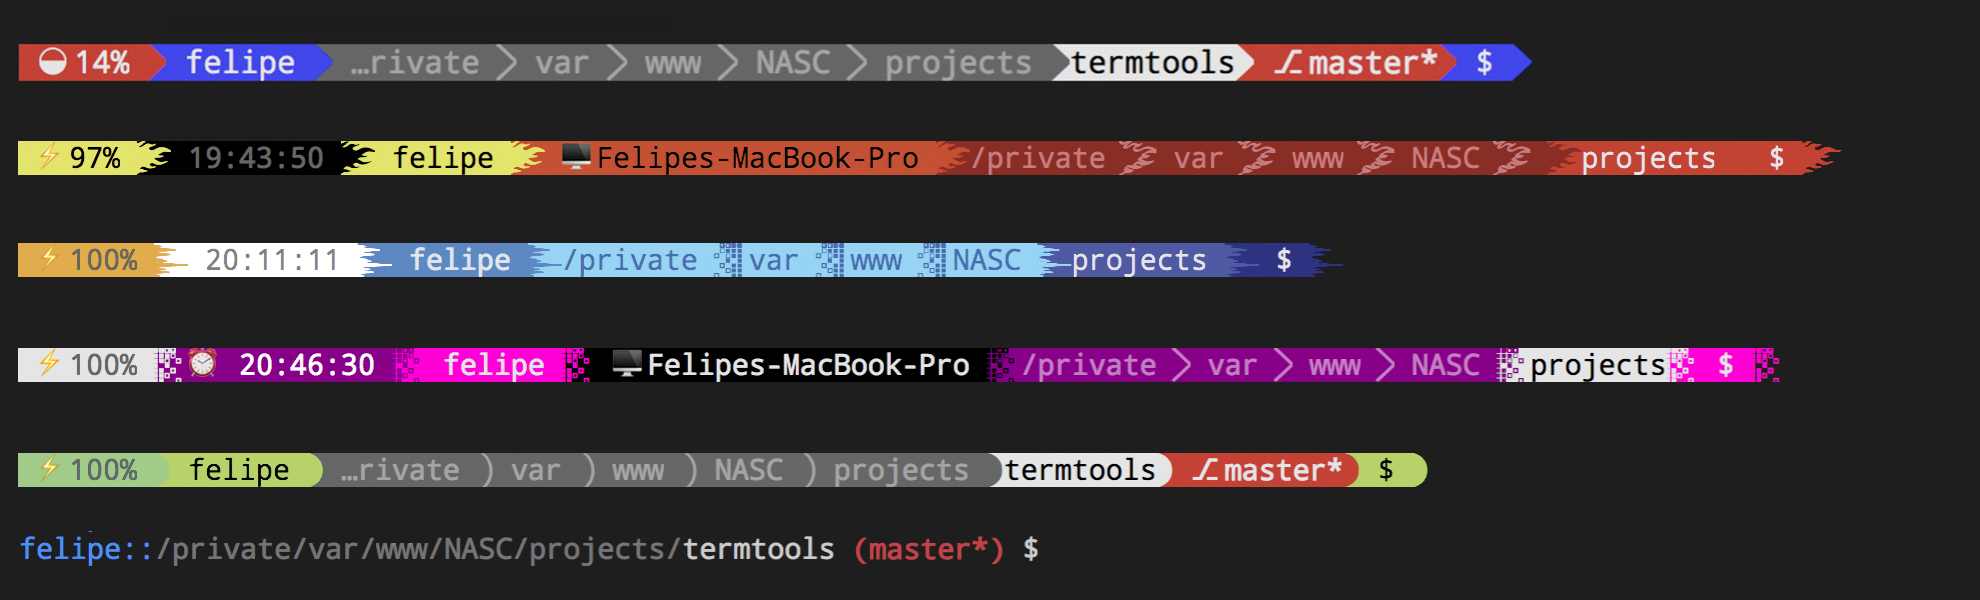
Yes, we deliver termtools with 6 builtin themes, they are:
- basic
- default
- hell
- sea
- pinkish
- round
You can easily move from one theme to another using the command
termtools set theme [theme-name]
Just be careful! It will replace your ~/.bash_profile.js and, if you have done any customization to it, you will loose them.
If you have created a very nice theme and want to share, send us a pull request 😊
Customizing it
You can customize Termtools using JavaScript \o/
And it is not even a JSON, nope...it is JavaScript, indeed 🙏.
We can create a boilerplate for you to customize (a copy of the default theme).
Just run:
termtools customize
It will create a file at ~/.basch_profile.js.
That file is a copy of our default theme, with comments and all you might need to extend it.
This JavaScript file must export a literal object, or a function that returns a literal object.
If you exported a function, it will be called receiving one parameter, an object with these properties:
| Property | Description |
|---|---|
| IS_TTY | True if current session is running on a TTY environment |
| IS_ROOT | True if the current user is root |
| IP | The current device's ip |
| BATTERY | The current percentage of the battery (give or take...some OSs lie a little about it) |
| IS_CHARGING | True if the device is connected and charging |
| GIT_STATUS | The repository status. May be from -2 to 5, meaning: |
| -2: COMMITS DIVERGED | |
| -1: COMMITS BEHIND | |
| 0: NO CHANGES | |
| 1: COMMITS AHEAD | |
| 2: UNTRACKED CHANGES | |
| 3: CHANGES TO BE COMMITTED | |
| 4: LOCAL AND UNTRACKED CHANGES | |
| 5: LOCAL CHANGES | |
| GIT_SYMBOL | A symbol representing the current position of the branch. Symbols can be: |
| "-": COMMITS BEHIND | |
| "+": COMMITS AHEAD | |
| "!": COMMITS DIVERGED | |
| "*": UNTRACKED | |
| "": Anything else | |
| GIT_BRANCH | The name of the current git branch |
| IS_WRITABLE | True if the current user has write access to the current directory |
| colors | A referece to the a chalk instance, allowing you to add colors if you need to |
Use these data to decide how your exported object will be. You can use it, for example, to enable or disable parts of the $PS1, or to show some parts in different colors.
Check the documentation bellow to understand it better, how to customize your terminal using JavaScript.
After any change you make in your customized theme, you should see the difference just by hitting [ENTER] in your terminal.
If not...you can force it to reload usingtermtools reloador just the aliasreload.
Customization options
You will export a literal object containing these options, or a function that returns such an object. You can extend a given theme, or the default theme will be used.
{
    extends: 'basic'
}
While the default theme will have a PS1 like the second image in this documentation, the basic theme will look like this:

aliases
An object containing the command as the key, and the instruction as the value.
For example:
{
    aliases: {
        foo: "echo bar"
    }
}
Will then, allow you to run in your terminal:
$ foo
bar
Decorators
This will allow you to customize some of the decorators we will use in your PS1.
So far, they are:
- pathSeparator
- section
- readOnly
- git
You can use the code (\uCODE) for the following characters (available in the installed font).
For example, the code "e0a0" can be used as "\ue0a0":
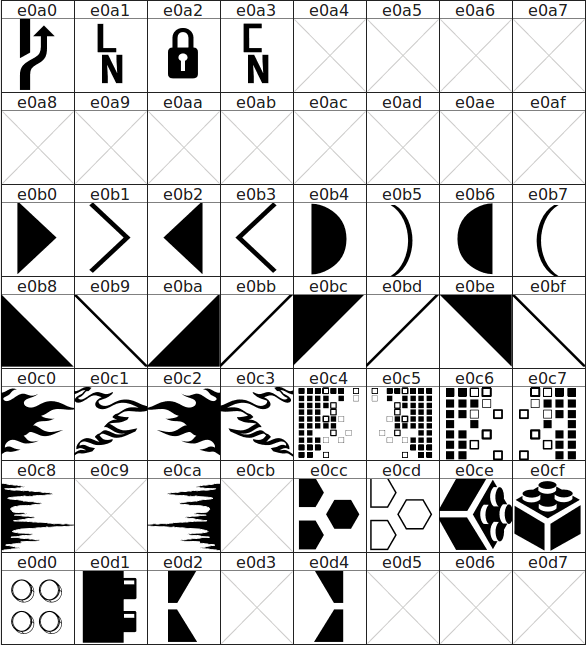
(imported from powerline nerd fonts plus)
Also, some other symbols and code you might find promising:

ps1
This is the part where you specify the rules for your PS1.
It has two customization options: parts and effects.
The effects are the style rules, applied for each part.
Parts
Every part of your PS1 has the enabled flag, allowing you to turn them on or off as you will.
Besides that, all the properties also accept a wrapper, which is a string with a "$1" in it.
For example, if in your "username" part, the wrapper is "[$1]", it will render "[felipe]" for a user named "felipe".
Some parts have their own special properties.
You can create any other part, and it may have the enabled, wrapper and content properties (like string parts). And yes, you can then customize them with effects as well.
The available parts and their special attributes are:
| Part name | Description | Extra options |
|---|---|---|
| battery | Shows the current battery state | N/A |
| time | The current time | N/A |
| userName | The currently logged user | N/A |
| string | Any given string you might wanna add | content: The content of the string |
| machine | The machine name | N/A |
| path | The current path (without basename) | *Options escribed bellow |
| basename | The current basename | N/A |
| git | If the current directory is a repository, show the git information about it | N/A |
| entry | The last character waiting for the user entry. Usually a " |
