README
📦🔐 Verdaccio Auth0 Connect - With UI Support
About
This is a Verdaccio plugin that offers OpenID Connect integration for both the browser and the command line.
Features
- UI integration with fully functional login and logout. When clicking the login button the user is redirected to identity provider and returns with a working session.
- Updated usage info and working copy-to-clipboard for setup commands.
- A small CLI for quick-and-easy configuration.
Compatibility
- Verdaccio 3 and 4
- Node >=10
- Chrome, Firefox, Firefox ESR, Edge, Safari, IE 11
Setup
Install
$ npm install verdaccio-auth0-ui
Auth0 Config
On Auth0 management page:
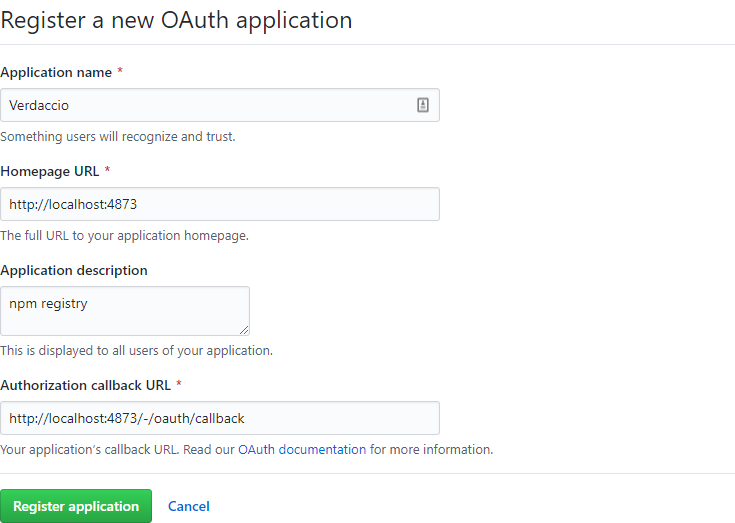
- Create an App "Regular web application" with name
NPM Registry- Allowed Callback URLs
YOUR_REGISTRY_URL/-/oauth/callback - Allowed Logout URLs
YOUR_REGISTRY_URL
- Allowed Callback URLs
- Create an API endpoint. Set API Audience to
https://yourprivateregistry.com/- Enable RBAC = on
- Add Permissions in the Access Token = on
- Allow Skipping User Consent = on
- Allow Offline Access = on
- On tab Permissions add
read:packagesandwrite:packagespermissions
- Create a User Role.
- Assign both permissions of
https://yourprivateregistry.com/to that Role.
- Assign both permissions of
- Assign created Role to a User.
Verdaccio Config
Merge the below options with your existing Verdaccio config:
middlewares:
  oidc-auth0-ui:
    enabled: true

auth:
  oidc-auth0-ui:
    org: REQUIRED_PERMISSION
    client-id: OIDC_CLIENT_ID
    client-secret: OIDC_CLIENT_SECRET

    oidc-issuer-url: https://yourorg.eu.auth0.com
    oidc-audience: https://yourprivateregistry.com/
    oidc-userinfo-nickname-property: nickname
    oidc-access-token-permissions-property: permissions

url_prefix: YOUR_REGISTRY_URL
- The configured values can either be the actual value or the name of an environment variable that contains the value.
- The config props can be specified under either the
middlewaresor theauthnode. Just make sure, the addon is included under both nodes.
org
Users within this group will be able to authenticate.
client-id and client-secret
These values can be obtained from Auth0 App page.
oidc-issuer-url
The URL of your Auth0 endpoint. E.g. https://yourorg.eu.auth0.com
oidc-audience (optional)
API Audience of your npm registry defined in Auth0. E.g. https://yourprivateregistry.com/
oidc-userinfo-nickname-property (optional)
The userinfo key that represents a username with your identity provider. Defaults to nickname
oidc-access-token-permissions-property (optional)
Permissions property stored in access_token. Defaults to permissions
url_prefix (optional)
If configured, it must match YOUR_REGISTRY_URL. See GitHub Config.
Proxy Config
If you are behind a proxy server, the plugin needs to know the proxy server in order to make GitHub requests.
Configure the below environment variable.
$ export GLOBAL_AGENT_HTTP_PROXY=http://127.0.0.1:8080
See the global-agent docs for detailed configuration instrcutions.
Login
Verdaccio UI
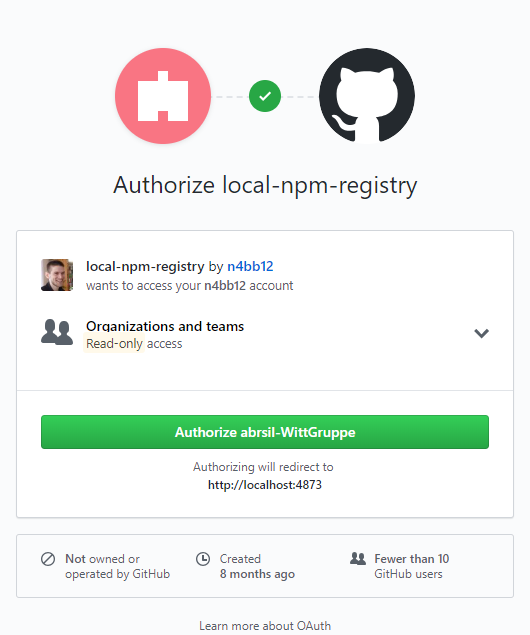
- Click the login button and get redirected to GitHub.
- Authorize the registry for your user and the configured GitHub org - this only needs to be done once.
- When completed, you'll be redirected back to the Verdaccio registry.
You are now logged in.
Important: Make sure to click the Request or Grant button for read:org access when prompted to authorize.
If you accidentally skipped this step, go to https://github.com/settings/applications, find the Verdaccio registry and grant read:org access from there.
Command Line
Option A) Use the built-in CLI
The easiest way to configure npm is to use this short command:
$ npx verdaccio-auth0-ui --registry http://localhost:4873
Option B) Copy commands from the UI
- Verdaccio 4:
Open the "Register Info" dialog and klick "Copy to clipboard":
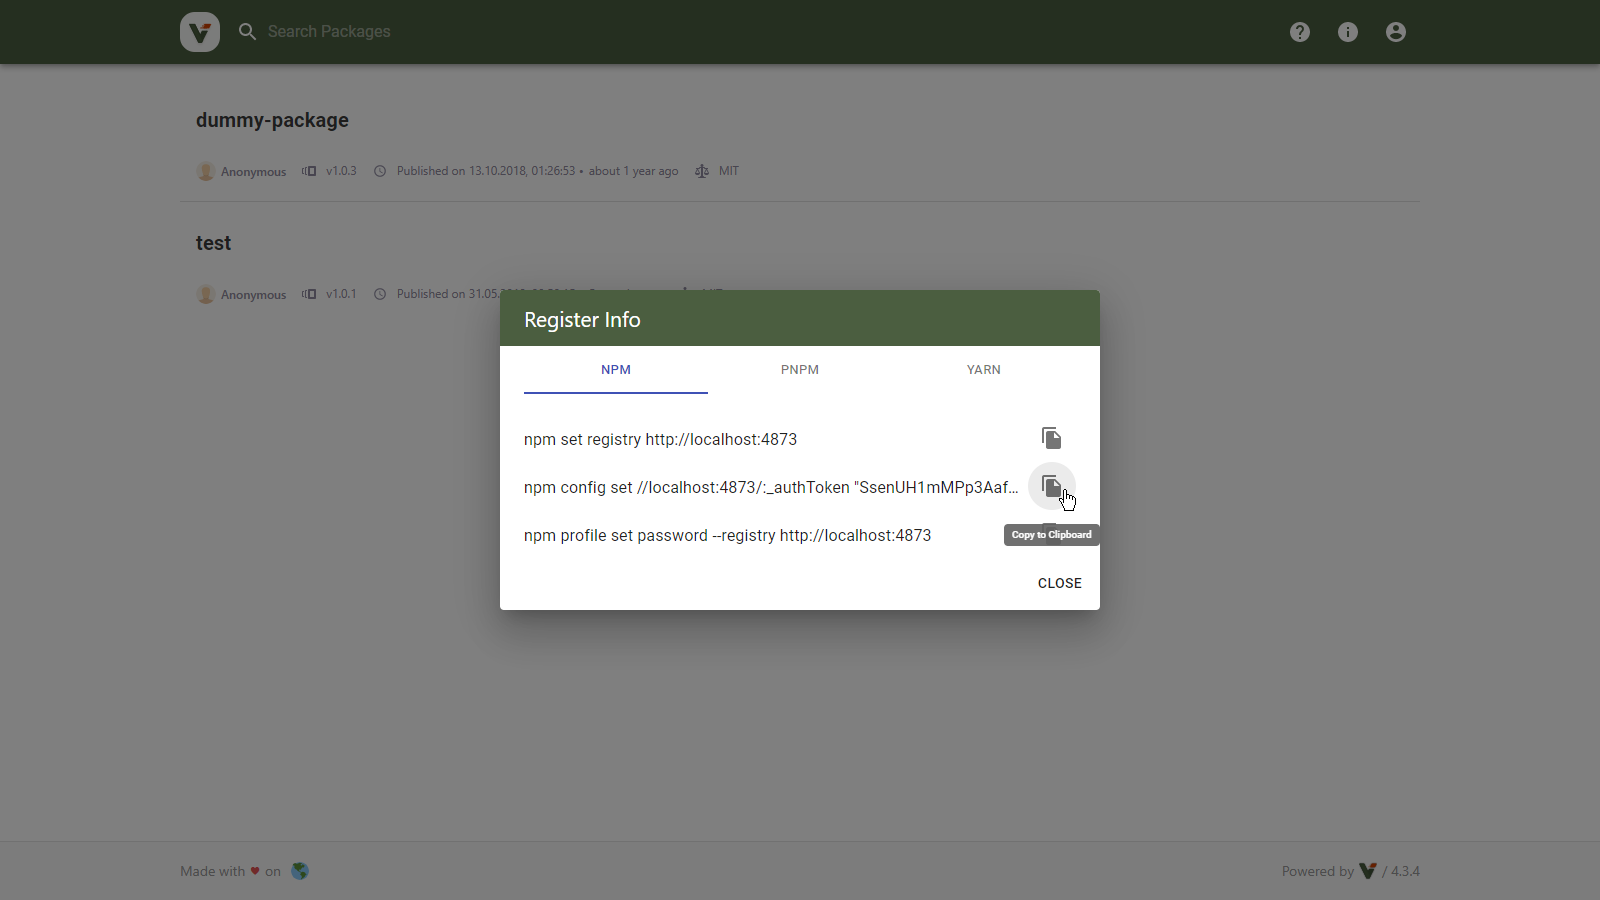
- Verdaccio 3:
Select the text in the header and copy it. In case the text is too long, you can double-click it. The invisible part will still be selected and copied.

- Run the copied commands on your terminal:
$ npm config set //localhost:4873:_authToken "SECRET_TOKEN"
$ npm config set //localhost:4873:always-auth true
- Verify npm is set up correctly by running the
whoamicommand. Example:
$ npm whoami --registry http://localhost:4873
n4bb12
If you see your GitHub username, you are ready to start installing and publishing packages.
Logout
Verdaccio UI
Click the Logout button as per usual.
Command Line
Unless OAuth access is revoked in the GitHub settings, the token is valid indefinitely.
Revoke Tokens
To invalidate your active login tokens you need to revoke access on the GitHub OAuth app:
- Go to https://github.com/settings/applications
- Find your Verdaccio app
- Click the Revoke button as shown below

If you have created the GitHub OAuth app, you can also revoke access for all users:
- Go to https://github.com/settings/applications
- Find your Verdaccio app
- Click the app name
- On the app detail page click the Revoke all user tokens button